CAUTION!
It is advisable to wear protective gloves when cleaning the squeegee because there may be sharp debris.
SQUEEGEE BLADE CHECK AND REPLACEMENT
1. Take off the squeegee as shown in the previous paragraph.
2. Check to see if the edge of the front/rear blades are cracked or split, if necessary replace them with
new.
3. Unscrew six the thumb nut (37) to get off the blades.
4. Check the front/rear blades for integrity, cut and tears. If they are not adequate, overturn or replace
them.
5. Install the squeegee in the reverse order of removal.
BRUSH /PAD DRIVER CLEANING
CAUTION!
It is advisable to wear protective gloves when cleaning the brush/pad because there may be sharp debris.
1. Remove the brush/pad as shown in the previous paragraph.
2. Clean and wash the brush/pad with water and detergent.
3. Check the brush bristles for integrity and wearing status; if necessary, replace the brush.
4. Check the pad for wearing status; if necessary, replace the pad driver.
TANK/VACUUM GRID WITH FLOAT CLEANING AND COVER
GASKET CHECK
CAUTION!
It is advisable to wear protective gloves when cleaning the tank and vacuum/suction assembly because
there may be sharp debris.
1. Move the machine to the appointed disposal area.
2. Disconnect the AC cable (16).
3. Take off the recovery tank (2), clean and rinse both solution/recovery tank, and drain out.
4. Take off all vacuum kits, gasket, filter, clean and re-install.
5. Check the recovery tank lids gasket ring and the vacuum rubber connector (18) between two tanks
are integrity or not..
NOTE
The gasket ring of recovery tank and the rubber connector between two tanks create
vacuum in the tank. If necessary, replace them.
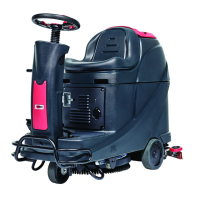
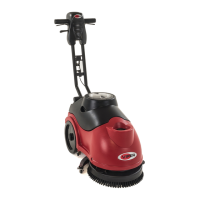
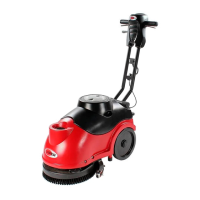
MACHINE STRUCTURE
1. Recovery tank lid
2. Recovery tank
3. Solution tank
4. Brush cover
 Loading...