EasyManua.ls Logo

Viper AS6690T-US - User Manual

Viper AS6690T-US
93 pages
Print Icon
To Next Page IconTo Next Page
Loading...
AS7190TO -US
AS6690T-US & AS7690T-US
AS6690T-US & AS7690T-US /
AS7190TO-US
INSTRUCTION FOR USE
AS6690T-US & AS7690T-US / AS7190TO-US
INSTRUCTION FOR USE
Model No.: 50000572/50000573/50000574
VS14002 Rev. A Nov. 2019
800304

Table of Contents

Questions and Answers

  • A
    Anne BanksAug 5, 2025
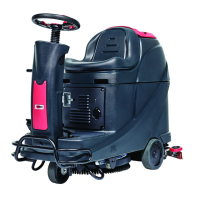
    Why is the recovery water vacuuming insufficient in my Viper Floor Machine?
    • D
      dgonzalezAug 5, 2025
      If the recovery water vacuuming is insufficient in your Viper Floor Machine, several issues could be the cause: * The recovery water tank might be full, in which case you should empty it. * The hose could be disconnected from the squeegee; ensure it is properly connected. * The vacuum grid might be clogged, or the float could be stuck closed; clean the grid and check the float. * The squeegee might be dirty, or the squeegee blades might be worn or damaged; clean and inspect the squeegee. * The tank cover might not be properly closed, the gasket might be damaged, or the standpipe tube might be clogged; ensure the cover is correctly closed, replace the gasket if needed, and clean the bend tube. * The vacuum hose could be clogged; clean the hose.
  • A
    Adam DavidsonAug 11, 2025
    What to do if the motors don't work and there is an error code on my Viper Floor Machine?
    • M
      Mary ReynoldsAug 12, 2025
      If your Viper Floor Machine motors aren't working and an error code is displayed, it could be due to a few reasons: * The battery connector might be disconnected; ensure it's properly connected. * The batteries might be completely discharged; charge the batteries fully. In some cases, restarting the machine may also resolve the issue.
  • C
    Christina MorrisAug 18, 2025
    How to fix squeegee marks on the floor with Viper Floor Machine?
    • L
      Lauren BarnesAug 18, 2025
      If the squeegee on your Viper Floor Machine leaves marks on the floor, it could be due to: * Debris under the squeegee blades; remove any debris present. * Worn, chipped, or torn squeegee blades; replace the blades. * The squeegee might not be adjusted properly; adjust it using the knob.
  • J
    Jasmine PottsAug 23, 2025
    Why is the solution flow to the brushes insufficient in my Viper Floor Machine?
    • X
      xhernandezAug 25, 2025
      If the solution flow to the brushes is insufficient in your Viper Floor Machine, the solution or clean water filter might be dirty. Clean the filter to resolve this issue.
  • G
    Gabriel SalinasAug 29, 2025
    What to do if my Viper Floor Machine does not move?
    • T
      Timothy GloverAug 29, 2025
      If your Viper Floor Machine does not move, it could be because the machine was turned on by using the ignition key while keeping one of the switches pressed. To resolve this, turn the ignition key to “0”, and then try to start the machine again without pressing the switches.

Summary

Introduction to the Machine Manual

Guide Purpose and Contents

Explains the manual's purpose and scope for operators and technicians.

How to Keep This Instruction Manual

Guidelines for storing and maintaining the instruction manual for future reference.

Declaration of Conformity

Certifies machine conformity with relevant laws and standards.

Accessories and Maintenance Procedures

Outlines that maintenance and repair must be done by qualified personnel.

Product Changes and Improvements

Company reserves the right to make product changes without prior notice.

Scope of Application

Suitable for commercial/industrial use on smooth floors, not outdoors.

Machine Identification Data

Location of serial number and model name for spare parts ordering.

Transport and Unpacking Instructions

Handling and Unpacking Instructions

Procedures for receiving, inspecting, and unpacking the machine safely.

Safety Information and Symbols

Machine Safety Symbols

Explains symbols displayed on the machine indicating warnings or dangers.

Instruction Manual Symbols

Explains symbols used within the instruction manual for warnings and notes.

General Safety Instructions

Specific warnings and cautions for safe operation and potential damages.

Machine Description and Structure

Machine Structure (Figure 1)

Identifies key components of the machine structure using labeled diagrams.

Machine Structure (Figure 2)

Identifies additional components of the machine structure using labeled diagrams.

Control Panel Overview

Multifunction Display Details

Details the information displayed on the control panel's multifunction display.

Control Panel Buttons and Functions

Explains the operation and purpose of various control panel buttons.

Working Mode Descriptions

Normal Mode Operation

Describes display indicators and operational parameters for normal mode.

Silent Mode Operation

Describes display indicators and operational parameters for silent mode.

Off Mode Operation

Describes display indicators and operational parameters for off mode.

ECO Mode Operation

Explains ECO mode settings, display indicators, and operational benefits.

Vacuum System Modes

Details operation and display for vacuum system modes (normal, silent).

Reverse Mode Operation

Describes operation and display indicators for reverse mode.

Floor Prep Mode Operation

Explains floor prep mode operational settings for orbital machines.

Machine Size Specifications

AS6690 T Dimensions

Provides detailed dimensional drawings and measurements for the AS6690T model.

AS7690 T Dimensions

Provides detailed dimensional drawings and measurements for the AS7690T model.

AS7190 TO Dimensions

Provides detailed dimensional drawings and measurements for the AS7190TO model.

Technical Parameters

Machine Specifications Table

Lists comprehensive technical specifications for all machine models.

Wiring Diagram

Electrical Connection Diagram

Illustrates the electrical connections and component layout of the machine.

Operating Guide: Batteries

Battery Warning Symbols Overview

Highlights important warning symbols related to battery usage and charging.

Battery Check and Setup

Instructions for checking and setting batteries for new machine installations.

Battery Installation Procedure

Step-by-step guide for correctly installing batteries into the machine.

Battery Type Configuration

How to select and set the correct battery type (WET/GEL/AGM) for the machine.

On-board Charger Configuration

Instructions for setting up and configuring the integrated on-board battery charger.

Charging Curve Settings

Details dipswitch settings for selecting appropriate battery charging curves.

Battery Charging Process

General instructions and notes for fully charging the machine's batteries.

Battery Discharge Management

Describes battery discharge indicators and necessary immediate actions.

Brush and Pad Holder Operations

Brush;Pad Installation Steps

Step-by-step guide for installing brushes or pad-holders onto the machine.

Brush;Pad Removal Steps

Step-by-step guide for safely removing brushes or pad-holders from the machine.

Orbital Pad Handling Procedure

Instructions for installing and removing cleaning pads on orbital machines.

Squeegee and Solution Tank Operations

Squeegee Balance Adjustment

Detailed procedure for adjusting squeegee height for optimal floor contact.

Solution Tank Filling Guide

Instructions for filling the solution tank with water or cleaning detergent.

Machine Startup Procedure

Step-by-step guide to safely start the machine and begin operation.

Machine Operation Procedures

Machine Shutdown Procedure

Step-by-step guide to safely stop the machine after use.

Scrubbing and Drying Operation

Guidance on operating the machine effectively for scrubbing and drying floors.

Orbital Deck Level Adjustment

How to adjust the orbital deck level using the handle for proper cleaning.

Tank Emptying and Operation Notes

Wall Cleaning Technique

Suggested technique for cleaning floors near walls effectively.

Vacuum System Float Shut-off

Explains vacuum system deactivation when the recovery tank is full.

Recovery Tank Draining

Detailed steps for emptying the recovery water tank using the drain hose.

Solution Tank Draining

Instructions for emptying the solution tank with clean water.

Post-Operation Procedures

Essential steps to perform after finishing work before leaving the machine.

Machine Storage and Initial Use

Long-Term Storage Guidelines

Procedures for storing the machine properly for periods exceeding 30 days.

Initial Operational Checks

Checks to perform after the first 8 hours of machine operation.

Maintenance Procedures

Maintenance Safety Precautions

Important safety warnings and guidelines before performing any maintenance.

Scheduled Maintenance Overview

Table outlining recommended maintenance tasks and their frequencies.

Battery Charging Procedure

Detailed instructions for charging the machine's batteries.

Off-board Battery Charger Use

Steps for charging the batteries using an external (off-board) charger.

On-board Battery Charger Use

Steps for charging the batteries using the integrated on-board charger.

Cleaning Procedures

Brush and Pad Cleaning Steps

How to clean brushes and pads after use to ensure proper function.

Solution Filter Maintenance

Instructions for cleaning the solution filter to maintain water flow.

Squeegee Cleaning Guide

How to clean the squeegee for optimal drying performance.

Squeegee Blade and Fuse Management

Squeegee Blade Inspection and Replacement

Procedure for checking, adjusting, or replacing worn or damaged squeegee blades.

Checking Operating Hours

How to view the total accumulated working hours of the machine.

Fuse Inspection and Replacement

Steps for inspecting and replacing fuses within the machine's control box.

Tank and Float Cleaning

Tank and Float Filter Cleaning

Instructions for cleaning the recovery tank, lid, and ball float filter.

Tank Seal Integrity Check

How to inspect and replace the tank sealing strip for proper suction.

Accessories and Troubleshooting

Optional Equipment List

Lists optional accessories and parts available for the machine.

Troubleshooting Common Issues

Provides probable causes and remedies for common machine problems.

Error Code Explanations

Explains various error codes displayed on the machine and their meanings.

Machine Scrapping and Disposal

Machine Disposal Guidelines

Procedures for proper machine disposal and segregation of components.

Material Composition and Recycling

Details the material composition and recyclability of machine parts.

Viper AS6690T-US Specifications

General IconGeneral
BrandViper
ModelAS6690T-US
CategoryFloor Machine
LanguageEnglish

Related product manuals