VARIPOOL
17
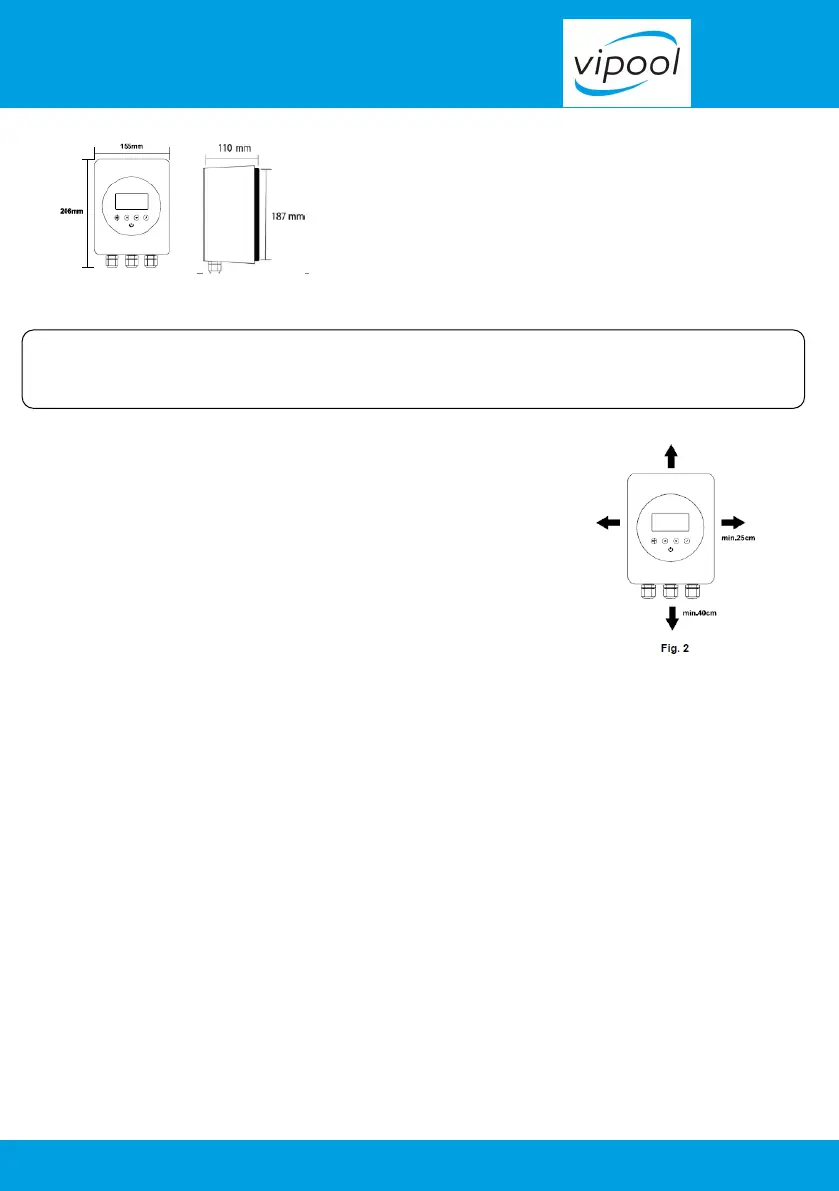
DIMENSIONS
3. BEFORE INSTALLATION
Upon receipt of this device, check for damage to the packaging or product. DO NOT PROCEED
with installation if any damage is found; contact your supplier. Do not use extension leads with the
device. This can pose a danger particularly in the vicinity of a swimming pool
Make sure the place you choose for installation meets the following conditions:
-Ambient temperature from -10~40°C
-45 to 90 percent relative humidity, non-condensing
-Less than 1000m above sea level
-Keep out of direct sunlight
-Good ventilation.
For ecient cooling, please make sure it is installed with a minimum
clearance surrounding it (Fig2).
Blocked ventilation or an enclosed space with limited air flow may
cause overheating or potential operational failure of the inverter.
4. CONNECTING TO POOL PUMP
Please follow these steps and the wiring diagram for correct connection. The warranty may be
compromised if the device is not installed in accordance with instructions described in this manual.
Only one pump can be connected to the inverter. Please do not connect any other appliance to the
output.
Mark the hole locations on the wall, drill and insert the expansion plugs supplied, fit the screws and
hang the device on the screws.
4.1 Turn o all electrical supply to the pool pump, unplug it from the main switch or at the chlorinator
which provides electrical power to the pump.
4.2 Plug the pool pump into the device’s power outlet (marked PUMP CONNECTION ONLY).
4.3 Plug the device into the main switch/chlorinator/timer connection where the pump was originally
plugged into.
4.4 Switch all power back on.