DE6205 3
Note 1: If the CL-8A/CL-8A T detects an error during programming,
the green LED goes out for 3 seconds after [#] is pressed and then
reverts to slow flashing. This indicates that the data has not
been
accepted and the entire programming sequence should be repeated.
Note 2: If you make an error while programming, press [] for
instant return to the programming menu.
5.2 Deleting all User Codes
Note: Besides the default master code (code No. 1), a specific code is
programmed in the factory as code No. 2. It is therefore important to delete
all codes before placing the CL-8A/CL-8A T into service!
The response will be as follows:
After entering [4] – the green LED starts to flash rapidly
After entering
[]
followed by
[#]
– the green LED lights for 2
seconds, and resumes rapid
flashing.
After entering the [master code] followed by [#] – the LED remains lit
for 2 seconds and then reverts to slow
flashing.
5.3 Programming New User Codes
and Their Extent of Control
Prepare a list of user codes you want to program and record them in
your Programming Chart (see Appendix A).
A.
The user number is the number assigned to this user on the user list,
not the code.
• The green LED lights for 2 seconds and starts to flash rapidly
B.
then repeat
to verify
The user code is any combination of numbers, up to 8 digits.
• The green LED lights for 2 seconds and resumes rapid flashing
C.
Select a trip code from the list below to determine which outputs
will be tripped by the new user code.
1 to trip the relay only
2 to trip the auxiliary output only
3 to trip both the relay and the auxiliary output
• The green LED lights steadily for 2 seconds and then flashes
slowly
, indicating that the data has been saved and that you are
back in the programming menu. To program additional user
codes, follow the sequence A through C above, or quit by
.
Caution! Code No. 01 will now become the master code, and will
provide the only access to future programming.
5.4 Deleting Selected User Codes
The response will be as follows:
After entering [ 4 ] – the green LED starts to flash rapidly
After entering
[user number]
followed by
[ # ]
– the green LED lights
steadily for 2 seconds, then resumes rapid
flashing.
After entering the [master code] followed by [ # ] – the green LED
remains lit for 2 seconds and then begins flashing slowly
.
5.5 Setting the Relay Timer
[ TT ] is the relay pull-in time
To set duration from 1 to 98 seconds, enter a number from 01 to 98
To convert the relay to toggle mode (latch/unlatch), enter 99.
5.6 Selecting the AUX Output Mode
[M] is a number selected from the mode column in Table 2 below.
Note: User codes must be authorized to activate the auxiliary output.
Table 2. Auxiliary Output Operating Modes
Mode Description
1 Output is pulsed for 1 second by every user code authorized to
operate the auxiliary output.
2 Output is toggled (latch/unlatch) by every user code authorized
to operate the auxiliary output.
3 Output operates concurrently with the relay timer, but stays
enabled 5 seconds longer than the relay (operation time: TT+5
seconds). If the toggle mode has been selected for the relay
(TT= 99), the auxiliary output will be turned on for 5 seconds
each time the relay is toggled. This mode does not work for
user codes that are not programmed to operate the relay.
4 Latches by user codes authorized to trip the auxiliary output,
unlatches by pressing .
5 Turned on for ten seconds by pressing any key.
6 Output oscillates at the rate of 1 Hz after 3 consecutive code
errors. This condition will persist for 10 minutes, and may be
reset only by entering a valid user code (resetting is possible
only after the first 30 seconds, during which the keypad will be
locked out as a result of the 3 code errors).
7 Output turned on by pressing 1 and 3 simultaneously. Remains
on while either key is kept pressed.
5.7 Deleting the Ambush Digit
If you do not intend to use an ambush digit, it is imperative that
you delete the ambush digit code – to ensure that no previously
programmed digit remains in memory.
5.8 Selecting an Ambush Digit
[ A ] is the desired ambush digit, chosen from 0 to 9.
IMPORTANT: If you have programmed an ambush digit, you must
restrict user codes to seven digits each (or less) and you must avoid
choosing user codes ending with that same digit as the ambush one.
5.9 How to Quit Programming
while the green LED is flashing slowly
The green LED will extinguish.
6. RESETTING THE DEFAULT MASTER CODE
If you forget or misplace the master code (code No. 01) and it
becomes necessary to reprogram the keypad, you will have to
reset the master code to the factory default (1234) as follows:
A. Open the keypad’s case, revealing the printed circuit board.
B. Install the jumper across the two pins labeled JP2. (See Fig. 3).
C. Momentarily short circuit the pins labeled JP1 using a screw-
driver or jumper wire.
D. Wait ten seconds, remove the jumper from JP2, and
immediately key 1234#. The green LED will light steadily for
two seconds and after that will start flashing slowly, indicating
that the programming menu is active.
Important Note: The master code has temporarily
reverted to 1234. Remember, however, that all other data
programmed previously remains intact!
E. Program a new master code (user code No. 01) immediately,
and record it in a secret, safe place.
If you choose to quit programming at this stage, press # while the
green LED is flashing slowly.
7. QUICK REFERENCE FLOW CHARTS
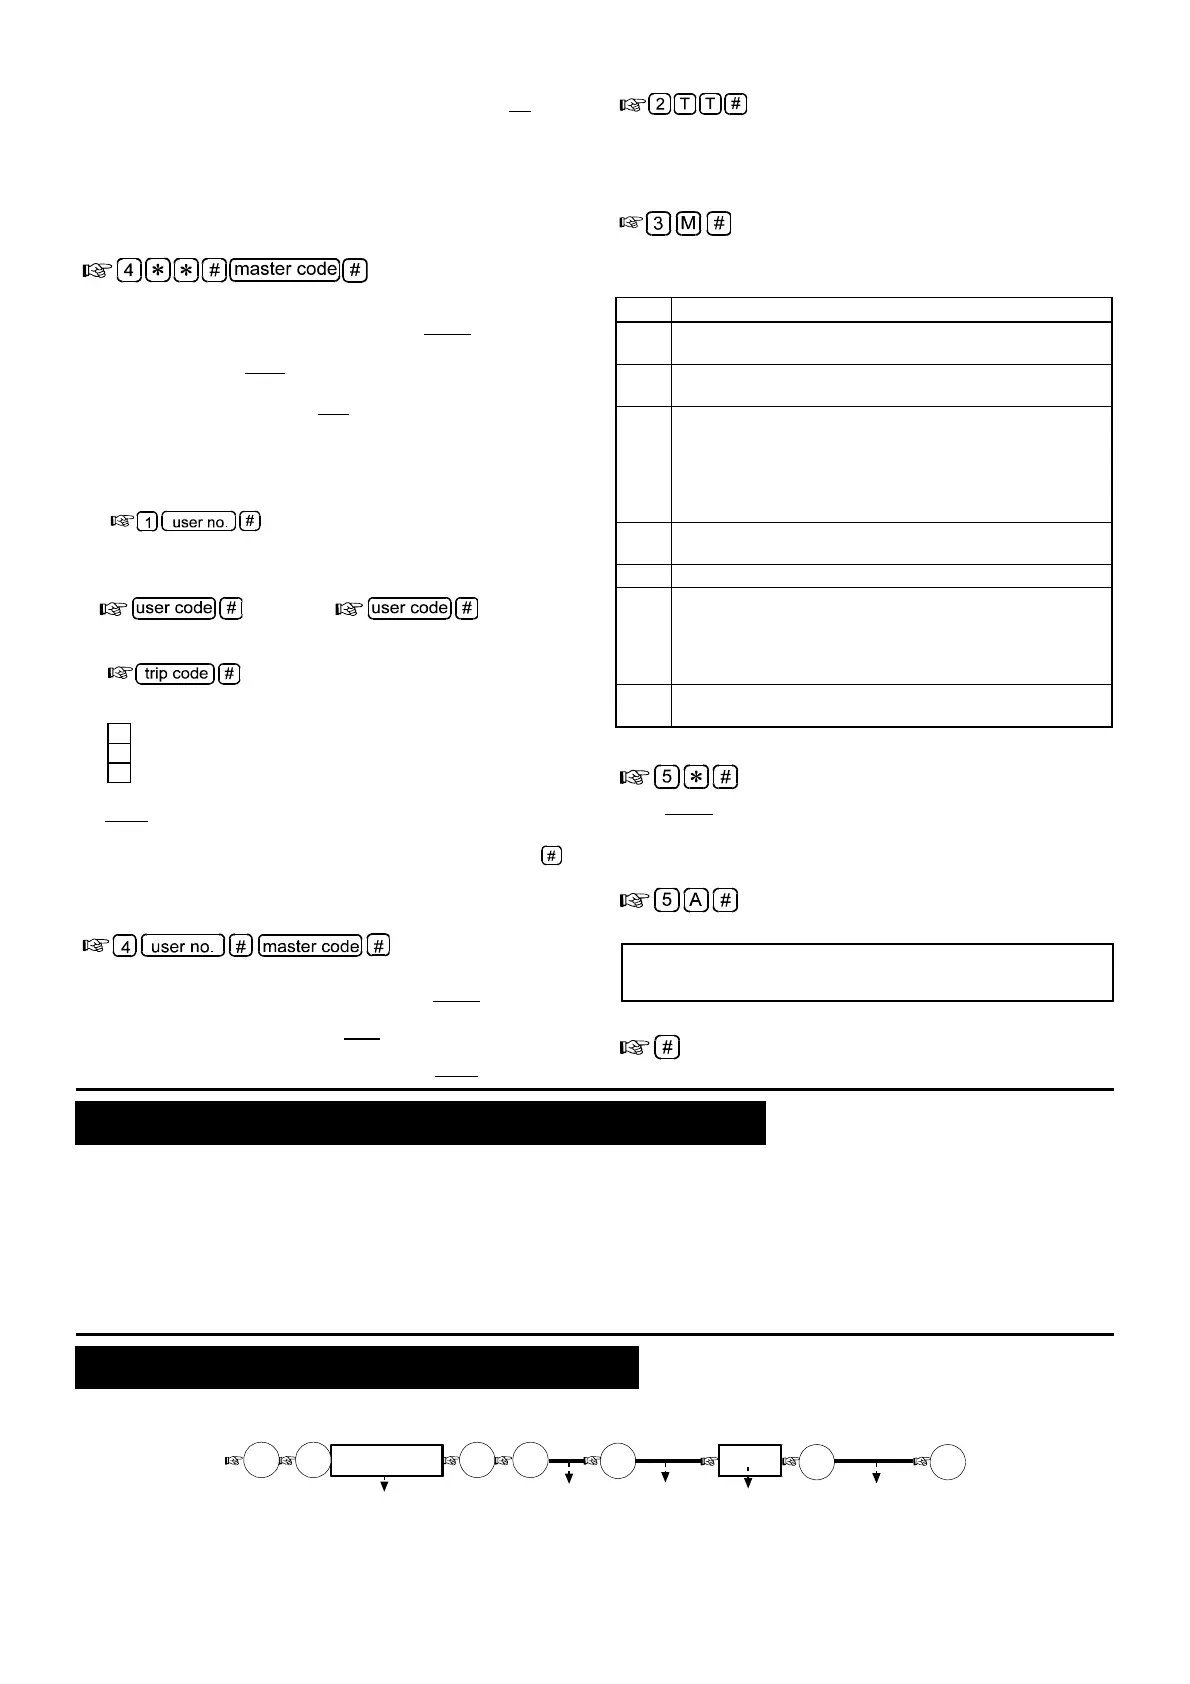
7.1 Setting the Relay Timer
ENTER MASTER-
CODE XXXX
The LED
flashes slowly
Enter Enter
* *
2
The LED
flashes fast
**
Default is 1234
Use 01 to 98 for
setting relay, and
use 99 for latch
01 to 99
XX
#
The LED lights for
2 sec, then
flashes slowly
#
 Loading...