Do you have a question about the Vivitar 285 HV and is the answer not in the manual?
Lists essential safety guidelines for using photographic equipment and preventing hazards like burns and electric shock.
Details power output (BCPS), power sources, number of flashes, and recycle times for various configurations.
Provides flash duration, color temperature, connections, weight, and dimensions of the unit.
Explains the various power sources available for the Vivitar 285HV flash unit, including batteries and adapters.
Describes the function and color indications of the flash unit's Ready Light for operational status.
Explains the built-in circuit that prolongs battery life and its corresponding Ready Light indicator.
Instructions for inserting batteries and forming the capacitor for optimal flash performance.
Details the thyristor circuit for power conservation, faster recycling, and increased flashes per charge.
Explains how to adjust the head for zoom position and bounce angle for lighting control.
Details the Vari Sensor Module for automatic flash exposure control based on subject distance.
Explains how to use the Mode Selector Dial for manual or automatic operation and depth of field control.
Describes the built-in calculator dial for determining flash exposures based on film speed and zoom.
Explains how to use the indicator to check if light output is sufficient for proper exposure.
Provides instructions on how to attach the flash unit to a camera and connect via hot shoe or cord.
Guides on using the flash directly on-camera for automatic exposure control and range.
Instructions for bounce flash photography using the flash on-camera for softer lighting.
Details how to use the flash off-camera with sensor connection for more versatile lighting effects.
Instructions for using the flash in manual mode for direct flash photography and exposure control.
Explains manual bounce flash techniques for specific lighting scenarios beyond automatic range.
Describes the variable power system for reducing light output and controlling exposure levels.
How to use the flash for fill-in lighting outdoors to balance exposures with ambient light.
Information on the 20-minute recharger for NiCad battery packs.
Details the rechargeable NiCad Battery Pack and its usage requirements.
Describes the AC adapter for using the flash with standard electrical outlets.
Information on the 3-foot coiled shutter cord for extended flash-camera connection.
Details the spare battery holder for AA alkaline or NiCad batteries.
Information on the wireless remote flash trigger for multi-flash setups.
Describes the high voltage battery pack for increased flash capacity and faster recycling.
Details the soft carrying pouch case for flash unit protection.
Information on the filter kit including UV, ND4, 85B, Red, Yellow, Blue filters.
Details the filter kit with wide angle diffuser and other colored/neutral density filters.
Describes the sensor extension cord for off-camera flash positioning and special effects.
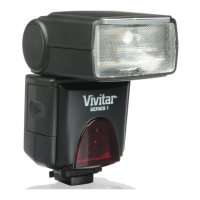
The Vivitar 285HV is a versatile and powerful electronic flash unit designed to enhance photographic capabilities across various shooting scenarios. It offers a blend of automatic and manual controls, making it suitable for both beginners and experienced photographers. The unit is primarily used to provide supplemental light for photography, ensuring proper exposure and creative lighting effects.
The core function of the Vivitar 285HV is to emit a burst of light to illuminate a subject, especially in low-light conditions or to control shadows. It operates on a thyristor circuit, which is a power conservation system that saves excess energy not needed for a proper exposure. This results in faster recycling times and a greater number of flashes per battery charge, particularly in automatic modes. The unit features a Zoom/Bounce Flash Head that allows photographers to coordinate the flash's field coverage with their camera lens's field of view. This head can be adjusted to different zoom positions (35mm, 50/55mm, 105mm equivalent) and bounce angles (0°, 45°, 60°, 75°, 90°), enabling direct flash, bounced flash, and wide-angle coverage with the included 28mm Wide Angle Flash Lens.
The Vivitar 285HV offers both automatic and manual operation modes. In automatic modes, a removable Vari Sensor Module measures the light reflected from the subject and its surroundings. A solid-state computer within the sensor then programs the flash to automatically provide the correct amount of light for a proper exposure. This means the photographer doesn't have to change the f-stop on their camera lens as they move closer or farther from a subject, as long as the subject is within the flash's automatic operating range. The Mode Selector Dial allows selection of four different automatic f-stops, each corresponding to a specific color wedge on the Calculator Dial, offering varying depths of field and operating ranges. For situations requiring maximum light output or specific creative control, the manual "M" position on the Mode Selector Dial allows the photographer to control the flash's power output.
A key feature for ensuring proper exposure is the Sufficient Light Indicator. This indicator glows green for about 2 seconds after the flash fires if the light output was sufficient for a proper exposure, providing immediate feedback to the photographer. The unit also includes a Calculator Dial, which is a built-in guide for determining flash exposures. It helps photographers set the correct ASA/DIN film speed, understand automatic operating ranges, and determine f-stops for various distances and zoom positions.
The Vivitar 285HV is designed for ease of use with several practical features. Attaching the flash to a camera is straightforward, utilizing a mounting foot and a lock lever for secure attachment to the camera's accessory shoe. For cameras without a hot shoe, a shutter cord can be used to connect the flash to the camera's X-sync terminal.
For power, the unit can operate on four 1.5-volt AA alkaline batteries as a standard source. Optional power sources include Nickel-Cadmium (NiCad) batteries for faster recycling times, the HVP-1 High Voltage Battery Pack for very fast recycle times and more flashes, the PPG-1 Power Pistol Grip for supplemental power and off-camera use, and the SB-4 AC Adapter for standard electrical outlets. It's important to note that when using external power sources like the HVP-1, PPG-1, or SB-4, fresh AA alkalines or a charged NC-3 battery pack must be in the flash unit to operate the synchronization circuit.
The Ready Light provides visual feedback on the flash's status: red for 1/2 power, green for 3/4 power, and blinking red and green when the Battery Saving Circuit is active and the unit is at full power. This allows photographers to know when the flash is ready to fire. The flash can be fired before the Ready Light is fully on, but this may result in underexposures.
The Zoom/Bounce Flash Head is highly adaptable. It can be extended or retracted to match the focal length of the camera lens, ensuring optimal light coverage. The head can also be tilted to various bounce angles, allowing light to be bounced off ceilings or other reflective surfaces for softer, more diffused lighting. When bouncing light, it's advisable to use white or neutral-colored surfaces to avoid color casts on the subject.
For manual shooting, the Vari-Power system allows photographers to reduce the light output from full power to 1/2, 1/4, or 1/16 power. This feature is useful for fill-in flash outdoors, multiple flash lighting with light ratio control, achieving faster recycle times, freezing high-speed action, or when a specific f-stop is desired for depth of field control.
The Vivitar 285HV also supports off-camera flash photography, which opens up new creative possibilities for direct and bounced lighting. The removable Vari Sensor Module can be mounted on the camera's accessory shoe via an optional extension cord, allowing the flash unit itself to be positioned independently while maintaining automatic exposure control.
Proper maintenance of the Vivitar 285HV focuses on prolonging battery life and ensuring the unit's longevity. The Battery Saving Circuit is a built-in feature that significantly extends battery life by causing the Ready Light to blink alternately red and green when active.
For battery operation, specific steps are outlined for inserting batteries correctly, following the polarity markings on the battery holder. It is recommended to turn the unit off immediately after use to prolong battery life and to remove batteries when storing the flash for extended periods to prevent damage from corrosion. If the red Ready Light fails to glow within 30 seconds, it's an indication that the batteries need to be replaced.
When the flash is new or has not been used for a while, the capacitor may lose some of its ability to store electricity. A "forming" procedure is described, involving setting the Mode Selector Dial to manual "M," turning the unit on, and firing the flash five times after the green Ready Light glows for 15-20 seconds. This helps restore the capacitor's ability to store electricity.
The manual also emphasizes general safety precautions, such as reading all instructions, supervising children when equipment is in use, avoiding touching hot parts, not operating the unit with a damaged cord, and unplugging the equipment from the electrical outlet when not in use. It also advises against disassembling the unit to avoid electric shock hazards, recommending that any service or repair work be performed by a qualified serviceman. After use, the equipment should be allowed to cool completely before storage.
| Type | Electronic Flash |
|---|---|
| Power Source | 4 AA Batteries |
| Tilt | 90 degrees |
| Swivel | 180 degrees |
| Guide Number | 120 ft (ISO 100) |
| Vari-Power | Full, 1/2, 1/4, 1/16 |