a few
minutes
before
you
resume
firing.
The
H VP-i High
Voltage
Battery
Pack -
Also available
from
your
Vivìtar dealer,
this unit
utilizes
disposable
high
voltage
batteries
or the
rechargeable
Vivitar
RB-510
battery
to
provide very
fast
recycle
times
and
a greater number
of
flashes
than that
provided
by the other
battery
power
sources
described
above.
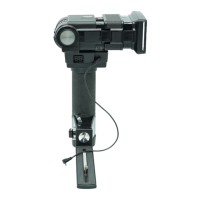
The
Vivitar PPG-1
Power
Pistol
Grip -
The
PPG-1
Power
Pistol
Grip
is a detachable
pistol
grip/flash
holder
for
off-
camera
use and can
provide
supplemental
power
for
faster
recycling
and
more
flashes.
lt uses
four
AA alkaline
batteries,
NiCads,
or the
special
Vivitar
NC-3
NiCad
Pack. It
has a
360°
rotating
shoe for
added
versatility.
The
Vivitar
SB-4
AC
Adapter
-
This
adapter allows you
to
use
standard
electrical
outlets
as an optional
and
economical
power
source.
IMPORTANT
NOTE:
When
using the HVP-1,
PPG-1
or SB-4
power
sources,
tour
fresh
AA
aikailnes
or
one
properly
charged
NC-3
battery
pack
must be In
the flash
unit to
operate the
synchronization
circuit.
Ready
Light
The Vivitar
285HV
is
equipped
with a
Ready
Light
(13)
with
a
3-stage operation: lt
glows red
when
the
flash is at
1/2 power,
glows
green when
the flash is at
3/4
power,
and
blinks
alternately
red
and
green when
the Battery
Saving Circuit
is in
operation
and
the unit
is at full
power.
The
new
285HV
has
a modified triggering
circuit
which
allows
you
to
tire
the flash
before the
Ready Light
goes on.
But
be
aware
that
underexposures
may result
when
the unit is
fired
before
the
Ready
Light
is
on.
With batteries in the flash, slide the On-Off Switch (12) fo
the RED
'ON"
position,
or plug the optional SB-4 AC
Adapter
into both the flash
AC
Adapter
Receptacle (17) and the wall
outlet. NOTE: The flasha On-Off Switch must be in the 'OFF
position when using the AC Adapter. Make sure there are
batteries in
the
unit
to
work
the
synchronization circuit when
using the SB-4.
When the green Ready
Light
glows, fire the
flash using
the
Open Flash Button
(1),
allowing the Ready
Light to glow 15 to
20
seconds first. After
a
sequence of 5 flashes,
your capacitor
will
then be
formed and you are ready fo begin shooting.
Thyristor Circuit
Your
Vivitar Model 285HV has
a unique
power conservation
sytem
called
a
thyristor circuit. In any of the four auto
modes,
this
circuit saves the excess
energy
not needed for a proper
exposure, threby
providing very
fast
recycling time and a
greater number of flashes
per
battery
charge. The recycle time
and the
number
of
flashes per charge varies depending
on the
flash-to-subject distance
and the auto
mode
used. As you
move the flash closer to the subject, the 285HV
recycles faster
and
is capable of providing more flashes per set of
batteries.
Zoom/Bounce
Flash
Head
e
Zoom
Position
The
Zoom/Bounce Flash Head (7) allows
you
to coordinate
the
field coverage
of your flash
with
the
field covered
by your
camera lens
Positions
are marked on the Zoom Setting
Indicator
(8)
for wide, normal and tele -. equivalent to camera
focal lengths of 35mm, 50/55mm and
105mm.
Extend or
retract the Zoom/Bounce Flash Head to the position which is
closest to the
focal length
of
the camera lens
you
are using
Battery Saving
Circuit
Your flash
unit has a
built-in circuit that actS to significantly
prolong
battery
life. When this circuit is in
operation,
the Ready
Light
will blink
alternately red and
green.
Battery
Operation
Inserting Batteries
Set the Flash
Head to the
straight-ahead
00
position.
Pushing with your
thumb
from the
front of the
unit,
slide open
the
Battery
Compartment Cover (3) and fake
ouf the
Battery
Holder
(27).
NOTE:
There is a stop
built into the
cover to
prevent it
from coming
all the way off
the back.
DO
NOT
FORCE THE
COVER.
Insert tour fresh
1.5
volt size AA alkaline
batteries
or
NiCads,
following the
battery
positioning
marked
on the Holder
Insert the
Holder info
the
battery compartment
(align the
square corner) and
slide the
Battery
Compartment
Cover
closed.
There
are some simple
procedures to
follow for getting the
most
out,ot
your flash and batteries. Always
turn your unit off
right
after
you've
finished using it to prolong
battery life.
Also,
when
storing your flash for a period
of time, remove
the
batteries, Io prevent
possible damage from battery
corrosion,
Replace the batteries if the
red Ready Light
fails to glow
within
30
seconds.
Forming
the Capacitor
When your flash
is new or when it has not been
used for a
period
ottime, the
capacitor loses some
of its ability
to store
electricity. When
this occurs, you
can "form" the
capacitor as
follows:
1.
Set the
Mode Selector
Dial (24) fo the
manual "Ivi"
position
7
Vari Sensor Module
Your Vivitar
285HV
Electronic Flash
is
equipped with
a
removable
Vari Sensor
Module
(26)
that
measures the
light
reflected from the
sublect
and
other reflective
surfaces
near
the
subject. This
information is
interpreted by
a solid state
computer in
the
sensor which
programs the flash
to
automatically provide
just
the right
amount
of light required for
a correct
exposure.
The practical
advantage is
that you don't
have
to change
the
f-stop on
your camera lens
when you
move
closer
to
a subject
or
farther
away. As
long as
your
subject is within the
automatic operating
range
of 'the flash for
that
f-stop, the computer
automatically makes
the
adlustment
for
you.
To
remove
the Vari
Sensor Module from
the
flash,
pull it
straight
out from
the body
of the flesh.
To mount the Module
back on
the flash, align
the
black ridge
at the back of the
Module
with the
groove
in
the Sensor
Socket
(2)
and
push the
Module firmly into
the
flash.
a
I.e
addition, a 28mm
Wide
Angle Flash
Lens
(28)
is included
with
your Model 285HV Flash
Insert
the flash
lens into
the
Lens/Filter
Slot
(6), with
the
tab on the lens
at the
bottom, The
28mm
Flash
Lens is
designed
to be used with
the
Zoom/Bounce Flash
Head
in the wide
position.
Bounce
Angle
The
Model
285HV will
tilt
to
any attive
click
positions (9)
(0°,
45°,
60°, 75°,
90°),
depending on the
lighting
you want
to
Create. When the
flash
is set
at the 45°,
60°, 75°
or
90°
position,
you can bounce light
ott
a reflective
surface fo create
softer lighting.
Automatic Operation
PDF compression, OCR, web optimization using a watermarked evaluation copy of CVISION PDFCompressor


 To Next Page
 Loading...