To ensure proper electrical contact, clean the battery
terminals before installing the batteries.
2.
To prevent battery explosion, leakage or overheating, use
batteries of the same type and brand. Do not
mix and match different types or new/used batteries.
3.
Do not attempt to recharge batteries other than NiCD or
NiMH rechargeable batteries.
4.
If the flash will not be used for an extended period of time,
all batteries from the flash to avoid possible
damage from battery leakage.
5.
Battery performance decreases at low temperatures. Keep
batteries warm (near room temperature) before
them, especially in cold weather.
6. Take spare batteries when going on
photographing outdoors in cold weather.
Battery Installation
1. Turn the Flash On/Off Switch
(10) to the Off position, then
open the Battery Cover (8) by sliding it forward.
2.
Insert four AA batteries into the battery compartment. Be
) of the batteries are aligned according
to the diagram inside the battery chamber.
3. Close the Battery Cover (8).
4.
Slide the Flash On/Off Switch (10) to the “1” position. The
On Indicator (17) will light come on. You may
pitch whine of the capacitor as it charges.
After a few seconds, the orange Ready Indicator (9) will
light up indicating that the flash is ready for use.
Auto Standby System
To conserve battery power, the flash unit will automatically
to standby mode if the flash is not used for
approximately 3 minutes.
Important Note
: Even though the flash unit is automatically
switched to standby mode, it will still use some battery power
for flash detection. Therefore, if the flash will not be us
long period, it is recommended that you set the Flash On/Off
Switch (10) to the Off position.
Low-Battery Power Indication
The amount of time that it takes for the orange Ready
Indicator LED to come on is your indication of battery
condition. As the batteries are depleted, the time will
increase. As the charge time approaches 30 seconds,
consider a new set of batteries.
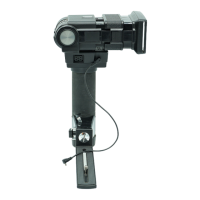
Attaching and Removing the Flash
Turn the Flash On/Off (10) to the Off position.
Slide the Mounting Base (7) onto the shoe on the flash
bracket and turn the Locking Ring (6) until it is secure.
When you attach or remove the flash, grasp the bottom of the
flash to prevent damage to the Mounting Base (7)
or the
bracket’s shoe.
Mount your digital camera on the bracket, on the grip pad,
using the ¼-20 thumbscrew and tighten securely. (Refer to
the following section “Flash Photography with the DF200”.)
Turn the Flash On/Off Switch to the “1” position.
Distance Table – Using the Zoom Head
The distance table (14) on the back of the flash suggests the
maximum effective flash range for the five (5) zoom positions
- W2, W1, MID, T1 and T2. The zoom positions correlate to
the “35mm equivalence” focal length of your digital camera
lens. (Digital cameras vary greatly. Use these numbers as a
guide.) In general: use W1, W2 for wide angle, MID for
normal (no zoom), and T1, T2 for telephoto. Select the zoom
setting appropriate for your lens positioning. For example:
Guide
Number
(in meters)
Zoom range of
camera (35mm
equivalence)
Suggested Zoom
Position on flash
unit (in mm)
23 28-34mm W2
25 35-49mm W1
28 50-84mm MID
30 85-104mm T1
31 105mm and above T2
*This table is based on Full power setting - Power setting 1
(W2 = 28mm, W1 = 35mm, MID = 50mm, T1 = 85mm, T2 = 105mm)
Flash Photography with the DF200
In order to ensure that the images taken with your digital
camera are sufficiently illuminated, follow these instructions:
Step:
1. Before mounting your digital camera onto the bracket set
the White Balance and Flash mode:
i. If your digital camera allows for the adjustment of white
balance, set the camera to “sunlight”, or “outdoors”.
(*Refer to your digital camera user manual.)
ii. Set the flash mode of your digital camera to “On“ or
“Red Eye” to ensure that the flash is emitted for every
shot. “On” is also known as “fill” for some cameras.
0
For most digital cameras “Red Eye Reduction” mode will
pre-pulse the camera flash several times prior to the actual
flash pulse.
3
 Loading...