This document is an instruction manual for the VIVO Electric 4 to 8 Frame Stainless Steel Honey Extractor, SKU: BEE-V004E.
Function Description:
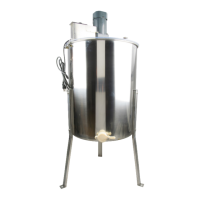
The VIVO Electric 4 to 8 Frame Stainless Steel Honey Extractor is designed to efficiently extract honey from honeycomb frames. It uses centrifugal force to spin the frames, causing the honey to be flung out and collect at the bottom of the drum, where it can then be drained. This electric model automates the extraction process, making it less labor-intensive than manual extractors.
Users must read and follow all safety requirements outlined in the manual. It is crucial to understand the directions and, if in doubt, contact a qualified technician. The product should not be used for purposes other than those specified in the manual, and its weight capacity should not be exceeded. Improper installation, incorrect assembly, or inappropriate use can lead to damage or serious injury. The manual also warns of sharp edges on the extractor.
Preparation for Use:
Before first use, the machine must be carefully removed from its packaging. All protective film should be removed, and the honey extractor should be thoroughly cleaned with mild soap and water. The extractor must be placed on a dry, flat, and stable surface to ensure safe and balanced operation.
Package Contents:
The package includes the following components:
- A (x1) Drum: The main body of the extractor where frames are spun and honey collects.
- B (x3) Leg: Supports for the drum.
- C (x2) Lid: Covers for the drum, equipped with safety switches.
- D (x1) Honey Gate: A valve at the bottom of the drum for draining honey.
- E (x1) Power Cable: To connect the extractor to an electrical outlet.
Hardware included:
- S-A (x3) M8 Plastic Knob: Used for securing the legs.
- S-B (x3) M8 Washer: Used with the plastic knobs.
- S-C (x8) M4x12 Screw: Used for securing the lids.
- S-D (x8) M4 Nut: Used with the M4x12 screws.
- S-E (x3) Concrete Anchor: Optional, for securing the extractor to the floor.
Tools needed for assembly:
- Adjustable Wrench
- Phillips Screwdriver
- T-A (x1) 3mm Allen Wrench (included)
Assembly Steps:
- Step 1: Remove cap nuts and washers from the lower leg supports on the Drum (A).
- Step 2: Mount Legs (B) to the Drum (A). Use the previously removed hardware for the lower holes and M8 Plastic Knobs (S-A) with M8 Washers (S-B) for the upper holes.
- Step 3: Install the Honey Gate (D) into the Drum (A).
- Step 4: Line up the holes in the Lids (C) with the hinges in the crossbar of the Drum (A) and secure them using M4x12 Screws (S-C) and M4 Nuts (S-D). It is crucial that the Lids (C) are installed correctly and in the down position to engage the safety switches, allowing the motor to turn on. Each lid has a built-in safety latch that cuts power the moment it is opened.
- Step 5: Plug the Power Cable (E) into the motor on the Drum (A).
- Step 6 (Optional): For added security, Concrete Anchors (S-E) can be used to secure the extractor to the floor.
Operating Instructions:
- Step 1: Ensure the control dial is set to "0" and the power switch is off (O). Plug the power cord into a standard AC wall outlet.
- Step 2: Place honey frames into the extractor basket. Load three sides to maintain balance, which helps reduce shaking during operation.
- Step 3: Close both lids to engage the safety switches. Flip the power switch to the on (I) position, ensuring the emergency stop button is not engaged. Turn the dial to achieve the desired spinning speed. The front lid's safety switch will cut power if opened, and power will not be restored until the lid is closed. Once frames are emptied, turn the dial back to "0" and remove the frames.
- Step 4: After one side of the frames is emptied, remove them, turn them around, and place them back in the extractor. Repeat Step 2, then remove the frames from the extractor.
- Step 5: Position a bucket or container under the drain. Open the honey gate to begin draining honey. Tip the extractor forward to drain as much honey as possible.
- WARNING: Keep hands clear of moving parts to reduce the risk of injury.
Disassembly:
To disassemble the extractor:
- Remove the four cap nuts from the top of the extractor (two on each side).
- Using the 3mm Allen Wrench (T-A), loosen the set screws in the coupler.
- Pull the top brace up and off.
- The basket can then be lifted out.
Care & Maintenance:
Quick Cleaning:
- Option 1: Rinse the extractor with cold water from a hose. A pressure washer is highly effective. Empty excess water to prevent surface rust.
- Option 2: Place the open extractor next to a hive. Bees will clean it out and utilize the materials.
In-Depth Cleaning:
Disassemble the extractor (refer to Disassembly instructions). Use mild dish soap and warm water to scrub the drum and basket clean. Thoroughly rinse all parts and dry them with a soft cloth. Reassemble the extractor once dry.
Care:
- Store the extractor in a dry place when not in use. While stainless steel is highly resistant to rust and corrosion, light surface rust can form in wet conditions.
- If surface rust appears, clean it with a light abrasive to remove the rust.
- The gearhead is permanently sealed and requires no maintenance.
- Always set the dial to "0" when not in use to prevent sudden starts when plugged in again. Ensure the emergency stop button is fully engaged.
Warranty:
VIVO offers a ONE YEAR warranty for this product and has a 30 Day Return Policy. Customers with problems are encouraged to contact them directly.
Customer Support:
VIVO's dedicated support team is available Monday-Friday from 7:00 am - 7:00 pm CST. They offer immediate assistance for damaged or defective parts and are happy to replace parts to ensure a fully functioning product.
- Phone: 309-278-5303 (Average resolution time: 5M 4S within office hours)
- Website: www.vivo-us.com (Chat live with an agent! Average resolution time: < 15M within office hours)
- Email: help@vivo-us.com (Average response time: 1HR 8M within office hours, with 92% of responses within < 3hr)
For more VIVO products, visit their website at www.vivo-us.com.
Users are encouraged to share photos of their VIVO setup and tag @vivo_us.