6 7
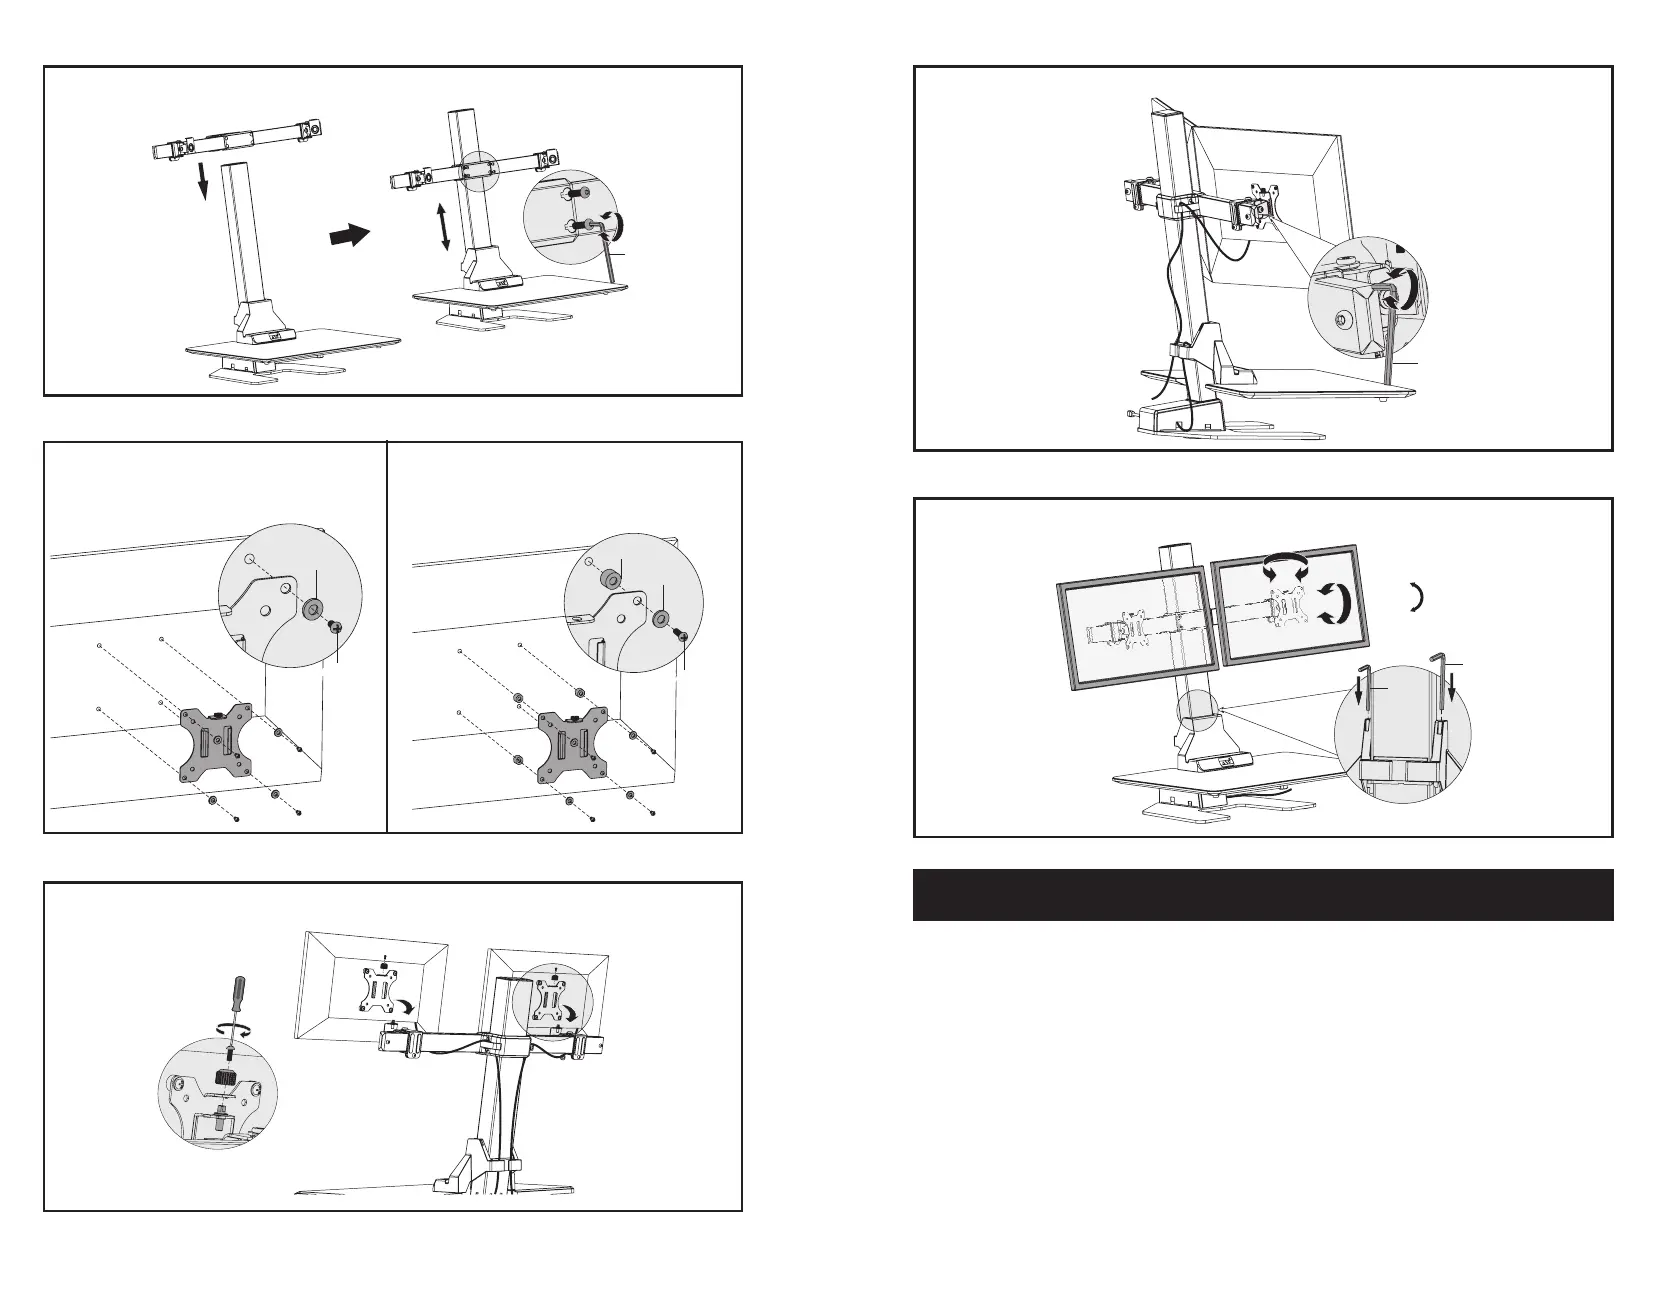
Attach VESA plates to the mounts of arm (D) using knobs.
STEP 9
STEP 11
Adjust tilt of monitors as desired. Store allen wrenches in decorative cover (C).
J
K
�
STEP 10
Tighten with 5mm allen wrench (K).
K
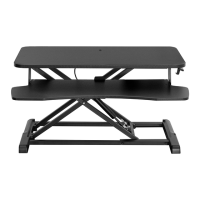
STEP 7
Slide arm (D) onto pole (A) and tighten at desired height using 4mm allen wrench (J).
1
OPTION A: Flat Back Monitor
For at back monitors, attach VESA plates using
12mm screws (M-A or M-B) with washers (M-E).
STEP 8
OPTION B: Curved Back Monitor
For curved or recessed back monitors, use 16mm
screws (M-C or M-D) with washers (M-E) and
spacers (M-F).
MA MB-/ -
ME-
ME-
MF-
MC MD-/ -
OPERATING INSTRUCTIONS
Upward and Downward Movement
Press and hold the up or down arrow until the workstation reaches the desired height. If motor
continuously operates for a relatively long period of time, the overheat protection will activate. The
control panel will work normally again aer approximately 20 min.
Overload Protection Mode
While operating, should the load on the desk exceed rated specications, the system will enter into
overload protection mode to protect the system from damage. When this happens, the workstation will
move downward approximately 30mm and come to a stop with the current height displayed.
Reset Mode
While the unit is powered on, press the down arrow until workstation moves to the fully lowered position.
Don’t release until it raises approximately 5mm and automatically stops.
+/-45°
+/-30°
180°
 Loading...