5
English
•
Deutsch
•
Nederlands
A
A
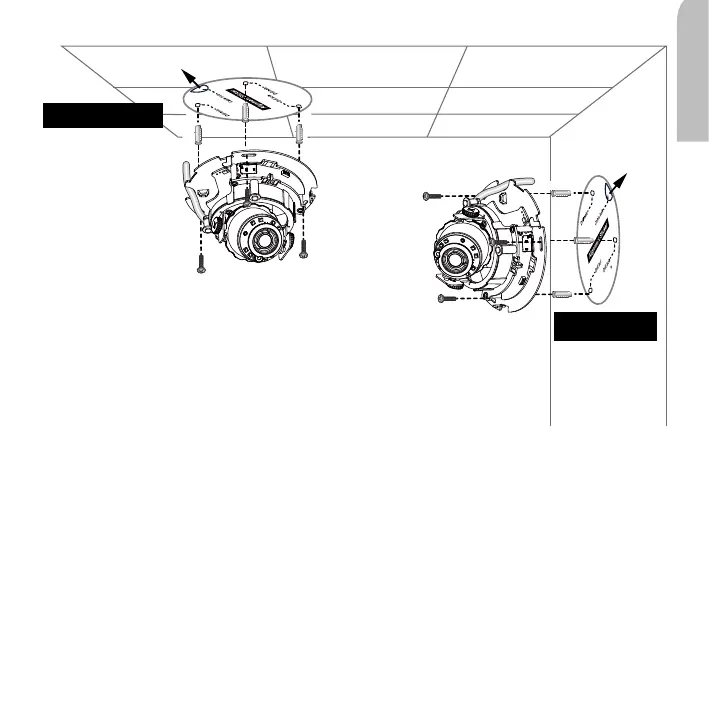
1. Attach the alignment sticker to the ceilling/wall.
Bringen Sie den Aufkleber an der Decke/Wand an.
Bevestig de bijgesloten uitlijnsticker op het plafond/wand.
2. Drill three pilot holes into the ceilling/wall.
Bohren Sie 3 Löcher in die Decke/Wand.
Boor 3 voorboorgaten in het plafond/muur.
3. If you want to feed the cable through the ceiling/wall, drill a cable hole A as
shown in the above picture.
Wenn Sie das Kabel durch die Decke/Wand führen möchten, bohren Sie ein Loch A für das Kabel
wie oben abgebildet.
De Netwerk Camera kan worden gemonteerd met de kabel door het plafond/wand of met de kabel
aan de zijkant. Als u de kabel door het plafond of muur wilt leggen, boort u een kabelgat A, zoals is
aangegeven in bovenstaande afbeelding.
4. Hammer the supplied plastic anchors into the holes.
Hämmern Sie die beiden mitgelieferten Kunststoffverankerungen in die Bohrungen ein.
Timmer vervolgens de bijgesloten plastic pluggen in de gaten.
5. Secure the camera using the supplied screws.
Schrauben Sie die Kamera mit den mitgelieferten Schrauben fest.
Bevestig de camera met de bijgesloten schroeven.
Deckenbefestigung
Plafondmontage
Wandbefestigung
Wandmontage
Ceiling Mount
Wall Mount
 Loading...