9
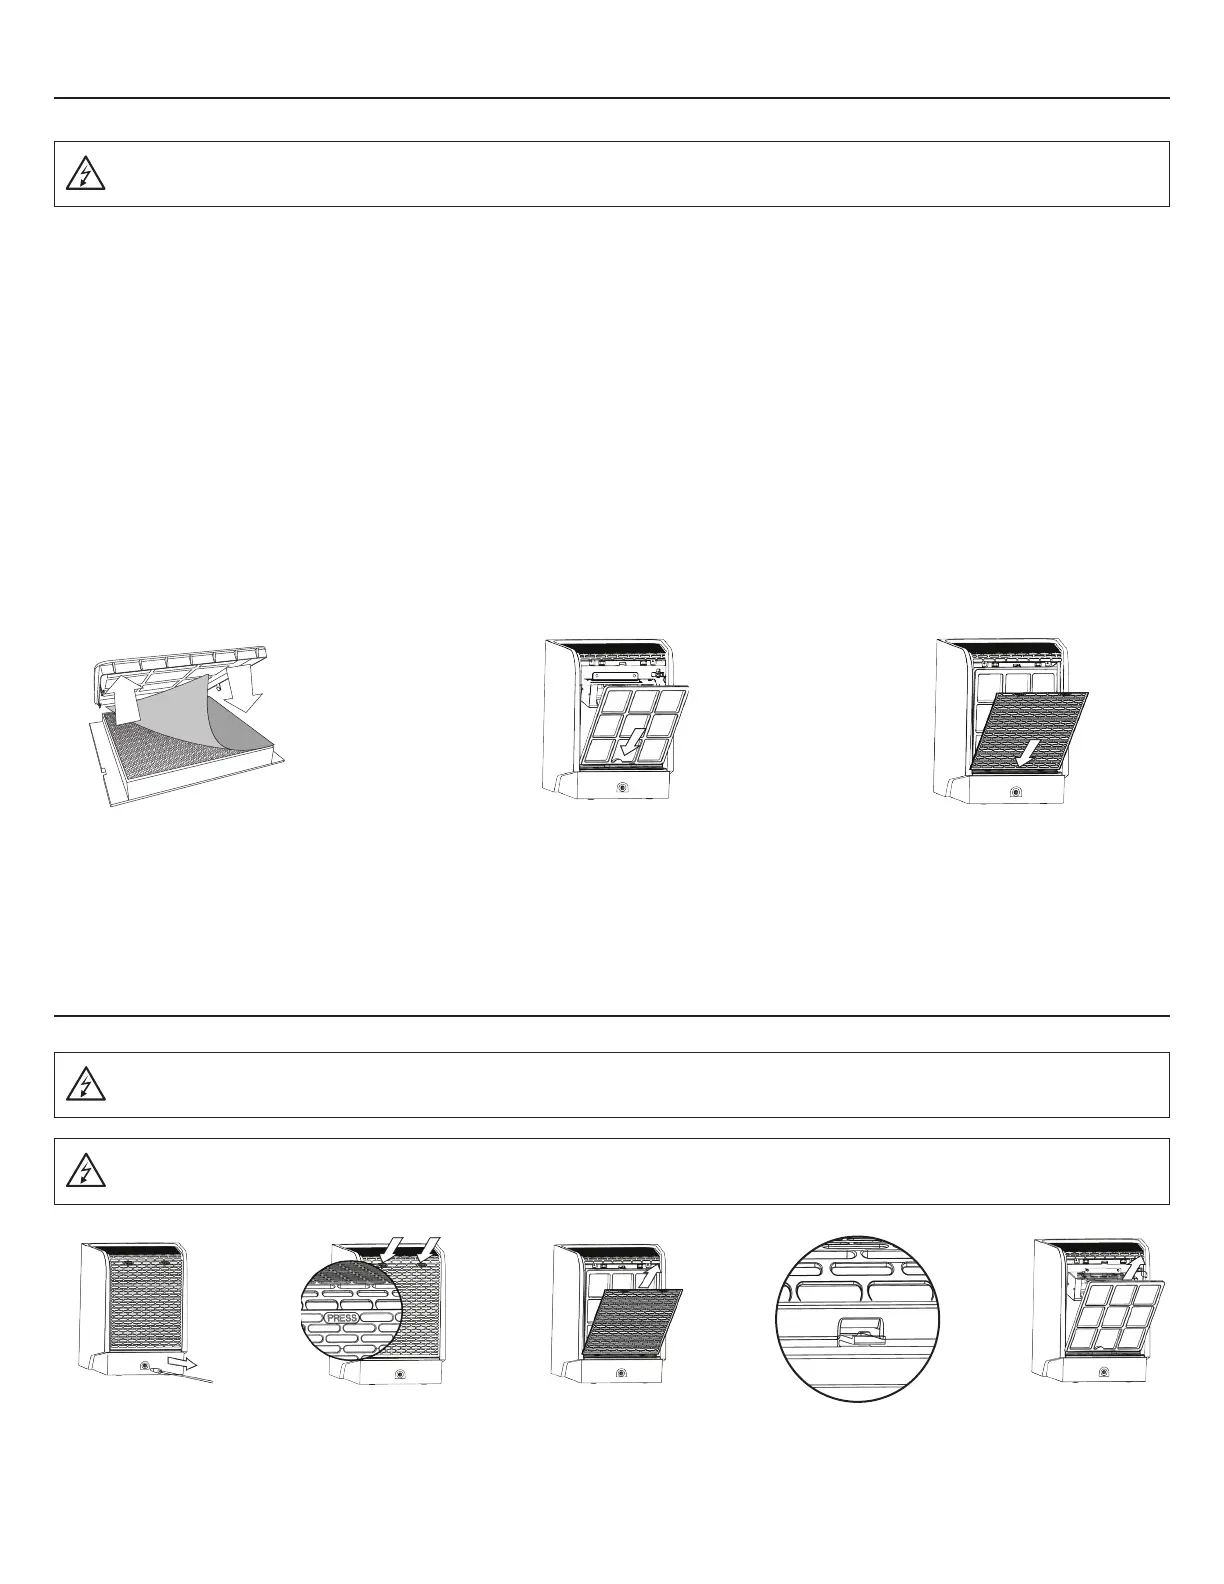
REMOVING THE FILTER ASSEMBLY
UNINSTALLING THE OPTIONAL HEPA FILTER SHEET
1. Unplug
unit.
2. Press the top of the
Back Cover to release
the back panel.
3. Lift up to
remove the back
panel.
4. Press the tab down
release the Filter
Assembly.
5. Lift the Filter
Assembly up
and out to
remove.
WARNING: Unplug the unit before performing any maintenance procedures.
WARNING: Unplug the unit before performing any maintenance procedures.
WARNING: Do not operate the Vollara Air & Surface Pro+ without the Filter Assembly and Back Cover properly installed.
The Optional HEPA Filter Sheet is designed specifically for areas with tobacco smoke, multiple pets, or anywhere excessive levels of
contamination are in the air.
• Protects your air purifier from indoor contaminants, which may shorten the life of your product
• Reduces monthly maintenance and cleaning time up to 90%
• Helps reduce odors
• Great in kitchen environments
• Helps reduce VOC’s and other contaminants
3. Replace the Back Cover by inserting
the bottom in first and snapping
into place.
2. Replace the Filter Assembly, inserting
the bottom of the Filter Assembly first.
NOTE: Removing the optional HEPA filter sheet will increase the airflow of the unit.
Remove the Filter Assembly (see
below).
1a.
Place the HEPA Filter Sheet on
top of the Prefilter.
1b.
 Loading...