19
19
photo when the camera icon is highlighted. The last image taken will
be overlaid on the screen to help line up the next photo. Press left or
right on the D-pad after you are nished taking photos and the project
selection screen will appear. Press left or right to play the animation,
further edit it or create a new project.
NOTE: You can delete the frame currently being viewed by pressing
the Delete button to display the delete frame menu, then select Yes to
conrm and continue.
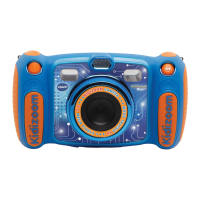
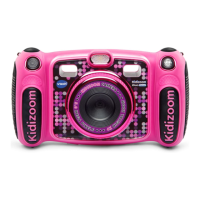
D. Photo Editor
In Photo Editor, you can add photo frames, stamps, special effects and
fantasy effects to a photo.
Press up or down on the D-pad to view photos, then press the
OK button to conrm your selection and start editing. An editing menu
will appear. Use the D-pad to choose a function and press the
OK button to begin.
Photo Frames
Choose this function to add a photo frame to your photo. Press left
or right on the D-pad to select a frame, then press the OK button to
conrm your selection.
Stamps
Choose this function to add a stamp to your photo. Press left or right
on the D-pad to choose a stamp, then press up or down to enlarge
or shrink it. Press the OK button to conrm your selection, then use
the D-pad to position the stamp. Finally, press the OK button again
to apply the stamp to the photo.
Special Effects
Choose this function to add distortion, kaleidoscope or colour lter
effects to your photo. Press left or right on the D-pad to choose an
effect, then press up or down to change the size of the area to which
it will be applied. Press the OK button to conrm your selection. Use
the D-pad to move the effect to where you would like to apply it, then
press the OK button to add it to the photo.
For colour lter effects, simply select the effect, then press the
OK button to apply it.
Note: Generating a special effect on your camera may take more than
one minute.