9
Remote control Kit
6 720 680 078 (2012/12)
3Remote control Kit
3.1 Parts supplied
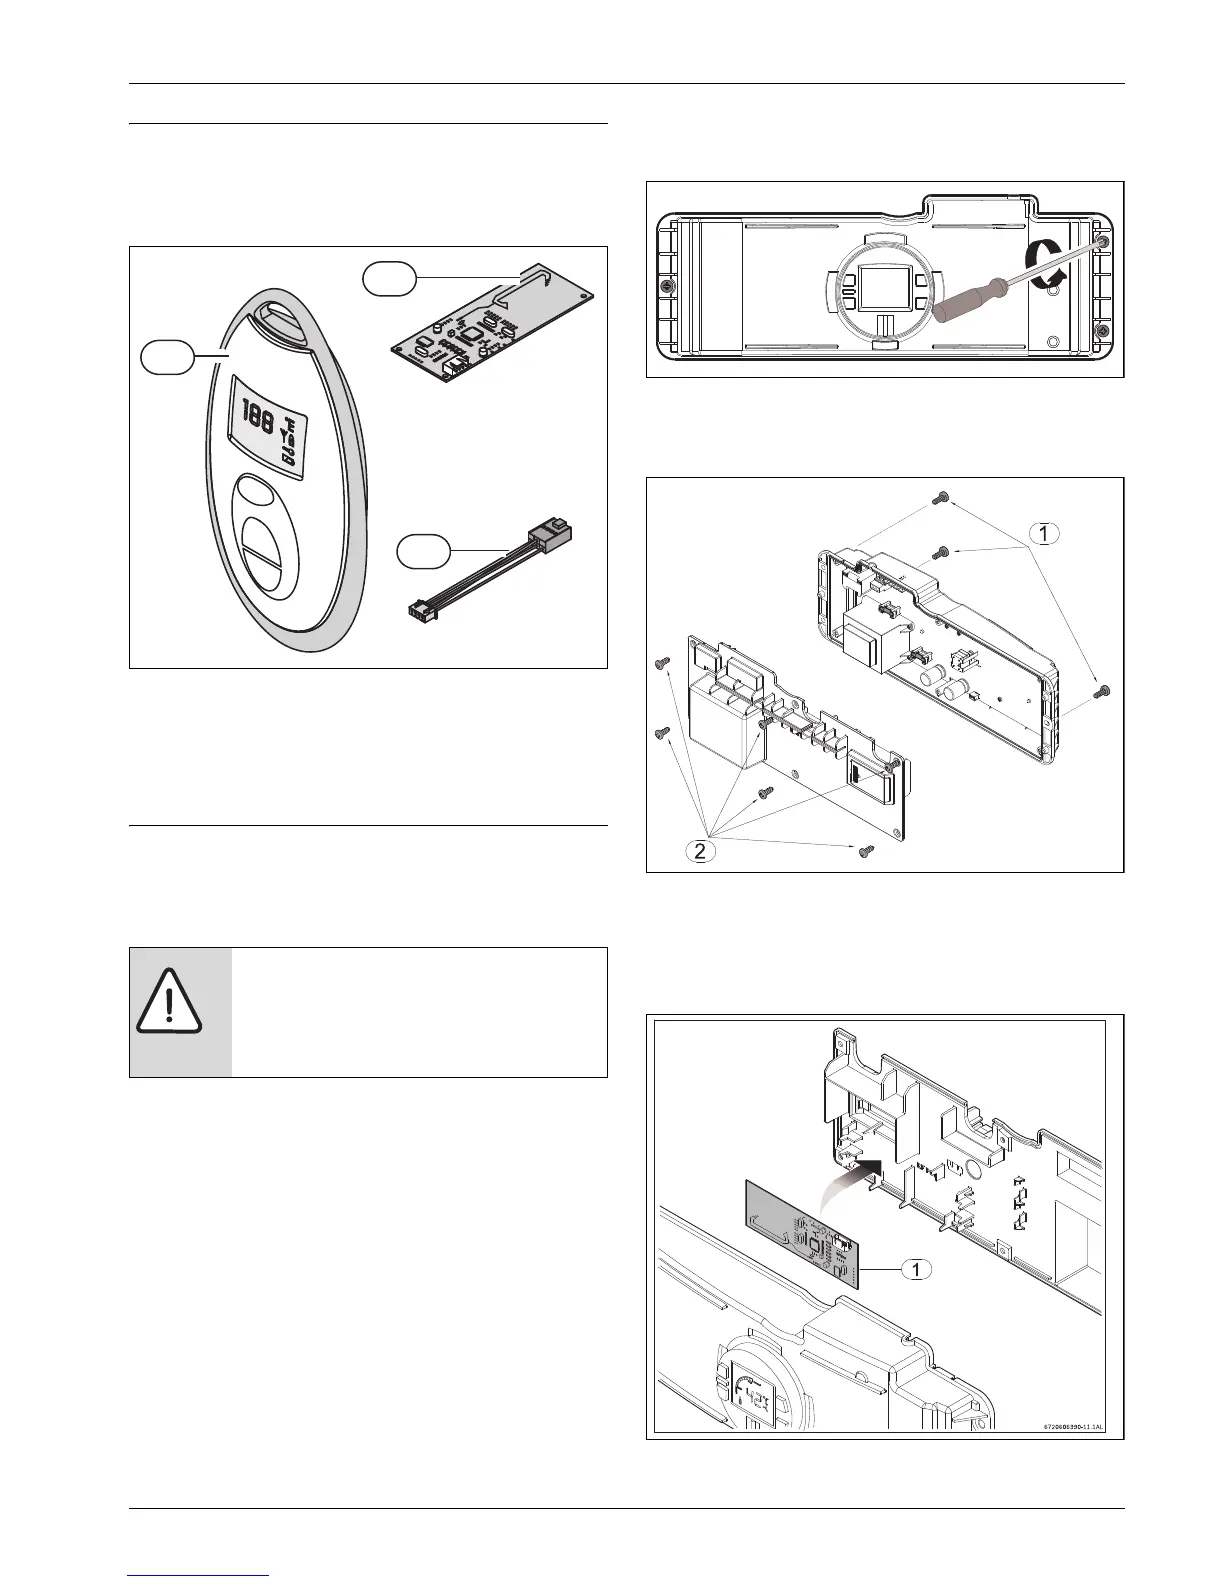
Fig. 1 Parts
[1] Remote control
[2] Remote control transceiver PCB
[3] PCB connection cable
4Remote control installation
4.1 Remote control transceiver PCB installation
Pre-installation preparation
▶ Loosen the two Philips head screws located on bottom rear
of cover.
▶ Lift front cover upward and remove.
▶ Remove the three screws from the control unit (Fig. 2 ,
pos.1).
Fig. 2
▶ Remove the 6 screws from the back cover of the control
unit, to access the electronic board (PCB) (Fig. 3 , pos.2).
Fig. 3
Remote control transceiver PCB installation
▶ Place the remote control PCB in the back cover of the
control unit as shown in Fig. 4 .
Fig. 4
WARNING: Electrical discharge!
▶ For safety reasons, disconnect the
power supply to the water heater before
performing installation.
 Loading...