Base Assembly
Page 3
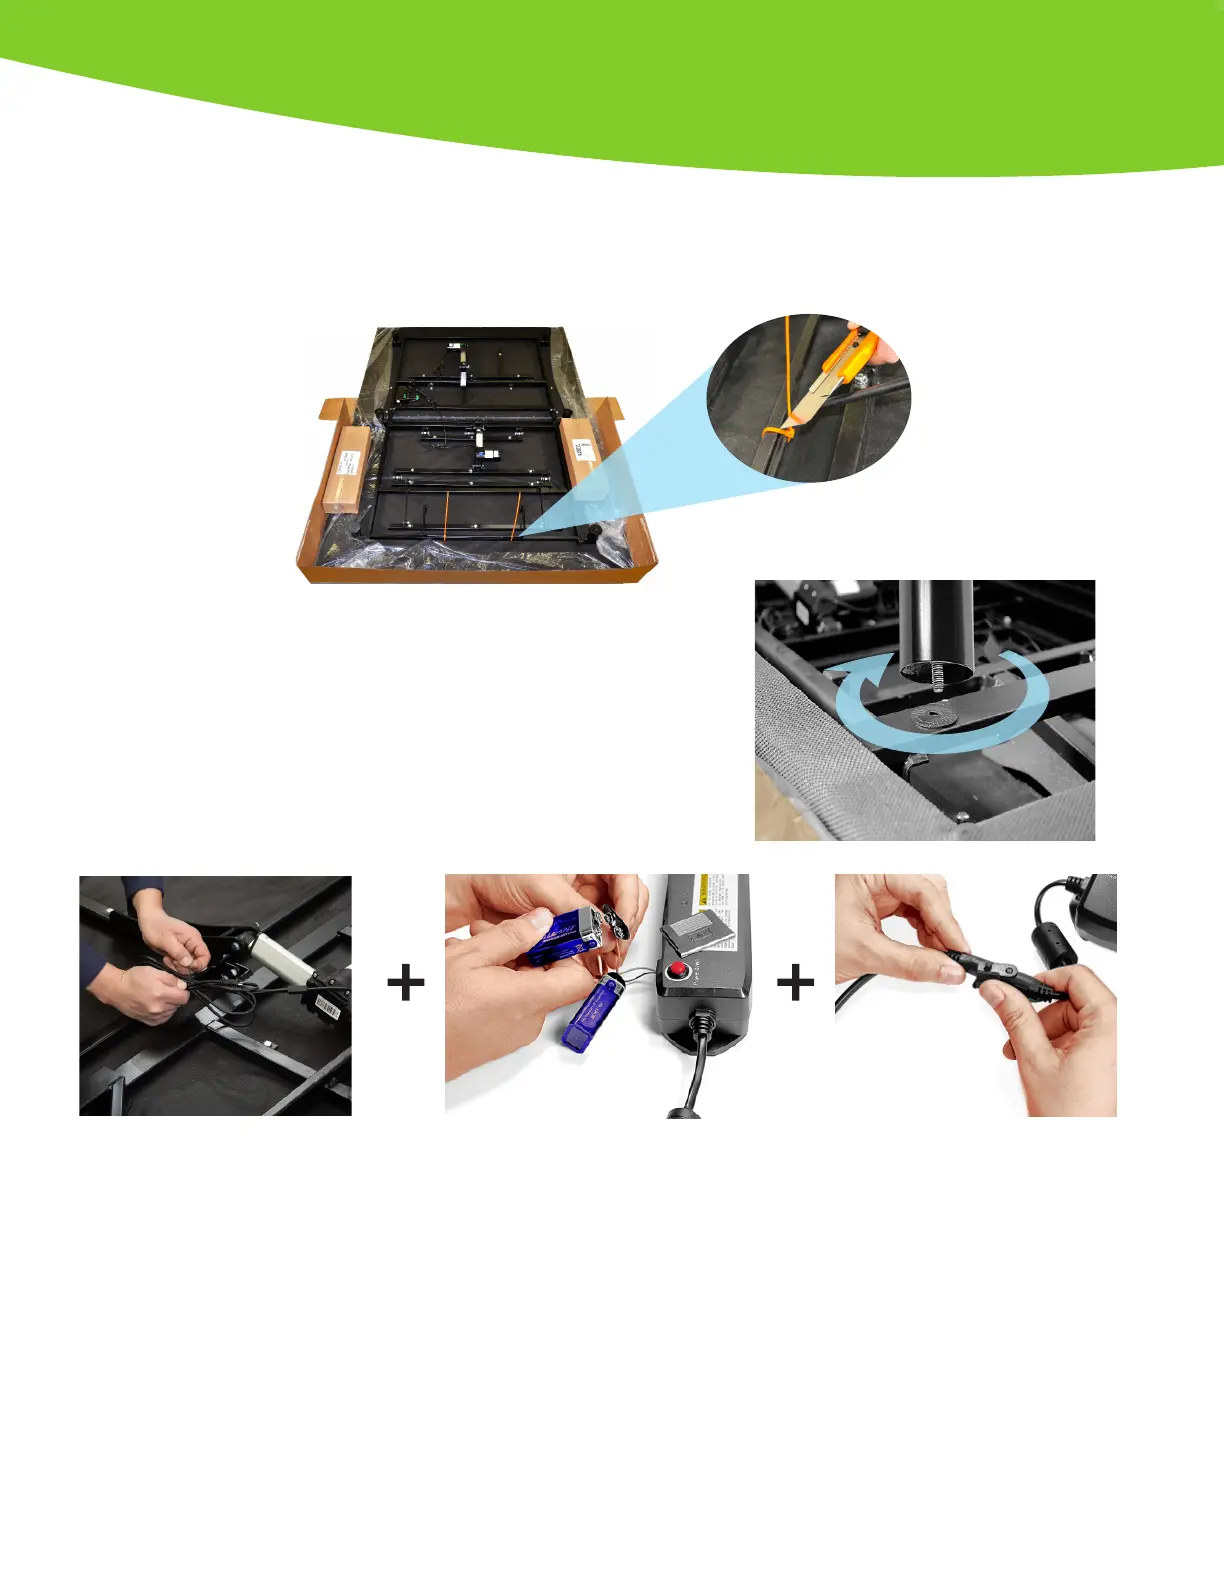
Step 1
For safety reasons, It is highly recommended to use two people for lifting and the installation of this product. Before assembly,
place the unit in the nal installation location to make the assembly process easier. The unit should always be in a at surface
when opening and placed top side down on the oor according to the box instructions. Remove the top section of the box.
Step 3
Screw in the provided legs (6) in each corner and center of the
base rotating clockwise until tight.
DO NOT OVER TIGHTEN THE LEGS.
NOTE: THESE BACKUP BATTERIES WILL ALLOW THE BED TO BE LOWERED IF A POWER OUTAGE
OCCURS. IT IS RECOMMENDED NOT TO DO ANYTHING EXCEPT TO LOWER THE BED AS THE BATTERY
BACKUP WILL NOT ELEVATE THE BED SECTIONS. HEAD AND FEET SECTIONS CAN BE LOWERED BY
PRESSING “HEAD DOWN” OR “FOOT DOWN” ON REMOTE CONTROL.
It is recommended to replace the two 9 volt batteries every 12 months or after every emergency lowering use. It is important
to always have extra 9 volt batteries in case extra energy is needed during a power outage.
Step 2
Remove any
accesory boxes/
bags and untie the
mattress retainer,
which is held with
orange plastic ties.
Step 4
Remove the twist ties and
release the DC cord.
Step 6
Insert the AC cord into the Pow-
er Supply and lock it using the
clip. NOTE: DO NOT PLUG
BASE INTO THE POWER
OUTLET YET.
Step 5
Plug the two 9 volt batteries
(included) in the compartment of
the Power Supply and insert the
cover to close.*