2 Component Removal and Installation
22
Meritor WABCO Maintenance Manual 34 (Revised 03-16)
8. Install the new cover and the new snap ring to hold the
components in place.
Pressure Relief Valve
NOTE: If you plan to replace the Street-Tee fitting, refer to
TP-9557, Pressure Relief Valve Installation, for instructions. To
obtain this publication, refer to the Service Notes page on the front
inside cover of this manual.
1. Remove the old valve from the dryer.
If your dryer uses a bypass valve (date code of 2295 or earlier),
the pressure relief valve will be installed with a Street-Tee
fitting at the front (Port 1) of the dryer. On dryers with date
codes later than 2295, the pressure relief valve is located at
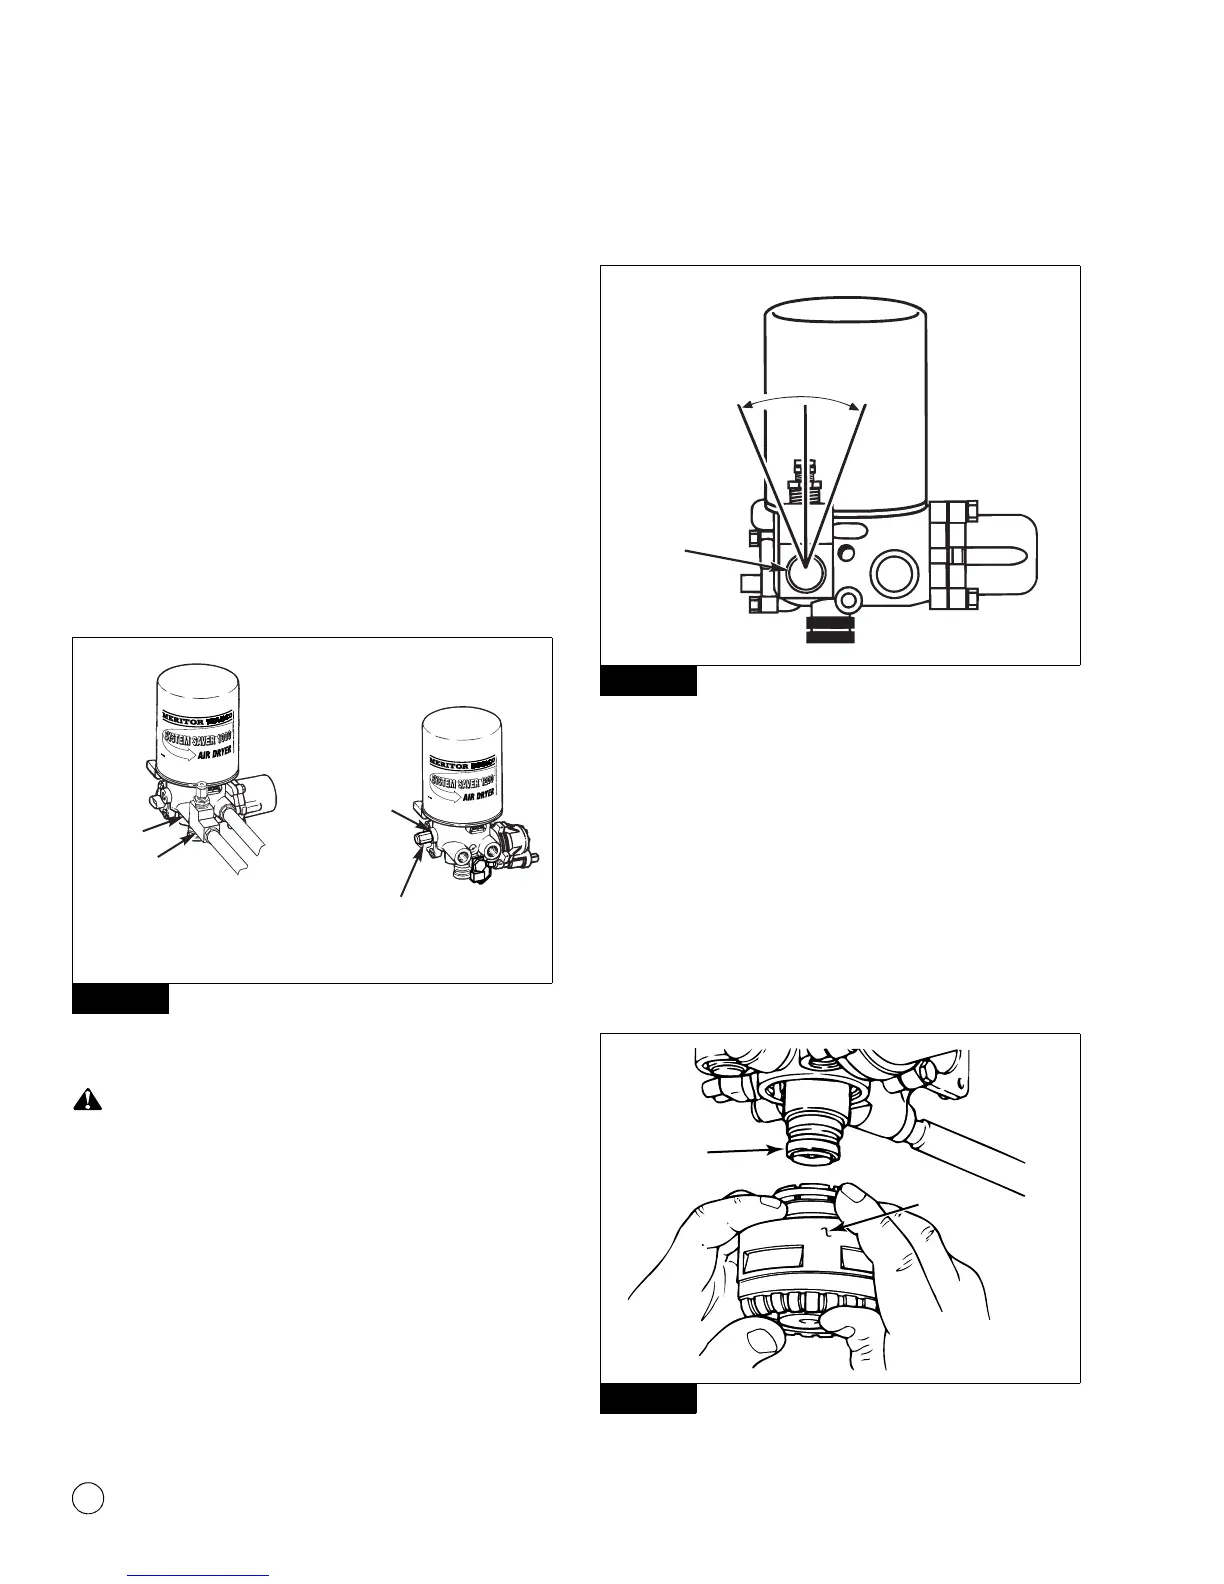
the side of the dryer (Port 31). Figure 2.21.
Figure 2.21
2. Unscrew and remove the old pressure relief valve. Figure 2.21.
For Street-Tee installations, install the pressure relief valve in
the UP position, or within 30° of vertical. Figure 2.22. If not
installed in the correct position, serious personal injury and
damage can result.
NOTE: The threads on the replacement pressure relief valve
provided by Meritor WABCO are coated with sealant. They do
not require any additional sealant.
3. Screw the replacement valve into the Street-Tee fitting or the
dryer base, depending on the date code of the air dryer.
Do not exceed torque of 30 ft-lb (40.8 N폷m) for 3/8-inch
thread, or 65 ft-lb (88.4 N폷m) for 1/2-inch thread.
@
Figure 2.22
Purge Silencer (Muffler)
NOTE: This is an optional part designed to reduce dryer purge noise
level.
1. Remove retainer ring. Remove old silencer from purge valve
head. Do not damage purge valve head.
2. Clean purge valve head.
3. Install replacement silencer firmly onto purge valve head until
fully seated. Secure with retainer ring. Figure 2.23.
Figure 2.23
Figure 2.21
1002181b
PORT 1
PRESSURE
RELIEF VALVE IN
STREET-TEE FITTING
PORT 31
PRESSURE
RELIEF VALVE
Figure 2.22
Figure 2.23
1002183a
PURGE
VALVE
HEAD
SILENCER