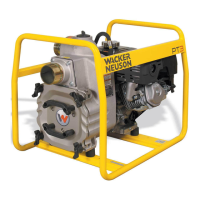
PT 2/3 Repair Disassembly/Assembly Procedures
wc_tx000479gb.fm 46
5.6 Volute and Shims
See Graphic: wc_gr002496
Volute and Shims Disassembly:
5.6.1 Remove the housing cover/volute assembly (a) from the pump.
5.6.2 Remove the three screws (b) securing the volute assembly (c) to the
housing cover and remove the volute assembly.
5.6.3 Remove the three screws (d) securing the shim plate (e) and shims (f)
to the volute (g). Remove the shims and the shim plate.
Volute and Shims Assembly:
5.6.4 Remove spark plug (on units with Hatz engine, place speed control
lever in STOP position) so that engine will not start.
5.6.5 Make sure impeller is installed.
5.6.6 Place 6–10 shims (f) between the shim plate (e) and the volute, and
secure them to the volute with three screws (d).
5.6.7 Install the volute assembly (c) to the housing cover.
5.6.8 Install the housing cover/volute assembly (a) to the pump housing.
5.6.9 Pull the starter rope. If the starter rope does not move, the impeller is
binding and shim(s) must be removed. Disassemble the volute
assembly and remove one shim. Reassemble the volute assembly to
the housing cover and remount the housing cover/volute assembly (a)
to the pump housing. Pull the starter rope. If the starter rope does not
move, the impeller is still binding; remove another shim. Continue in
this manner until the impeller is snug, yet moves freely when the starter
rope is pulled.
Note:
The greater the distance between the impeller and volute, the
less efficient the pump will be.


 To Next Page