Do you have a question about the WAGNER 4-STEP ELECTRONIC PRO DUTY POWER PAINTER and is the answer not in the manual?
Review all safety warnings before operating the equipment.
Fill the fluid container with the material to be sprayed.
Connect the suction set to the sprayer.
Securely attach the fluid container to the sprayer.
Choose the appropriate spray tip for the material.
Adjust the flow control knob to its maximum setting.
Connect power and select the desired power level.
Test the spray pattern and make adjustments.
Return any unused material back to its original container.
Fill the container with the recommended cleaning solution.
Operate the sprayer to dispense the cleaning solution.
Disconnect power before further disassembly.
Disassemble the pump housing and remove parts.
Thoroughly clean all removed sprayer components.
Put the sprayer components back together.
Apply lubricant to specific parts for maintenance.
Warns about high-pressure fluid injection risk and necessary medical treatment.
Addresses risks from solvent fumes and precautions against ignition sources.
Highlights risks of using certain solvents like bleach or halogenated hydrocarbons.
Advises on protection against harmful inhaled vapors from paints and solvents.
Covers reading instructions, compliance, keeping away from children, and using PPE.
Warns about electrical shock risk and proper use of extension cords and grounding.
Important notes on material mixing and preparation before use.
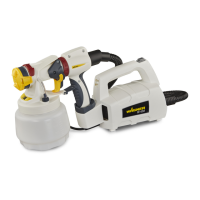
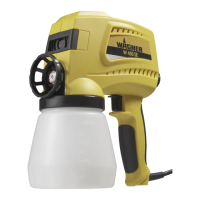
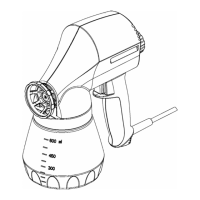
Step-by-step instructions for setting up the sprayer with a one-quart container.
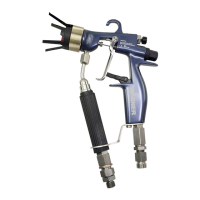
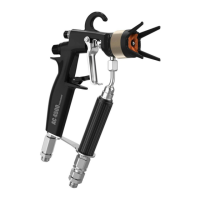
Instructions for attaching and preparing the optional suction extension setup.
Guidance on choosing and adjusting different spray tips for various patterns.
Explanation of the four power levels and their effect on spraying.
Instructions on adjusting material flow for optimal spray pattern.
Advice on thinning materials for better spraying performance.
Detailed steps for priming the sprayer using the suction extension.
Instructions on how to spray effectively for an even coat.
Tips for achieving a good spray pattern and even coverage.
Techniques to control overspray and protect surrounding areas.
Comprehensive instructions for cleaning the sprayer after use.
Step-by-step guide to cleaning the suction extension components.
Instructions for cleaning the pump housing and its parts.
Guidance on reassembling and storing the sprayer properly.
Information on parts that wear out and require regular replacement.
Steps for replacing the swirl valve due to wear and tear.
Procedure for lubricating the sprayer for prolonged life.
Instructions for replacing the piston and spring components.
Contact information and guidance for further repair needs.
Information on product registration for warranty purposes.
Diagnosing and solving issues when the motor will not start.
Troubleshooting a motor that hums but does not spray.
Resolving issues when the motor runs but no material is sprayed.
Identifying causes and solutions for uneven material flow.
Tips for reducing excessive spray mist.
Addressing issues causing paint runs or sags during application.
Solutions for unwanted material dripping from the spray tip guard.
Troubleshooting problems with the display module and frequency control.
Causes and solutions for the motor overheating.
Diagnosing and fixing material leaks from the sprayer.
Detailed list of sprayer components with part numbers and quantities.
List of available optional accessories for the sprayer.
Details of the one-year limited warranty for the sprayer.
Information on the lifetime warranty for the ceramic spray tip.
| Product Type | Airless Paint Sprayer |
|---|---|
| Max Pressure | 3000 PSI |
| Hose Length | 25 ft |
| Spray Pattern | Adjustable |
| Voltage | 120 V |
| Power | 0.5 hp |
| Power Source | Electric |
| Spray Tip Size | 0.015 inches |