EasyManua.ls Logo

Walker Edison LEEB3B - User Manual

Walker Edison LEEB3B
15 pages
Print Icon
To Next Page IconTo Next Page
Loading...
Assembly Instructions
Copyright © 2018, by Walker Edison Furniture Co., LLC, All rights reserved.
Please visit our website for the most current instructions, assembly tips, to report damage
or request parts. www.walkeredison.com
Revised 06/2022
P.1
LEEB3B
Question and Answer IconNeed help?

Do you have a question about the Walker Edison LEEB3B and is the answer not in the manual?

Summary

General Assembly Guidelines

Ensure Parts and Hardware Availability

Confirm all parts and hardware are present before starting assembly.

Follow Assembly Steps Carefully

Adhere strictly to each step to ensure the product is assembled correctly.

Two-Person Assembly Recommended

Two people are advised for easier and safer assembly.

Types of Hardware Used

The product uses wood dowels, screws, and bolts for assembly.

Using Wood Glue for Dowels

Apply glue to dowel holes for secure wood dowel placement.

Required Tools

A Phillips head screwdriver and hammer are necessary for assembly.

Power Tool Restriction

Power tools should not be used during the assembly process.

Parts and Hardware Identification

Parts List

Detailed list of all furniture components with their respective part numbers.

Hardware List

Comprehensive list of all hardware items, including types, sizes, and quantities.

Assembly Steps

Step 1: Prepare Parts with Dowels

Insert wood dowels (A and B) with glue (I) into specified parts.

Step 2: Secure Drawer Runners

Attach drawer runners (13) to side panels (3) and (4) using screws (D).

Step 3: Attach Side Panel to Base

Secure part (1) and (5) to part (4) using screws (E).

Step 4: Assemble Main Frame Sides

Attach parts (1), (5), and (8) to part (3) using screws (E).

Step 5: Attach Bottom Crossbeams to Legs

Secure part (9) to parts (16) using screws (F).

Step 6: Attach Side Crossbeams to Legs

Secure part (10) to parts (16) using screws (F).

Step 7: Connect Bottom Frame

Connect bottom frame parts (9) and (10) to legs (16) using screws (F).

Step 8: Attach Base Panel

Secure base panel (2) to legs (16) using screws (G) and hex key (H).

Step 9: Attach Base Panel to Side Panels

Secure base panel (2) to side panels (3) and (4) using screws (F).

Step 10: Attach Drawer Supports

Secure parts (9) and (10) to part (2) using screws (E).

Step 11: Attach Top Crossbeam

Secure part (8) to part (1) using screws (E).

Step 12: Attach Back Panel

Secure back panel (14) to the body using screws (N).

Step 13: Reinforce Back Panel

Joint parts (3), (4), and (14) using metal corners (O) and screws (C).

Step 14: Assemble Drawer Sides and Bottom

Attach drawer sides (11, 12) to drawer front (6) and insert drawer bottom (15) and back (7).

Step 15: Attach Drawer Handles

Secure handles (J) to the drawer fronts using screws (C).

Step 16: Install Drawer Stops

Insert wood dowels (B) into part (13) to serve as drawer stops.

Step 17: Insert Drawers

Insert drawers into the unit, ensuring the side with the warning label is in the highest drawer.

Step 18: Wall Anchoring

Secure the furniture to the wall using the provided wall anchor hardware for safety.

Assembly Complete and Maintenance

Assembly Complete

Indicates the successful completion of the furniture assembly process.

Maintenance Guide: Drawer Lubrication

Apply wax to wooden drawer guides for smooth gliding and long-term performance.

Overview

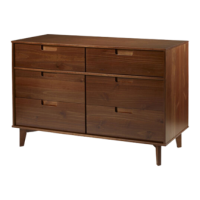
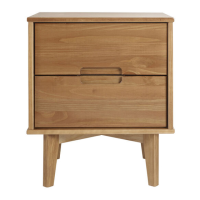
This document provides assembly instructions and guidelines for the LEEB3B furniture item, which appears to be a chest of drawers or a similar storage unit. The assembly process is broken down into 19 steps, with detailed illustrations and a comprehensive list of parts and hardware.

Function Description:

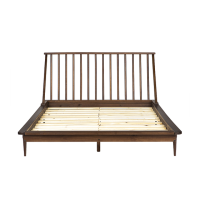
The LEEB3B is a multi-drawer storage unit designed to organize and store various items. It features multiple drawers, likely five based on the illustrations, providing ample space for clothing, accessories, or other household goods. The unit is designed to be a freestanding piece of furniture, with legs providing elevation and stability. A key safety feature is the inclusion of an anti-tip restraint, emphasizing the importance of securing the unit to a wall to prevent serious injury from tipping over, especially in households with children. The drawers are equipped with runners to facilitate smooth opening and closing, and a drawer stop mechanism is incorporated to prevent drawers from being pulled out completely.

Usage Features:

The assembly instructions highlight several important usage features and safety recommendations:

  • Stability and Anti-Tip Restraint: The manual strongly advises installing the provided tipover restraint. This is a critical safety feature, particularly for children, to prevent the unit from tipping over. Users are warned against placing TVs on the product, allowing children to climb or hang on drawers/shelves, and opening more than one drawer at a time. Heaviest items should always be placed in the lowest drawers to improve stability.
  • Drawer Functionality: The drawers are designed with runners for smooth operation. A drawer stop mechanism, implemented by inserting a wood dowel (B) into part (13), ensures that drawers do not accidentally slide out completely when opened. This enhances safety and prevents contents from spilling.
  • General Assembly Guidelines: The manual recommends two people for assembly, indicating that the unit might be large or heavy. It also specifies that power tools should not be used for assembly, suggesting that manual tools like a Phillips head screwdriver and a hammer are sufficient and safer for the materials involved. This prevents overtightening or damage to the components.
  • Hardware and Components: The unit utilizes various hardware types, including wood dowels, screws, and bolts. Wood dowels are secured with glue, ensuring a strong and lasting connection between parts. The handles (J) are attached to the drawer fronts, providing a convenient way to open and close the drawers. The back panel (14) is secured with screws, contributing to the structural integrity of the unit. Metal corners (O) are used to reinforce critical joints, further enhancing durability.

Maintenance Features:

The manual includes a "Maintenance Guide" specifically for the drawers, focusing on ensuring long-term performance and smooth operation:

  • Drawer Glide Maintenance: To maintain the performance and easy gliding of the solid wood drawers, it is recommended to apply wax to the wooden guide rails. This addresses potential friction points where wood-on-wood contact occurs during drawer operation.
  • Wax Application: Bee's wax or paraffin wax from a standard candle can be used. The wax should be rubbed directly onto the wooden guide rails, specifically where contact happens when opening and closing the drawer. It's important that the wax is at room temperature and not melted onto the wood, as this could lead to uneven application or residue buildup.
  • Application Frequency: For the first year, wax should be applied every few months. After the initial year, application can be done as needed to keep the drawers sliding smoothly. This regular maintenance helps prevent sticking, reduces wear and tear on the wooden components, and ensures a consistent user experience over time.

In summary, the LEEB3B is a functional and practical storage solution with a strong emphasis on safety through its anti-tip restraint system. Its design incorporates features for smooth drawer operation, and the provided maintenance guidelines ensure the longevity and continued performance of the unit.

Walker Edison LEEB3B Specifications

General IconGeneral
Product NameWalker Edison LEEB3B
CategoryIndoor Furnishing
ColorBlack
StyleModern
Assembly RequiredYes
MaterialLaminate

Related product manuals