26
Pro Dry Instruction Manual | Walker Filtration | www.walkerltration.com
Section 6: Maintenance
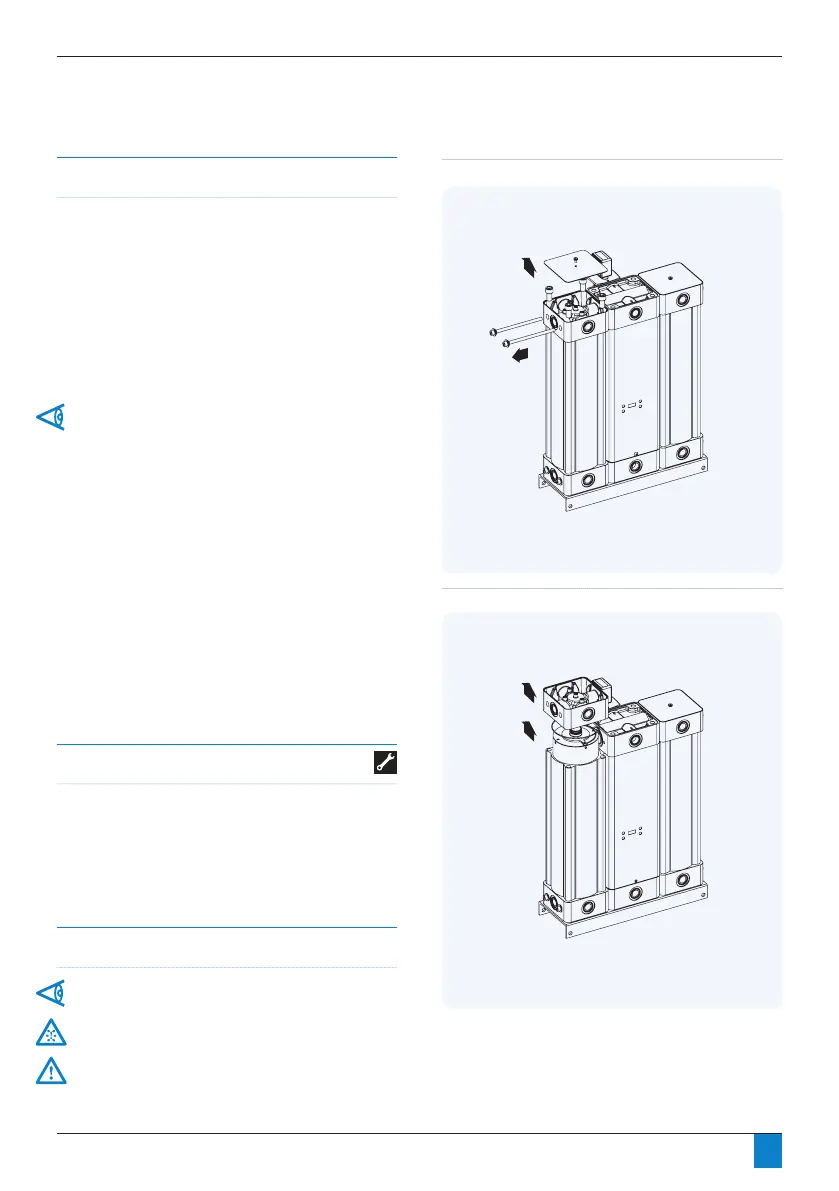
Figure 6.7: Models PD045 – PD365 - QPM removal stage 1
Tools required
• 5mm hex key
• 6mm hex key
• 8mm hex key
• 16mm hex key
• Adjustable spanner
• Flathead screwdriver
Figure 6.8: Models PD045 – PD365 - QPM removal stage 2
Desiccant Changeout
Models PD045 – PD365 only
Seegure6.7.
1. UnscrewQPMcoverxingscrew,removeQPMcover.
2. Unscrew QPM retaining bolts.
3. Unscrew pressure housing retaining bolts.
4. Remove QPM.
5. Pull out desiccant cartridge using the handle.
For dryer models PD105 - PD365 each tower assembly
includes 2 desiccant cartridges.
6. Replace installed desiccant cartridges with new cartridges
supplied as part of the cartridge service kit.
7. Ensure o-ring seals are in place when installing desiccant
cartridges.
8. Followsteps1to4inreverseordertonishinstallingin
tower assembly.
9. Repeat steps 1-8 for remaining tower assemblies.
10. Ensure dryer is leak free at lower pressure prior to applying
operating pressure to dryer.
11. Follow start-up procedure as stated on page 19 of this
manual.
12. Continue to page 27 to reset the controller.
Important information
Ensure shutdown and start-up procedures are followed prior
to carrying out any maintenance work on the dryer.
Walker Filtration will not accept responsibility for physical
injury, damage or delays caused by failure to observe the
instructions in this manual and manuals provided with your
equipment.
 Loading...