11
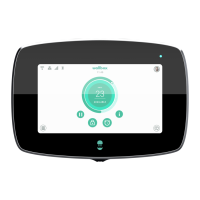
Carefully remove the CPU by gently pulling
its top part towards you.
5.
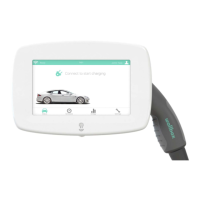
Gently press down the CPU so that it clips to
the metal levers.
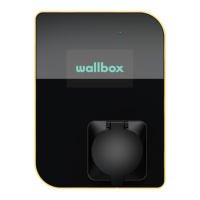
Close the front cover of the charger by performing the steps
mentioned in the Attaching the new Front cover section above.
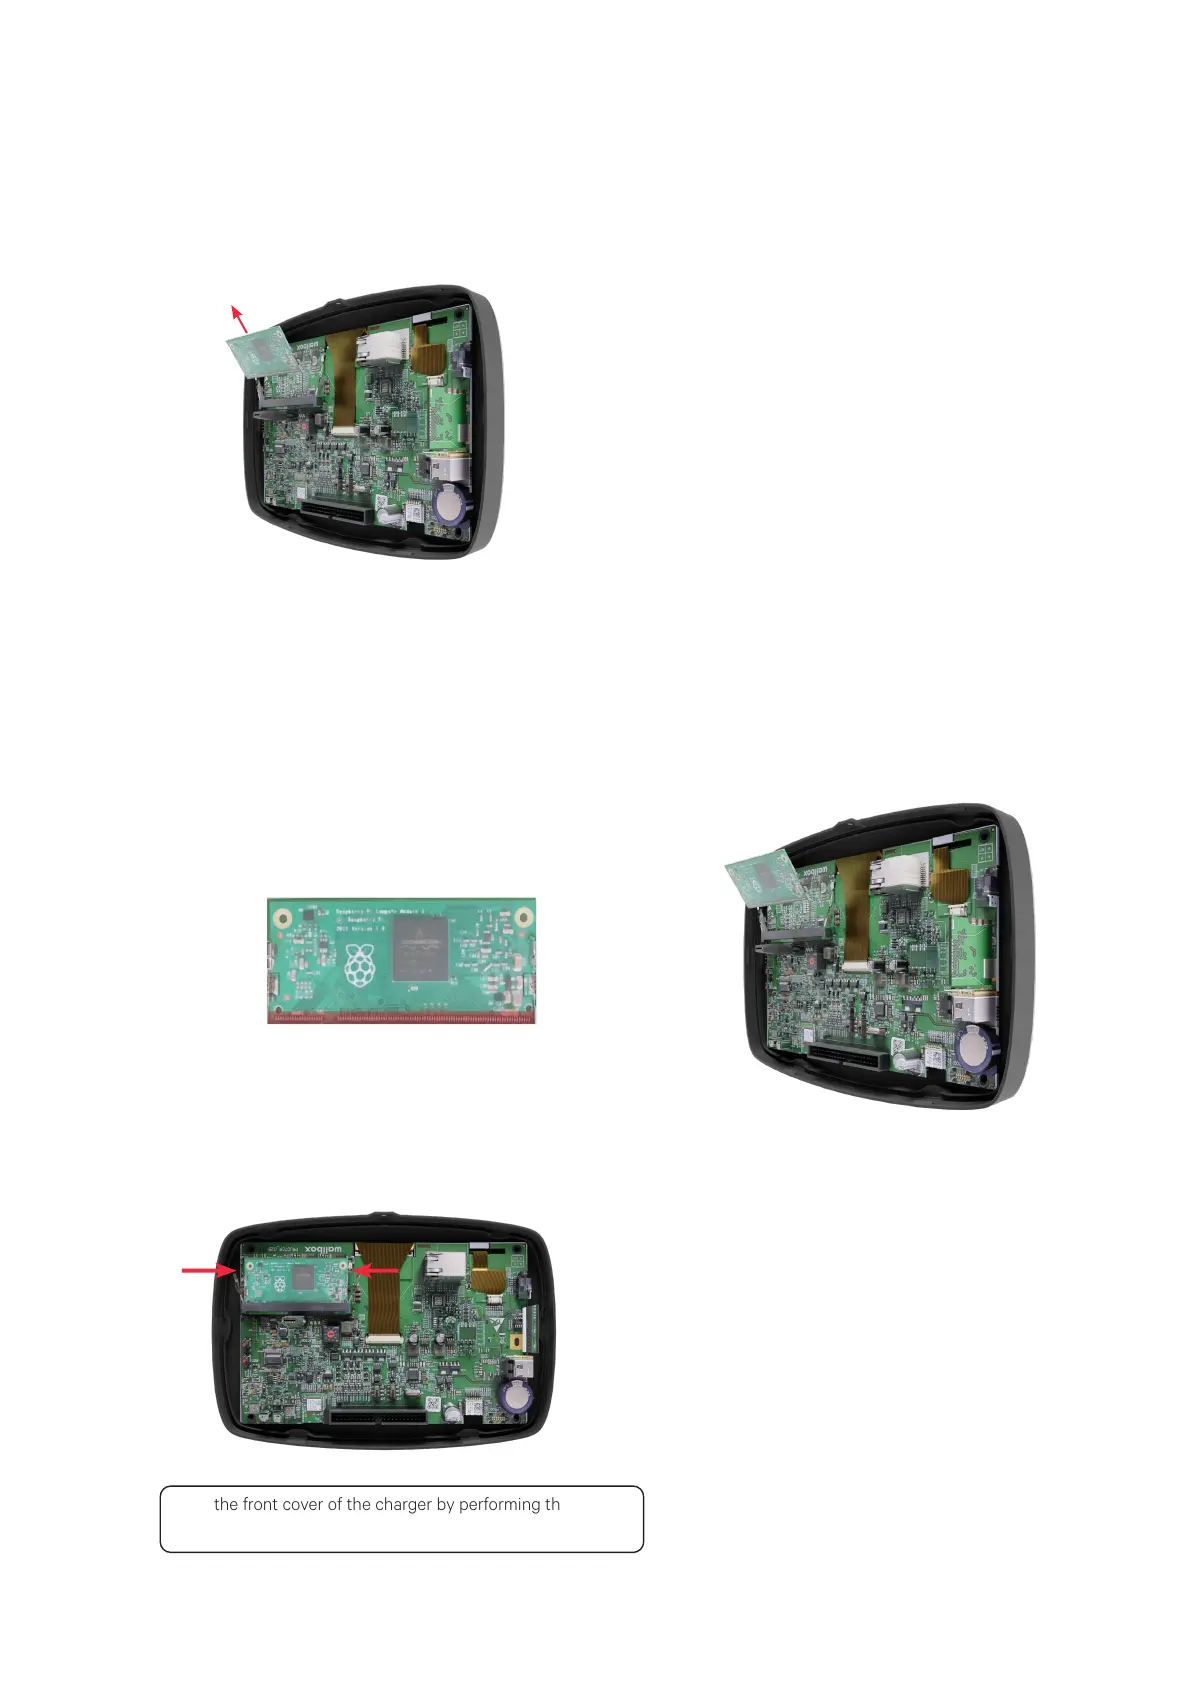
Identify the insertion mark on the edge of the
CPU. The CPU should only be attached by
positioning the insertion mark towards the
Control board.
Hold the other end of the CPU and place it
on the Control board with a small incline.
1. 2.
3.
Attaching the CPU
To attach the CPU on the Control board, perform the following steps: