7
Control board and Plastic Cover Replacement
The Control board of the Pulsar charger is enclosed within the front plastic cover and LED Halo of the
charger.
The Control board and front plastic cover of the Pulsar charger, if malfunctioning or damaged can be
replaced by performing the following steps:
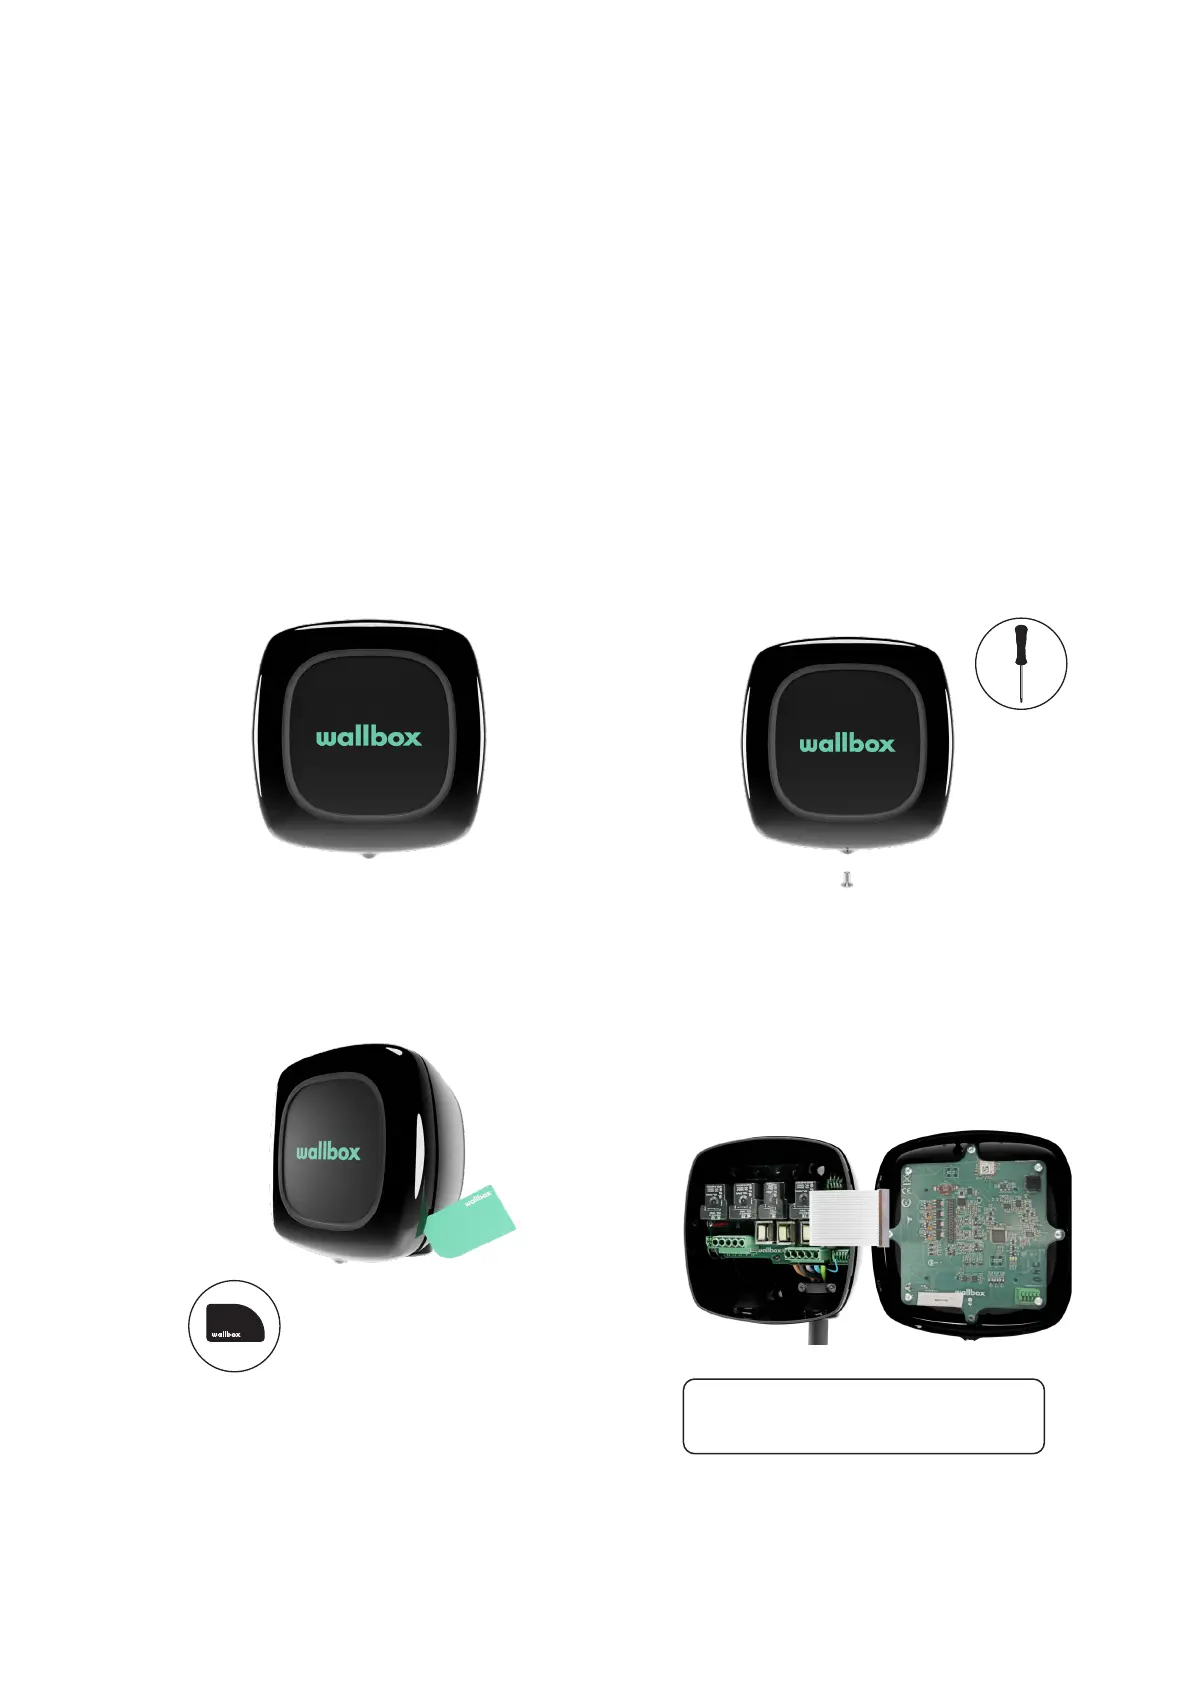
Unscrew the Torx screw at the bottom of
the charger using a Torx T9 screwdriver and
save it for later use.
Carefully remove the communications cable
from the front plastic cover and body of the
charger.
Keep the old Control board aside for return or
disposal.
Turn o the power supply to the charger.
Using the opening tool, unclip the cover from
the charger´s body.
1.
3.
2.
4.
Removing the old Control board and the plastic cover
Ensure that the communications cable is detached
gently from the connector. Do not pull or apply
excessive force to remove the cable.


 To Next Page