~ 4 ~
2.3 The pump should be installed so that the
suction pipe is as short and the suction lift
as small as possible.
2.4 When draw liquid from the same level of
the pump suction inlet, please allow a
downward slope from the liquid source to
the pump suction inlet to avoid air sucked in.
If it is to pump liquid from a level lower than
the pump suction inlet, a foot valve must be
tted to the end of the suction pipe.
2.5 Please select the pipe size specified in the
specifications. Smaller piping will cause
considerable pressure loss and aect pump
eciency.
2.6 All piping joints must be completely tight.
Leakage in suction piping may result in the
loss of the suction capability. Leakage in
discharge piping may cause the "cycling" of
the pump.
2.7 Please do not allow any foreign objects
(chewing gum, dirt, and sand etc.) fall into
the pump or motor.
2.8 The pump lifting capacity is related to the
temperature of owing liquid. Under normal
owing temperature (20°C - 30°C), it will lift
up to 5M. At high temperature operation
(over 60°C), the pump must be installed at
the level lower than the liquid source or the
pump inlet pressure must be higher than 1
atmosphere (15 PSI).
2.9 It is extremely dangerous to run the pump
against a closed discharge valve, because
it will cause extremely high liquid flow
temperature and damage your pump.
You may connect a bypass/a drain to the
discharge pipe to allow a minimum liquid
ow through the pump.
2.10 Metal piping is recommended when the
operations require high lifting head or high
liquid temperature.
2.11 In systems with hot liquids (over 60°C), extra
caution should be exercised to prevent from
personal injury caused by escaping water
2.12 Pumps that are not being used during periods
of frost should be drained to avoid damage.
3. Operation instructions
3.1 Priming
Do not start the pump until it has been primed.
Follow the following priming instruction:
3.1.1 Booster systems and systems where the liquid
level on the suction side is above the pump
inlet:
3.1.1.1 Close the isolating valves either side of the
pump.
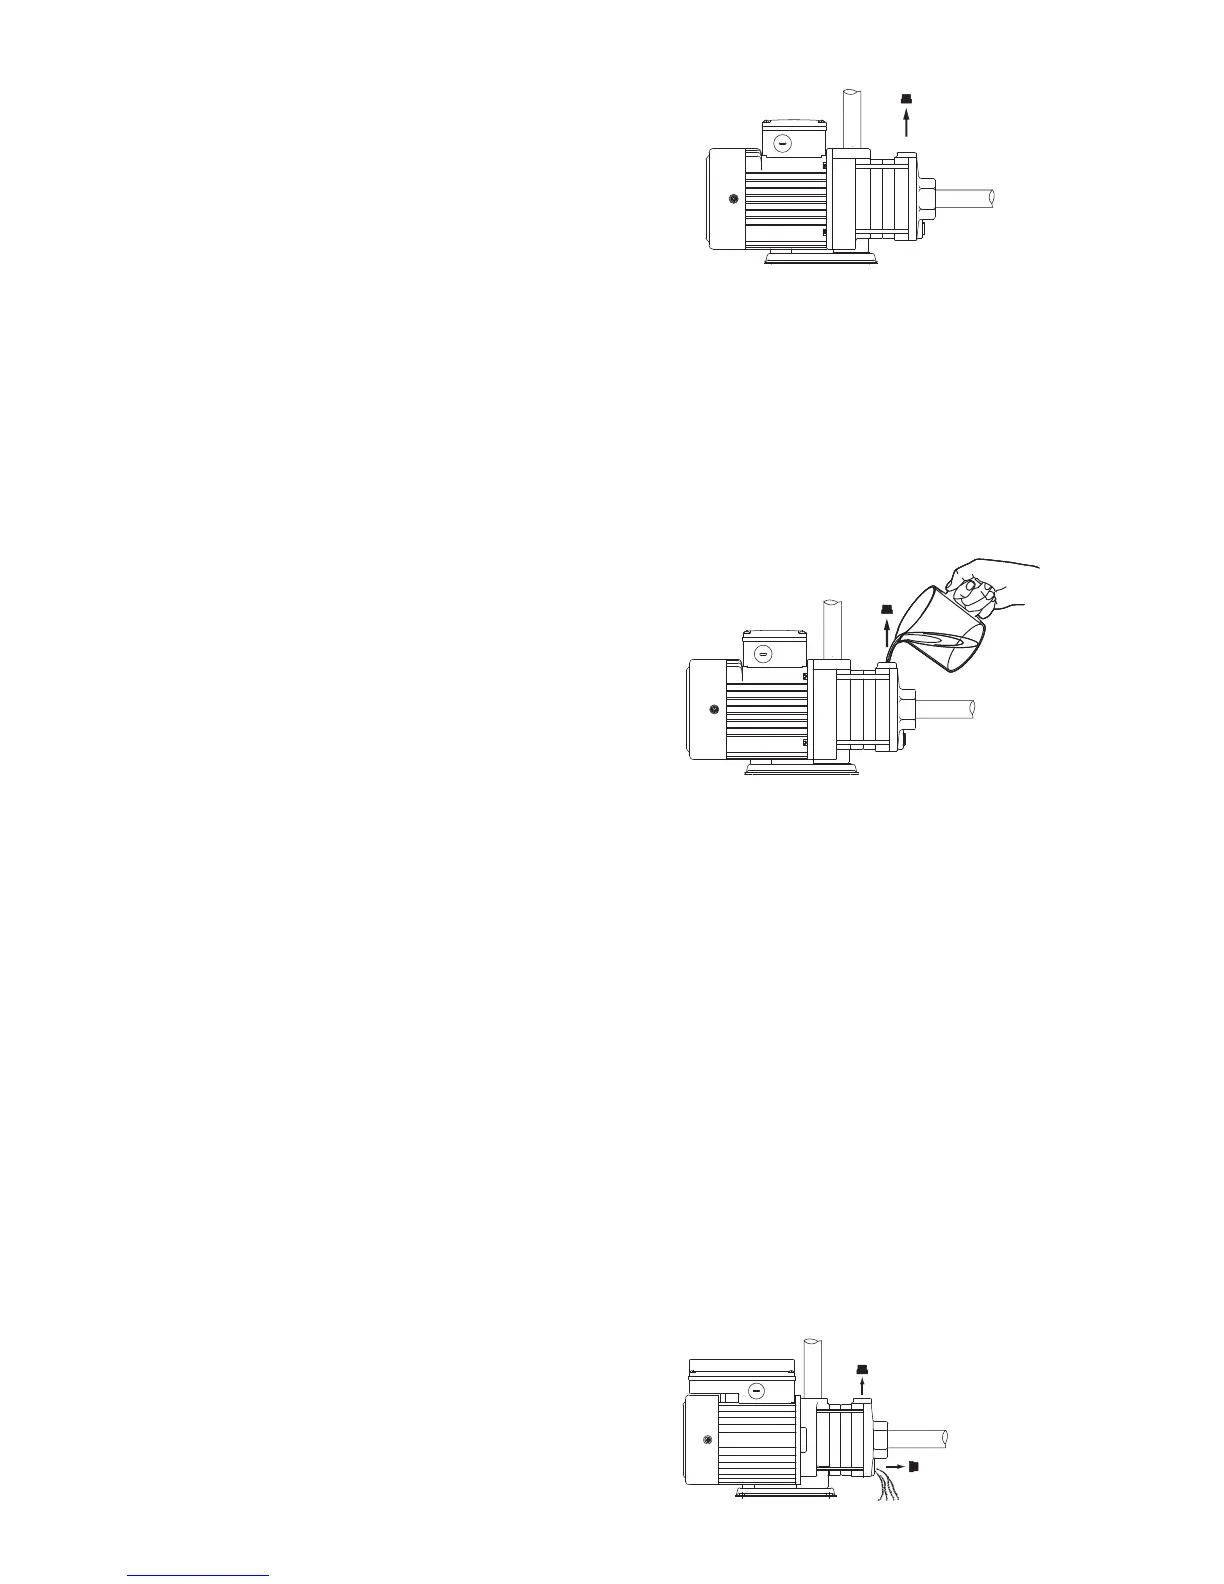
3.1.1.2 Remove the priming plug, g. 2.
3.1.1.3 Slowly open the suction valve and keep it
open until a steady stream of liquid runs out
the priming port.
3.1.1.4 Replace the priming plug and tighten it.
3.1.2 Pumping from tanks and wells where the
liquid level on the suction side is below the
pump inlet:
3.1.2.1 Close the discharge isolating valve.
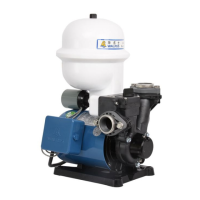
3.1.2.2 Remove the priming plug, g. 3.
3.1.2.3 Pour water through the priming port. Make
sure that the suction pipe and pump are
completely lled with liquid and vented.
3.1.2.4 Replace the priming plug and tighten it.
3.2 Start the pump and slowly open the discharge
valve until it is fully open.
3.3 If there is no discharge flow after a few
minutes, please turn o the pump and repeat
the Process of 3.1 Turn the pump on and o
several times until it is working normally.
3.4 When pump is working on normal condition,
measure the motor current and check it with
the nameplate value. If it exceeds the rated
value, please reduce the lifting capacity or
fully open the valve.
3.5
When pump is not in use for a period, it should
be drained by removing the priming and drain
plugs. For start up after long time inactivity,
please check if the impeller and mechanical
seal are free. If they are locked up by sand, rust
or something else please clean them up.
Fig.2
Fig.3
Fig.4
Priming plug
Priming plug
Priming plug
Drain plug