2
TOR.119.--.M.4L Rev. A1
03.11
-
-
-
-
VAR
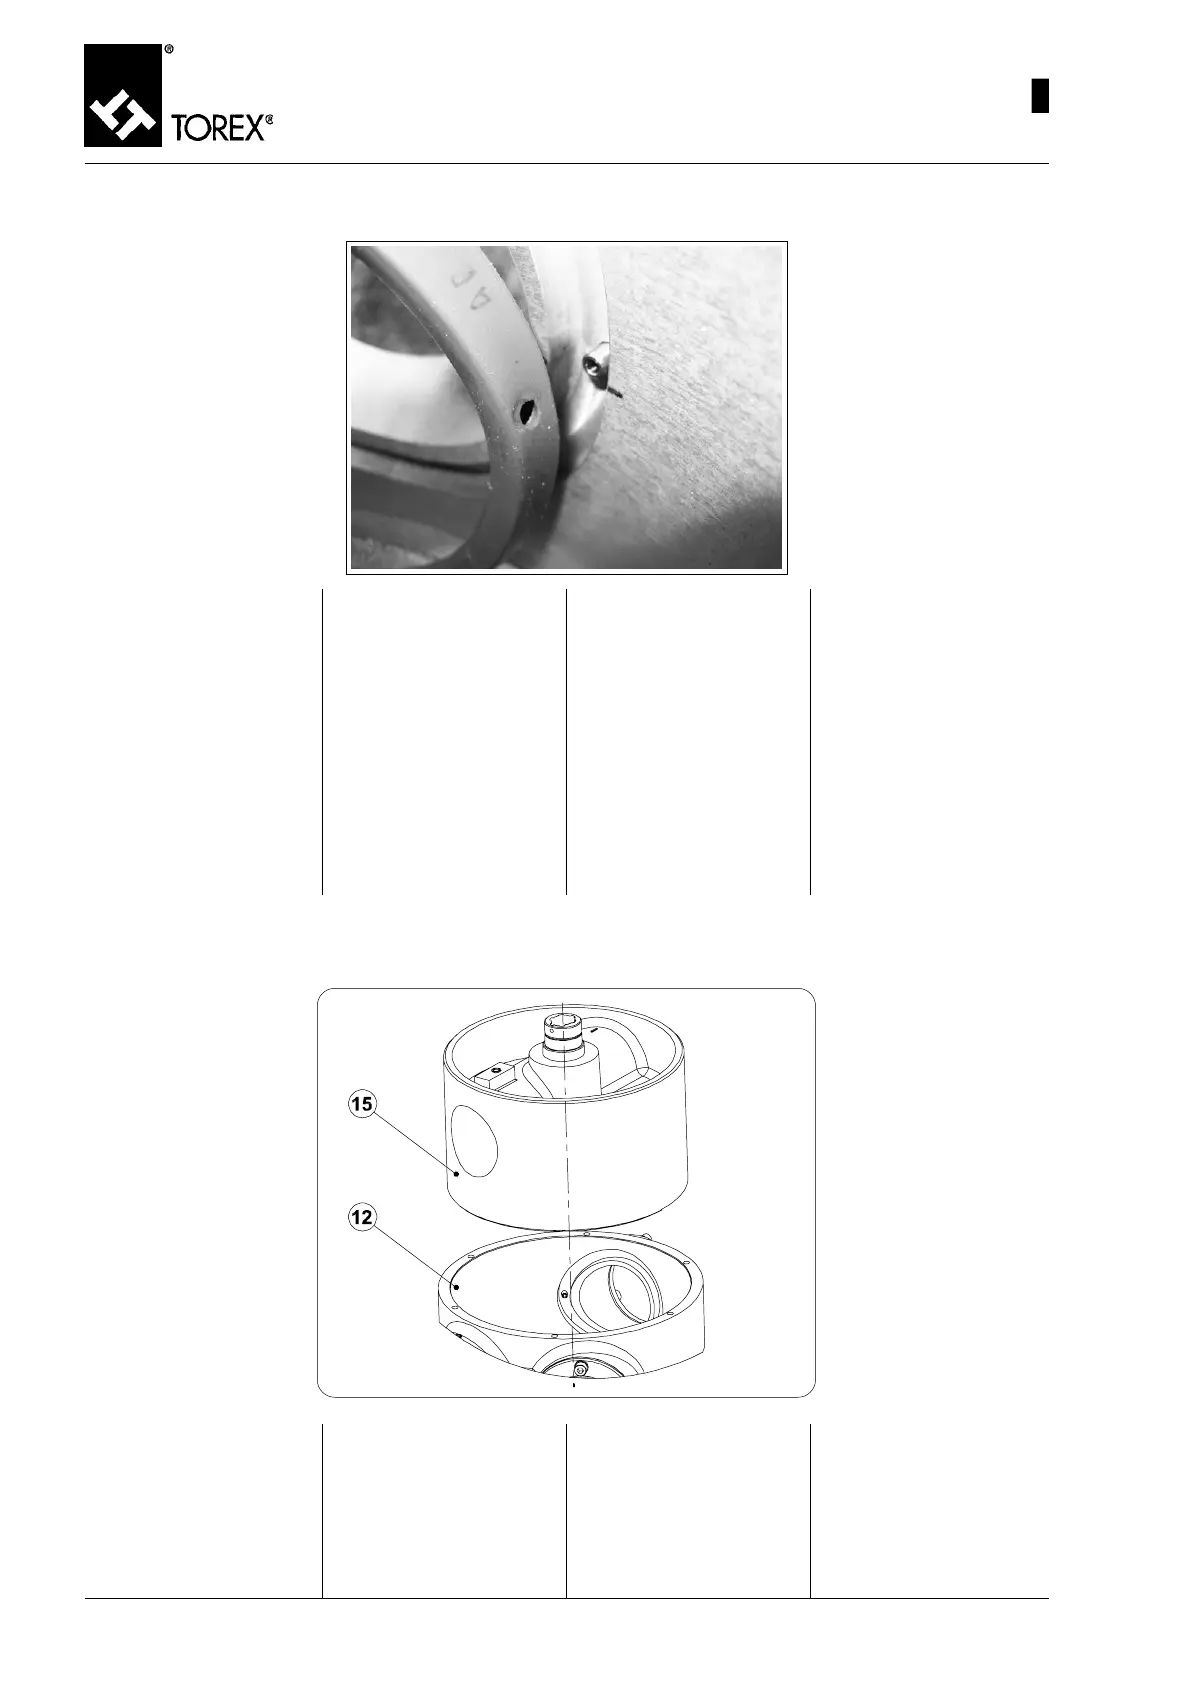
INFLATABLE SEALS ASSEMBLY - EINBAU DER AUFBLASBAREN DICHTUNGEN
MONTAGE DES JOINTS GONFLABLES - MONTAGGIO DELLE TENUTE GONFIABILI
Fig. 17
COVER AND DRUM ASSEMBLY - EINBAU DES DECKELS UND DER TROMMEL
MONTAGE DU COUVERCLE ET DU TAMBOUR - MONTAGGIO DEL COPERCHIO E DEL TAMBURO
Fig. 18
1) Prima dell’inserimento è con-
sigliabile pulire bene le sede
all’interno del corpo
2) Verificare che il condotto in-
terno dell’innesto aria sia li-
bero.
3) Spargere sulla superficie in-
terna della sede un sottile
strato di silicone, con parti-
colare cura nella zona
dell’immissione aria.
4) Inserire le tenute gonfiabili
nelle apposite sedi, inseren-
do il foro della tenuta nell’in-
nesto dell’aria interno (vedi
Fig. 17).
Montaggio Tamburo
1) Prima di inserire il tamburo nel
deviatore, accertarsi di aver
montato le tenute gonfiabili
(pos. 17, fig. 16) corretta-
mente come precedentemen-
te descritto.
36
1) Before insertion, clean the
seat inside the body careful-
ly
2) Check to make sure the duct
inside the air connection is
unobstructed.
3) Apply a thin layer of silicon on
the inside of the seat, taking
special care in the air inlet
area.
4) Insert the inflatable seals in
the seats provided, inserting
the seal opening in the inner
air connection (see Fig. 17).
1) Vor dem Einbau der Dichtun-
gen sollte man ihre Aufnah-
me innerhalb des Gehäuses
gründlich reinigen.
2) Sicherstellen, dass die Innen-
leitung zur Lufteinleitung frei
ist.
3) Eine dünne Silikonschicht auf
die Innenfläche der Dich-
tungsaufnahme verteilen,
insbesondere an dem Be-
reich der Lufteinleitung.
4) Die aufblasbaren Dichtungen
in ihre Aufnahmen stecken,
wobei das Dichtungsloch in
die interne Lufteinleitung ge-
steckt wird (siehe Abb. 17).
1) Avant le montage il est con-
seillé de bien nettoyer le lo-
gement à l’intérieur du corps.
2) Vérifier que le conduit interne
d’injection de l’air est déga-
gé.
3) Enduire la surface interne du
logement d’une mince couche
de silicone, en faisant parti-
culièrement attention à la
zone d’injection de l’air.
4) Mettre en place les joints gon-
flables dans leurs sièges, en
plaçant l’orifice du joint dans
l’orifice interne d’injection de
l’air (vedi Fig. 17).
Drum Assembly
1) Before inserting the drum in
the diverter valve, check to
make sure the inflatable seals
(pos. 17, Fig. 16) have been
mounted correctly as de-
scribed earlier.
Einbau der Trommel
1) Bevor man die Trommel in die
Weiche steckt, sicherstellen,
dass man die aufblasbaren
Dichtungen (Pos. 17, Abb. 16)
korrekt montiert hat, so wie es
vorstehend beschrieben wur-
de
Montage du Tambour
1) Avant d’introduire le tambour
dans la vanne déviatrice, vé-
rifier d’avoir monté les joints
gonflables (pos. 17, fig. 16)
correctement comme décrit
précédemment
MAINTENANCE- DIVERTER VALVE ASSEMBLY
WARTUNG – EINBAU DER ROHRWEICHE
ENTRETIEN - MONTAGE VANNE DEVIATRICE
MANUTENZIONE - MONTAGGIO DEVIATORE
 Loading...