14
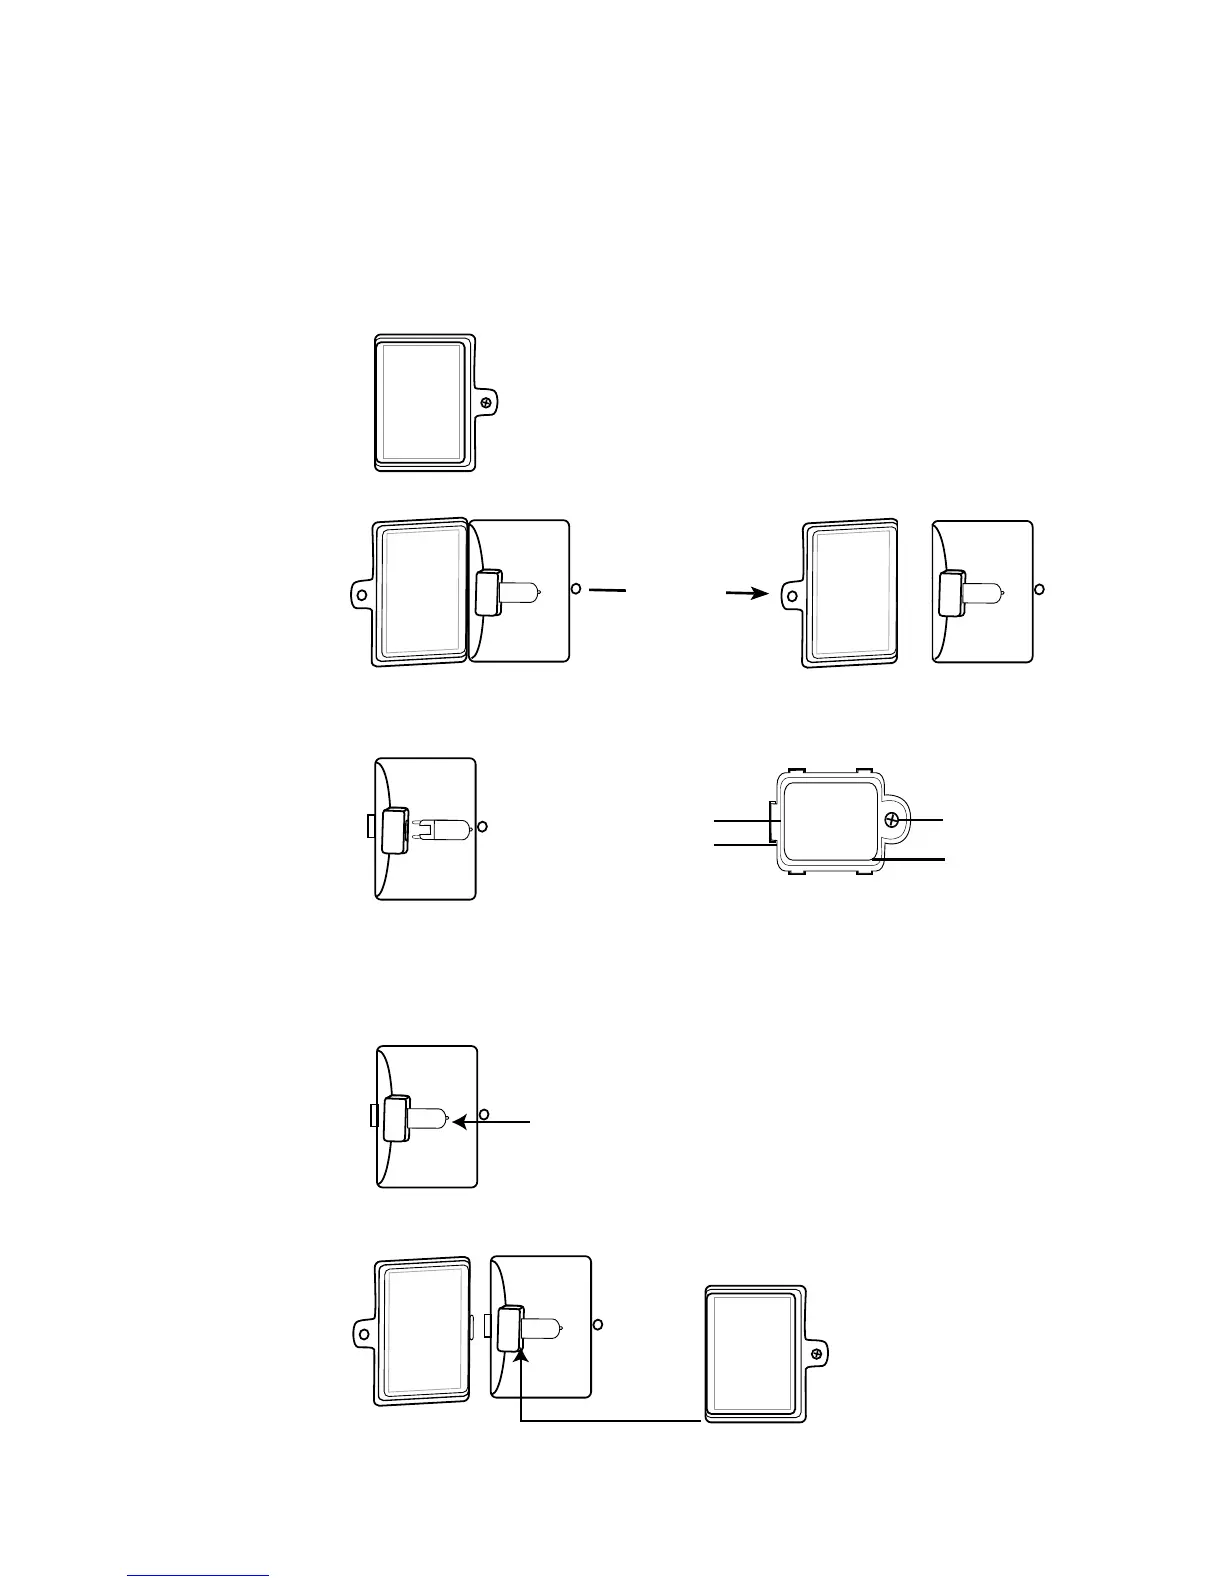
INSTALLING & REPLACING THE OVEN LIGHT
In the top right hand corner of your oven is a halogen light bulb,
which offers a longer lifespan than standard light bulbs and is able
to withstand high temperatures. Purchase a new 120V 25 watt G9
halogen light bulb at your local hardware store and insert it as follows:
1. Be sure that the oven is unplugged and completely cooled.
2. Remove the screw from the cover with a Phillips head screw driver.
3. Remove the cover.
4. Remove the old light bulb by pulling it out of the socket base
(toward the front of the oven).
5. Follow the guidelines on the light bulb instructions, without
touching the light bulb with your bare hand (as this will reduce
the lifespan). You can use a clean tissue or cloth glove to hold the
bulb. Install the new bulb in the socket base by gently pushing
it into place.
6. Replace the cover and secure it tight with a Phillips head screw driver.
Any other servicing should be performed by an authorized service
representative.
Open Glass
Lens Covering
Then Remove.
Tab of Oven Light Cover
Slot of Oven Light Compartment
Philip Screw
Oven Light Cover