©2019 Warn Industries, Inc.WARN® and the WARN logo are trademarks of Warn Industries Inc. 5 103507A0
INSTALLATION INSTRUCTIONS
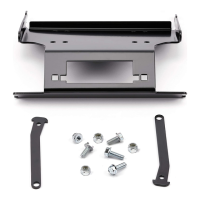
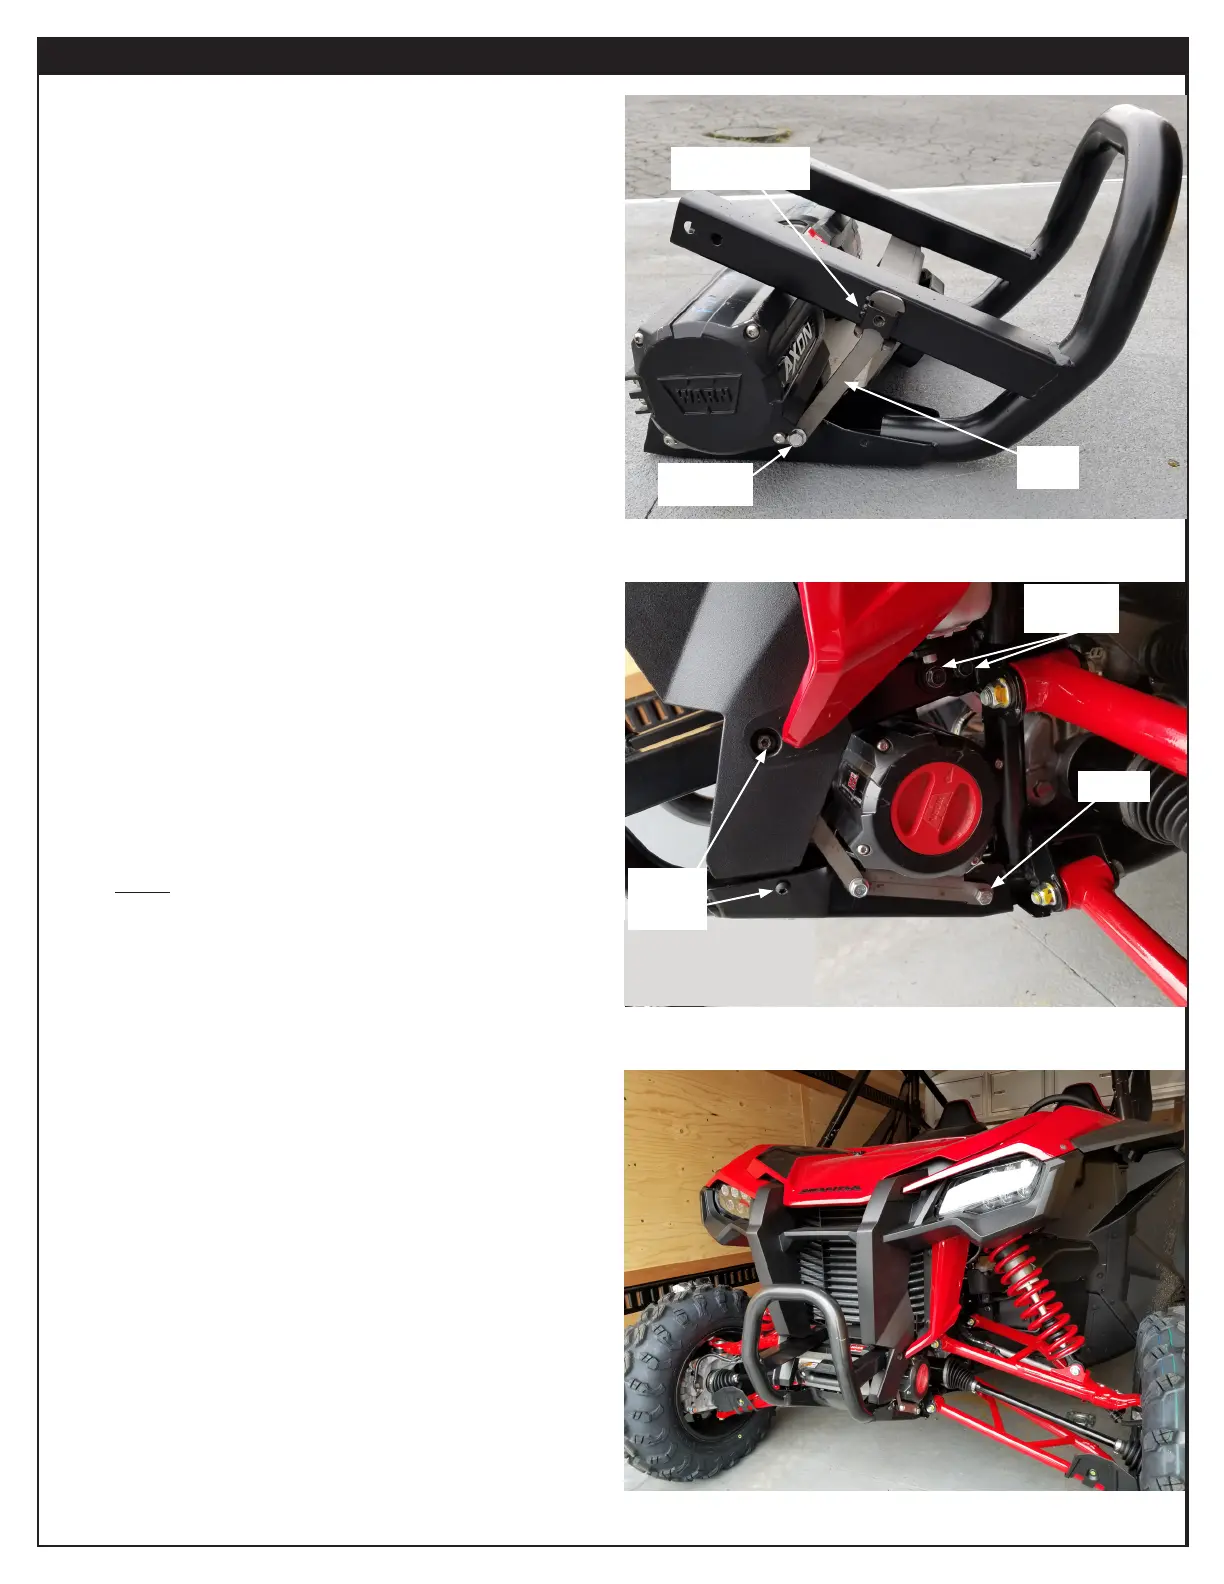
7. Slide the winch mount assembly onto the bumper,
aligning the front two holes of the moutning plate with
the holes in the bumper.
TIP: It may be easier to attach winch cables to winch before
proceeding.
8. Install the anged end of a winch mouting strap (A2)
through the tab on the bumper.
9. Align the other end of the winch mounting strap to the
front holes on the winch mount and secure using the
M8 x 20 bolt (B1) and lock nut (B2).
10. Repeat steps 8 and 9 for other side.
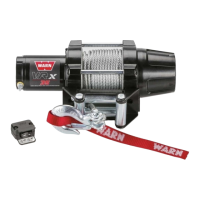
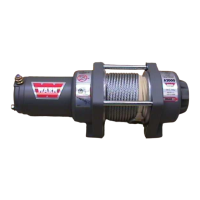
11. With assistance, slide the bumper/winch assembly back
over the frame, while leveraging the plastic back into
position.
12. Reinstall the two factory torx head screws through
vehicle plastic, upper winch mounting strap and bumper
tab hole.
13 Install the two upper factory hardware to original
position.
14. Secure the rear portion of winch mounting plate using
the longer M8 x 25 bolt (B3).
15. Repeat steps 12-14 for other side.
16. Tighten all hardware now to torque specications.
17. Complete wiring the winch using your winch kit
instructions.
A2
B1 and B2
Bumper tab
Torx head
screws
Upper M8
hardware
Figure 4
Figure 6
Figure 5
B3