Page 14 ;&(%$*4.8"4,7%<'*#$"&8#=%/7*,#*%4,77%>?@@@?@AA?BCDC1 Item 57342
EF;6GH IJ6KFGLIM NFLMG6MFMO6E6GPJ
Q&(X/"*4*%,89%Q&(X%F(*,%E*$%P/
1. Designate a work area that is clean and well lit.
The work area must not allow access by children
or pets to prevent distraction and injury.
2. Route the power cord along a safe route to reach
the work area without creating a tripping hazard or
exposing the power cord to possible damage. The
power cord must reach the work area with enough
extra length to allow free movement while working.
3. There must not be objects, such as utility lines,
nearby that will present a hazard while working.
4. Cut only the following materials:
Dimensional lumber, plywood, particle board.
M&$*- Use caution to avoid overheating the cutting tips.
5. Use an auxiliary fence to be in contact with
the table top when cutting thin workpieces;
6. Allow room on both sides of saw
for extended workpieces.
7. Use additional supports if needed to ensure
the stability of the workpiece. Mount the Saw
so that the surface is level to the ground, and
additional supports to provide a surface on the
same level as the saw table. If the work surface
and any workpiece supports are not level, and
on the same level, unwanted bevel angles will
appear in the cuts resulting in poor joinery.
R*8*(,7%L8#$('4$"&8#%2&(%P#*
%
EFQE%OFM%oPLOYTH%FNJPGFG6%;LMR6KE%L;%NLEPE6U1%%%
Y**/%.,89#%)*77%47*,(%&2%4'$$"83%,(*,1%
UI%MIG%IJ6KFG6%QLG_%FMH%RPFKU%ULEFST6U=%UFNFR6U=%IK%K6NI!6U1%%%
N&W"83%3',(9#%5'#$%5&W*%2(**7V%,89%47&#*%"8#$,8$7V1%%
LMEGFTT%RPFKU%S6;IK6%PE61
J(&/*(%J7,4*5*8$%I2%_,89#%U'("83%$.*%O'$$"83%J(&4*##
1. Review Safety warnings at the beginning of the
manual before performing any cutting procedure.
Keep all guards in place and in working order.
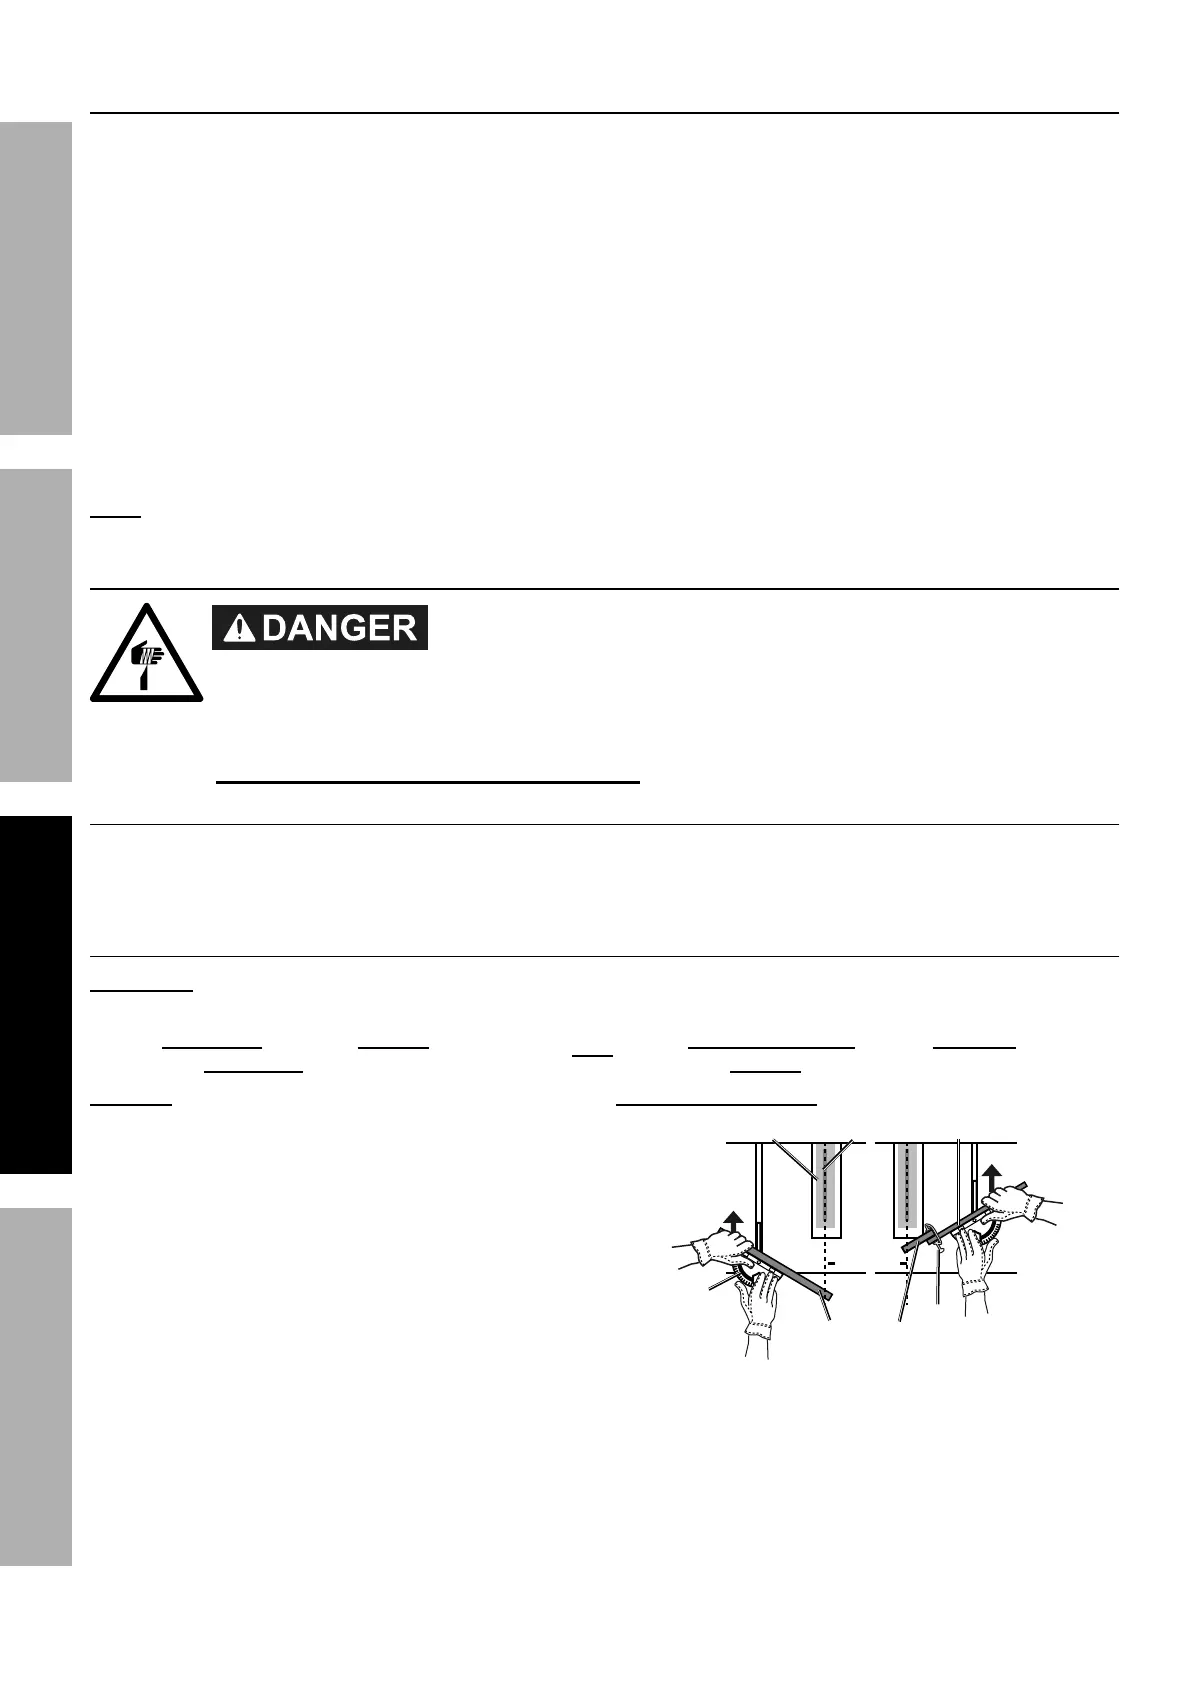
2. Do not pass hands directly over the Saw Blade
when cutting the workpiece. Push the workpiece
into the Saw Blade using a Push-stick, push-block or
by holding the workpiece against the Miter Gauge.
QFKMLMRl%%EF;6%OPGGLMR%JKIO6UPK6E%!FKH%U6J6MULMR%IM%G_6%GHJ6%I;%OPG1%%%
GI%JK6!6MG%E6KLIPE%LMkPKH%;KIN%YLOYSFOY-
P#*%;*84*%2&(%*W*(V%K"/%O'$%%
[4'$%,7&83%)"$.%$.*%3(,"8\1
K"/%O'$#
1. Rip cuts are straight cuts made parallel
to (along with) the grain of the wood by
sliding the workpiece along the Fence.
2. For pieces wider than 6″, hold the workpiece,
staying clear of the Saw Blade. For pieces
between 2″ and 6″, use the included Push-
stick or make a push-stick as described in the
Safety section of this manual. Use a Push-block
(not included) when ripping widths under 2″.
3. When ripping, always use the Rip Fence.
This improves the accuracy of the cut, and
reduces the chance for Saw Blade binding.
U&%8&$%'#*%;*84*%2&(%,8V%4(&##4'$%%
[4'$%,3,"8#$%$.*%3(,"8\1
O(&##4'$#0N"$*(%O'$#
Blade Guard
Saw Blade
Miter
Gauge
Workpiece
Clamp
Scrap Wood
Cut Line
1. Adjust the Miter Gauge to the needed angle and
place it in the right or left slot on the Table.
2. Hold the workpiece against the Miter Gauge,
and slide them together to make the cut.
Clamp smaller pieces to a piece of scrap wood
that can reach beyond the Miter Gauge and
hold the scrap against the Gauge while making
the cut. Keep the clamp clear of the Saw Blade.
SPG
 Loading...