Installation of the filter system
How to Use the Quick-Connect Fittings (To connect)
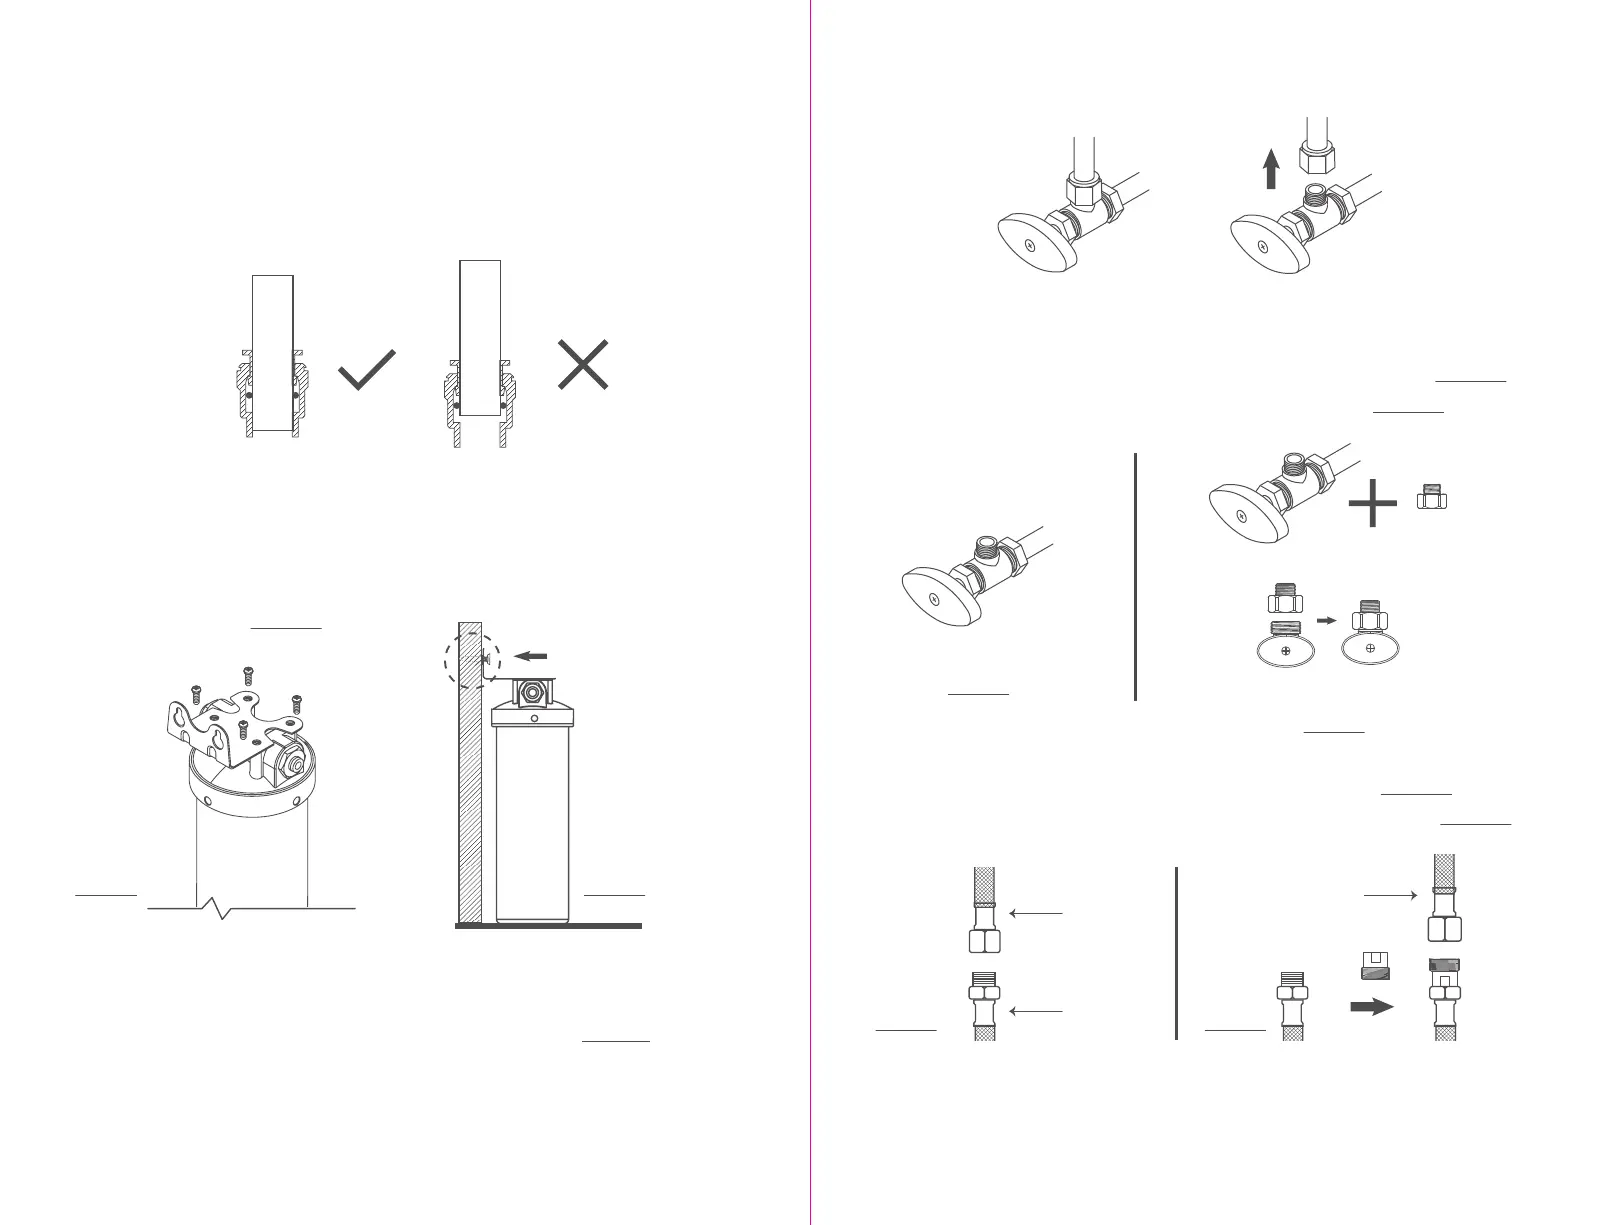
If the tubing is not fully inserted, no seal will be created, and leakage will occur.
When the tubing is fully inserted, put the blue lock clip on the tting. It will lock the tubing in
place and prevent it from falling o.
Step 1. Mount the Bracket
1. Make sure the arrows on the lter head are consistent with the direction of your water ow.
Unscrew four screws on the lter head then align the holes on the bracket with the holes in the
lter head. Insert four mounting screws included with the system through the bracket and into
the lter head until tight.
(Figure 1)
2. Choose a suitable installation position in advance. It can be put on the ground of cabinet or
xed on one side of cabinet with a bracket.
3. Paste the assistant label to nish drilling. Insert two screws in the hole.
(Figure 2)
Step 2. Connect the Water Supply (cold water only)
Step 3. Connect the Inlet Hose to the Cold Water Valve
1. If the angle valve outlet is 3/8”, it can be directly connected to the water supply. (Figure 3)
2. If the angle valve outlet is 1/2”, connect it with a No.1 converter at rst. (Figure 4)
Step 4. Connect to the Faucet
1. If the faucet hose is 3/8”, it can be directly connected to the outlet hose. (Figure 5)
2. If the faucet hose is 1/2”, using No.2 converter connect to the outlet hose at rst. (Figure 6)
Note: If the original faucet is equipped with a male connector, resulting in disconnetion,
please contact our customer services.
Shut o the water supply
Figure 3
Figure 4
Figure 5 Figure 6
Figure 1
Remove the faucet hose
3/8” outlet
1/2” outlet
Connect
①
to the cold angle valve
①
②
Faucet hose
Outlet hose
Faucet hose
Figure 2
 Loading...