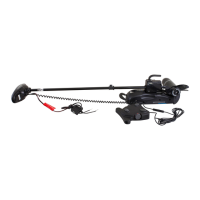
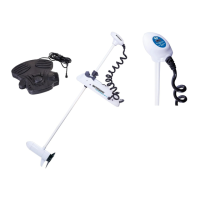
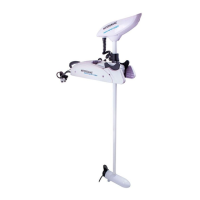
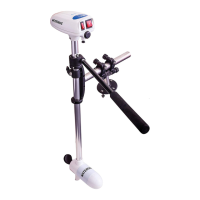
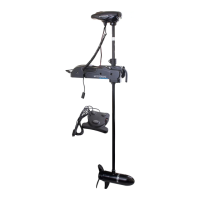
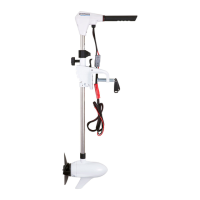
The Watersnake Combat Bow Mount Electric Motor is a powerful and silent trolling motor designed for various angling conditions. It features high-quality materials, superior design, and precision engineering for long-lasting and reliable performance.
Function Description
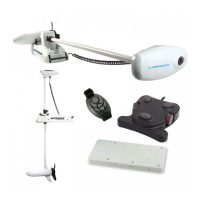
The Watersnake Combat motor is a bow-mounted electric trolling motor used to propel and steer a boat silently. It can be controlled via a foot pedal or a remote control hand unit. The motor is designed for deployment and stowing, with a quick-release bracket mechanism for easy attachment and removal from the boat.
Important Technical Specifications
The Watersnake Combat series offers several models with varying shaft lengths and thrust levels, all operating on a 12V deep cycle marine battery.
Combat 54/48 (COMBAT):
- Voltage (V): 12
- Max. Thrust (LB): 54
- Shaft Length (IN): 48
- Min Amp Draw (A/H): 13
- Max Amp Draw (A/H): 54
- Prop: 3 BLADE
- Foot Control: 1
- Remote Control: 1
- Mounting: BOW MOUNT (QUICK RELEASE BRACKET)
- Circuit Breaker: 1
- Required Battery: 12v DEEP CYCLE MARINE
- Min. Recommended Battery Size: 80 - 100 AMP HOUR
Combat 54/54 (COMBAT):
- Voltage (V): 12
- Max. Thrust (LB): 54
- Shaft Length (IN): 54
- Min Amp Draw (A/H): 13
- Max Amp Draw (A/H): 54
- Prop: 3 BLADE
- Foot Control: 1
- Remote Control: 1
- Mounting: BOW MOUNT (QUICK RELEASE BRACKET)
- Circuit Breaker: 1
- Required Battery: 12v DEEP CYCLE MARINE
- Min. Recommended Battery Size: 80 - 100 AMP HOUR
Combat 65/54 (COMBAT):
- Voltage (V): 12
- Max. Thrust (LB): 65
- Shaft Length (IN): 54
- Min Amp Draw (A/H): 13
- Max Amp Draw (A/H): 54
- Prop: 3 BLADE
- Foot Control: 1
- Remote Control: 1
- Mounting: BOW MOUNT (QUICK RELEASE BRACKET)
- Circuit Breaker: 1
- Required Battery: 12v DEEP CYCLE MARINE
- Min. Recommended Battery Size: 80 - 100 AMP HOUR
Wire Extension Length and Suggested Wire Gauge:
- 1m: 6 AWG / 6GA
- 3m: 4 AWG / 4GA
- 5m: 2 AWG / 2GA
Usage Features
Deployment and Stowing:
- Deploying: Press down on the pedal (A) and simultaneously slide the shaft (B) through the gear box, then lower carefully into the water.
- Stowing: Press down on the pedal (A) and simultaneously slide the shaft (B) through the gear box until the lower motor unit sits back in the locking clamps with a click. Slide the Depth Collar (C) down to the Gear Box and tighten its bolt for security. It is crucial to ensure the motor is properly stowed and secured before driving or moving the boat to prevent damage.
- Note: The motor is not designed to release from the cradle by pressing only the lever. Excessive pressure on the release lever can lead to deployment difficulties.
Depth Adjustment:
- Hold the motor shaft with one hand, loosen the depth collar adjustment screw, set the motor to the desired depth, and then retighten the adjusting screw securely.
Propeller Attachment:
- Ensure battery cables are disconnected before working on the propeller.
- Place the shear pin in the shaft.
- Align the propeller against the shear pin on the shaft (groove on the back of the propeller).
- Tighten the propeller nut securely.
Electrical Connections:
- Before connecting, ensure all switches are OFF and stand clear of the propeller.
- Connect the red cable to the positive (+) terminal and the black cable to the negative (-) terminal. Ensure terminals are clean for optimal performance.
- A Watersnake circuit breaker is supplied and attached to the red power cable to protect the motor's circuit boards. It shuts off the motor if the connection overheats.
- Only use a 12V deep cycle marine battery. Car/truck/motorcycle batteries are not designed for sustained power and can damage the motor's electronic components.
- If extending battery cables, refer to the wire gauge table for appropriate sizing.
Remote Control Hand Unit:
- Requires "line of sight" communication with the motor's head receiver.
- Powered by a CR2032 battery, which may need replacement after 12 months or regular use.
- Syncing: Remove the propeller. Remove the top cover of the motor head. Ensure the motor is deployed (vertical) and connected to a 12V deep cycle battery. Press and hold the RC chip button on the motor head. Simultaneously press and hold either the left or right directional button on the remote control unit for 10 seconds. Release both buttons and test. Repeat if syncing fails, as the remote battery may need replacing.
- Functions: Left directional button, Right directional button, On/Off, High speed bypass, Increase/decrease speed.
Foot Pedal Control System:
- Low profile design for adjusting direction and speed.
- Functions:
- Left directional button (L): Steers left.
- Right directional button (R): Steers right.
- Momentary button: Provides propulsion while held down (requires constant on/off switch in back position).
- Constant On/Off switch: When in the forward position, the propeller runs constantly, with speed controlled by the variable speed control dial.
- Variable speed control dial: Controls propeller speed, from full stop to maximum.
Maintenance Features
After Each Use:
- Clean the motor thoroughly with a light rinse of fresh water (avoid high-pressure streams) and warm soapy water to remove salt/debris, especially from the shaft and turning motor housing.
- Dry excess moisture and sparingly lubricate all friction points with a pressurized spray lubricant.
- Apply a light coat of wax or spray lubricant to the shaft a couple of times a year to keep it smooth.
Periodical General Maintenance (Once or Twice a Year):
- Remove side covers from the mounting assembly and clean any dirt/debris inside the bow mount assembly using warm soapy water (avoid harsh chemical cleaners).
- Apply marine-grade grease (without lead particles) to the quick lock and release mechanism while side covers are removed.
- Check for loose screws/bolts/fittings and tighten as required.
- Inspect wiring/terminals for corrosion or debris.
- Check the fuse or circuit breaker for corrosion or debris.
Storage:
- Short-Term: If the motor remains on the boat, cover it to protect electronics, especially if rain is forecast. Store in a safe, non-damp, room-temperature area.
- Long-Term (Off-Season): Store the motor in a safe place away from water, extreme cold, or hot temperatures, preferably under cover to protect electronics.
- Out of Water: After use, charge the 12V deep cycle marine battery (disconnected from the motor). Do not leave the motor connected while charging.
- If the boat is not stored under cover, remove the motor and store it separately, or cover it with a weatherproof cover to protect electronics.
- When towing long distances or on rough roads, remove the motor from the bow and stow it safely in the vehicle or boat.
Troubleshooting Quick Reference Guide:
- Many issues stem from power supply disruptions. Inspect the 12V deep cycle battery, wiring, and circuit breaker setup.
- No Power/Reduced Power:
- Ensure the motor is in the deployed (vertical) position (tilt switch prevents operation otherwise).
- Check for reversed battery connection.
- Verify the 12V deep cycle battery is fully charged.
- Ensure terminals/connections are secure and clean.
- Check fuse/circuit breaker for damage, corrosion, or debris.
- If battery lead is extended, confirm correct wire gauge.
- Remove propeller and check for fishing line/weed or debris.
- Ensure propeller pin (shear pin) is in place.
- Grinding noise indicates armature/magnet issues (contact repair agent).
- Motor Not Running at Variable Speeds:
- Check battery charge, terminals, connections, fuse/circuit breaker for damage/debris.
- Ensure foot control plugs are secure.
- Verify foot control constant on/off switch is in the forward position.
- Difficulty Deploying/Stowing:
- Follow the correct deployment/stowing process.
- Check for obstructions in the mounting bracket.
- Lubricate the shaft with spray lubricant (especially where it runs through the turning motor housing).
- Clean debris from the mounting bracket.
- Remove side plastic covers from the mounting bracket and apply marine-grade grease to the mechanism.
- Remote Control Hand Unit Not Operational:
- Battery may need to be changed.
- Re-sync the hand unit to the motor.
- Foot Control Unit Not Operational/Functions Not Operational:
- Check foot control lead plugs are secured.
- Refer to the foot control operation guide.
Servicing:
- It is recommended to use an Authorised Service Agent (e.g., Jarvis Walker's Anglers Central Service Centre) for servicing due to the precision alignment of components.
- Self-servicing or using unauthorised third parties will void consumer guarantees. Use good quality grease and avoid over-lubrication.