A
B
C
D
E
F
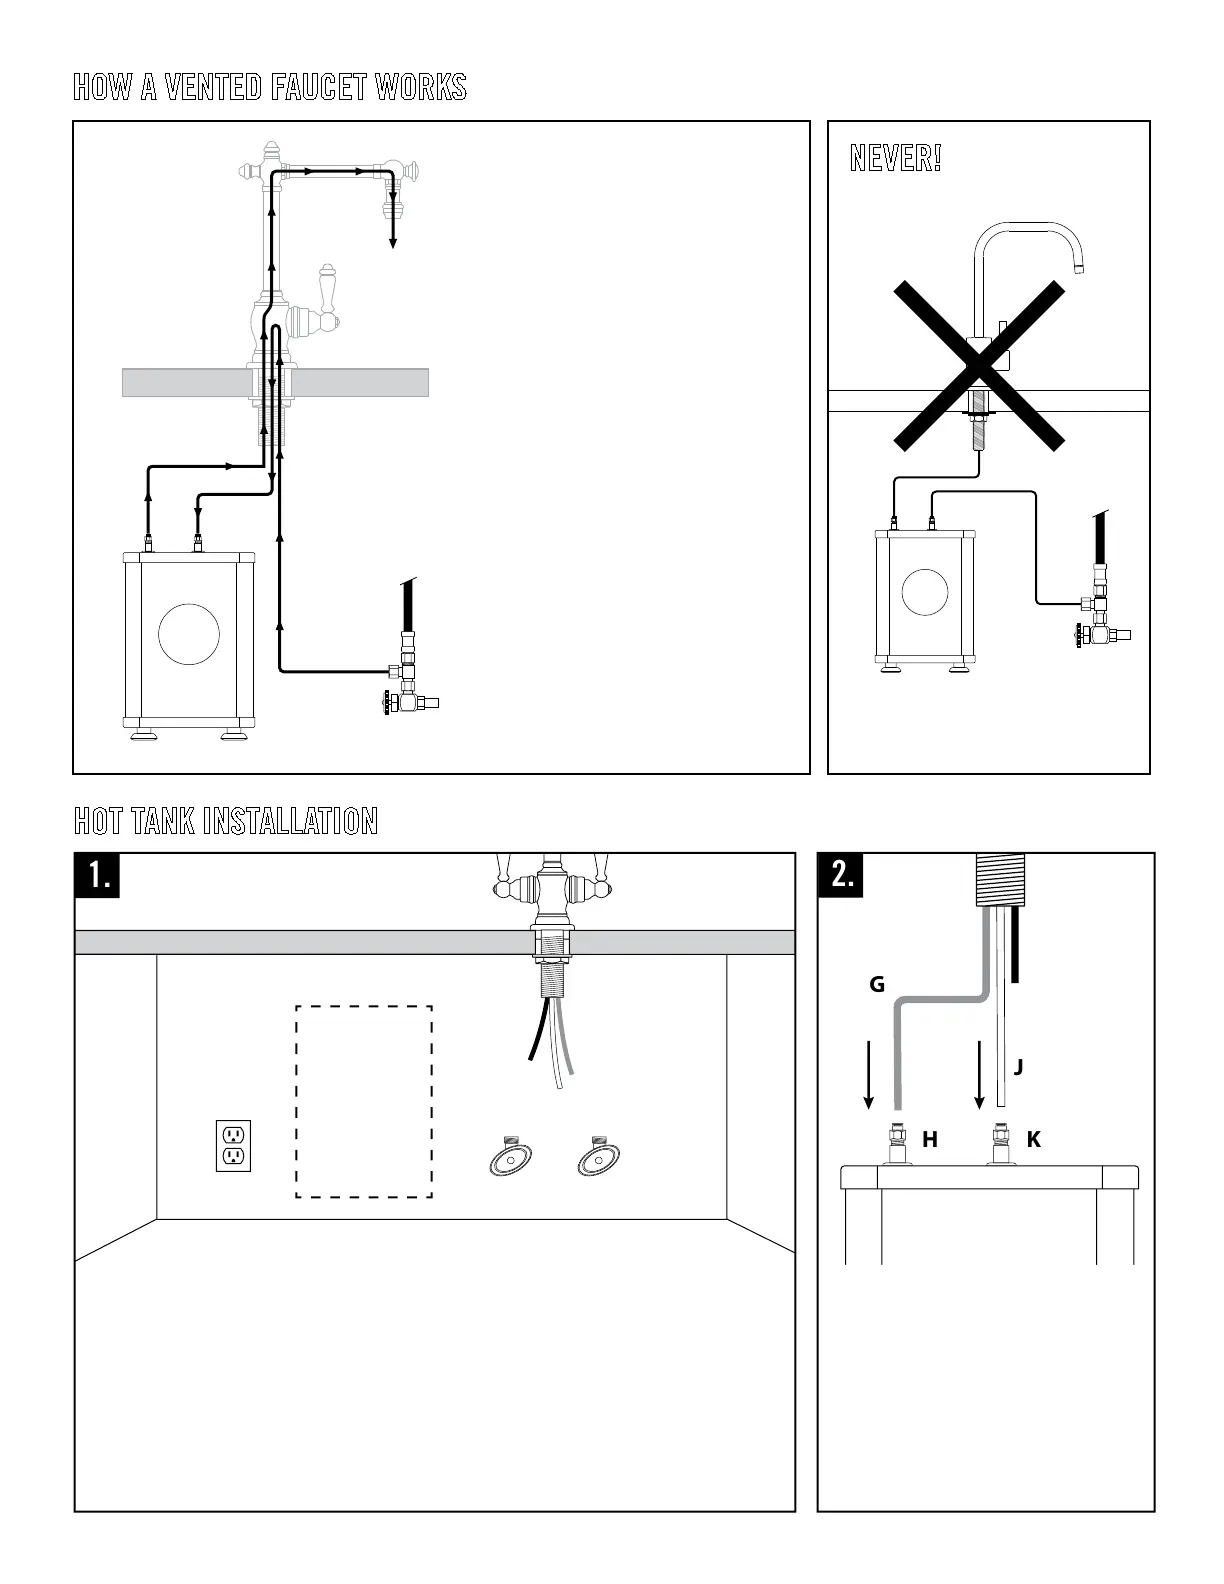
Water from the blue supply tube (A) ows
through the faucet base to the ON/OFF
valve (B). Water is then diverted into the
red tube (C) and into the Hot Tank (D) and
pressure is regulated through the built-in
PRV valve. The entering water displaces
hot water in the tank causing it to ow
freely through the clear “high temp” tube
(E). Hot water continues straight through
the faucet and exits the spout (F).
IMPORTANT - NEVER OPERATE THE
FAUCET WITH A KINKED CLEAR
OUTLET TUBE
OUTLET
INLET
Turn o water supply. Find a location under your sink that has access to an electrical outlet and
close enough to reach faucet tube leads without kinking. For tank to operate properly, it cannot be
installed beyond reach of factory tubing. Unit must be placed vertically and level. Unit should have
approximately 4”- 5” of space on the sides and approximately 1” from the cabinet wall in back.
HOW A VENTED FAUCET WORKS
HOT TANK INSTALLATION
NEVER!
CONNECTION TO A FAUCET OTHER THAN
A 3-LINE VENTED WILL VOID WARRANTY
AND CAUSE INTERNAL DAMAGE TO TANK
CONNECT A #5000 HOT TANK TO A FAUCET
AS SHOWN
CHOOSE TANK LOCATION
After faucet installation, connect 1/4” red
tube (G) to connect tting on tank inlet
(H). Base of inlet will be blue. Push until
secure.
Connect 5/16” clear tube (J) to connect
tting on tank outlet (K). Base of outlet
will be red. Push until secure.