12
TnP Prime User Manual Wavecom
WinPATS will scan for any available TnT or TnP testers and display them in a list - select your tester from the
list by tapping it. If you see multiple TnT or TnP products in the list, use the serial number of your TnP Prime to
identify your tester.
You will now be asked to register your TnP Prime - this allows you to receive product support, service and
calibration reminders from Wavecom. Once complete, tap Register. You’re now ready to start testing with
WinPATS!
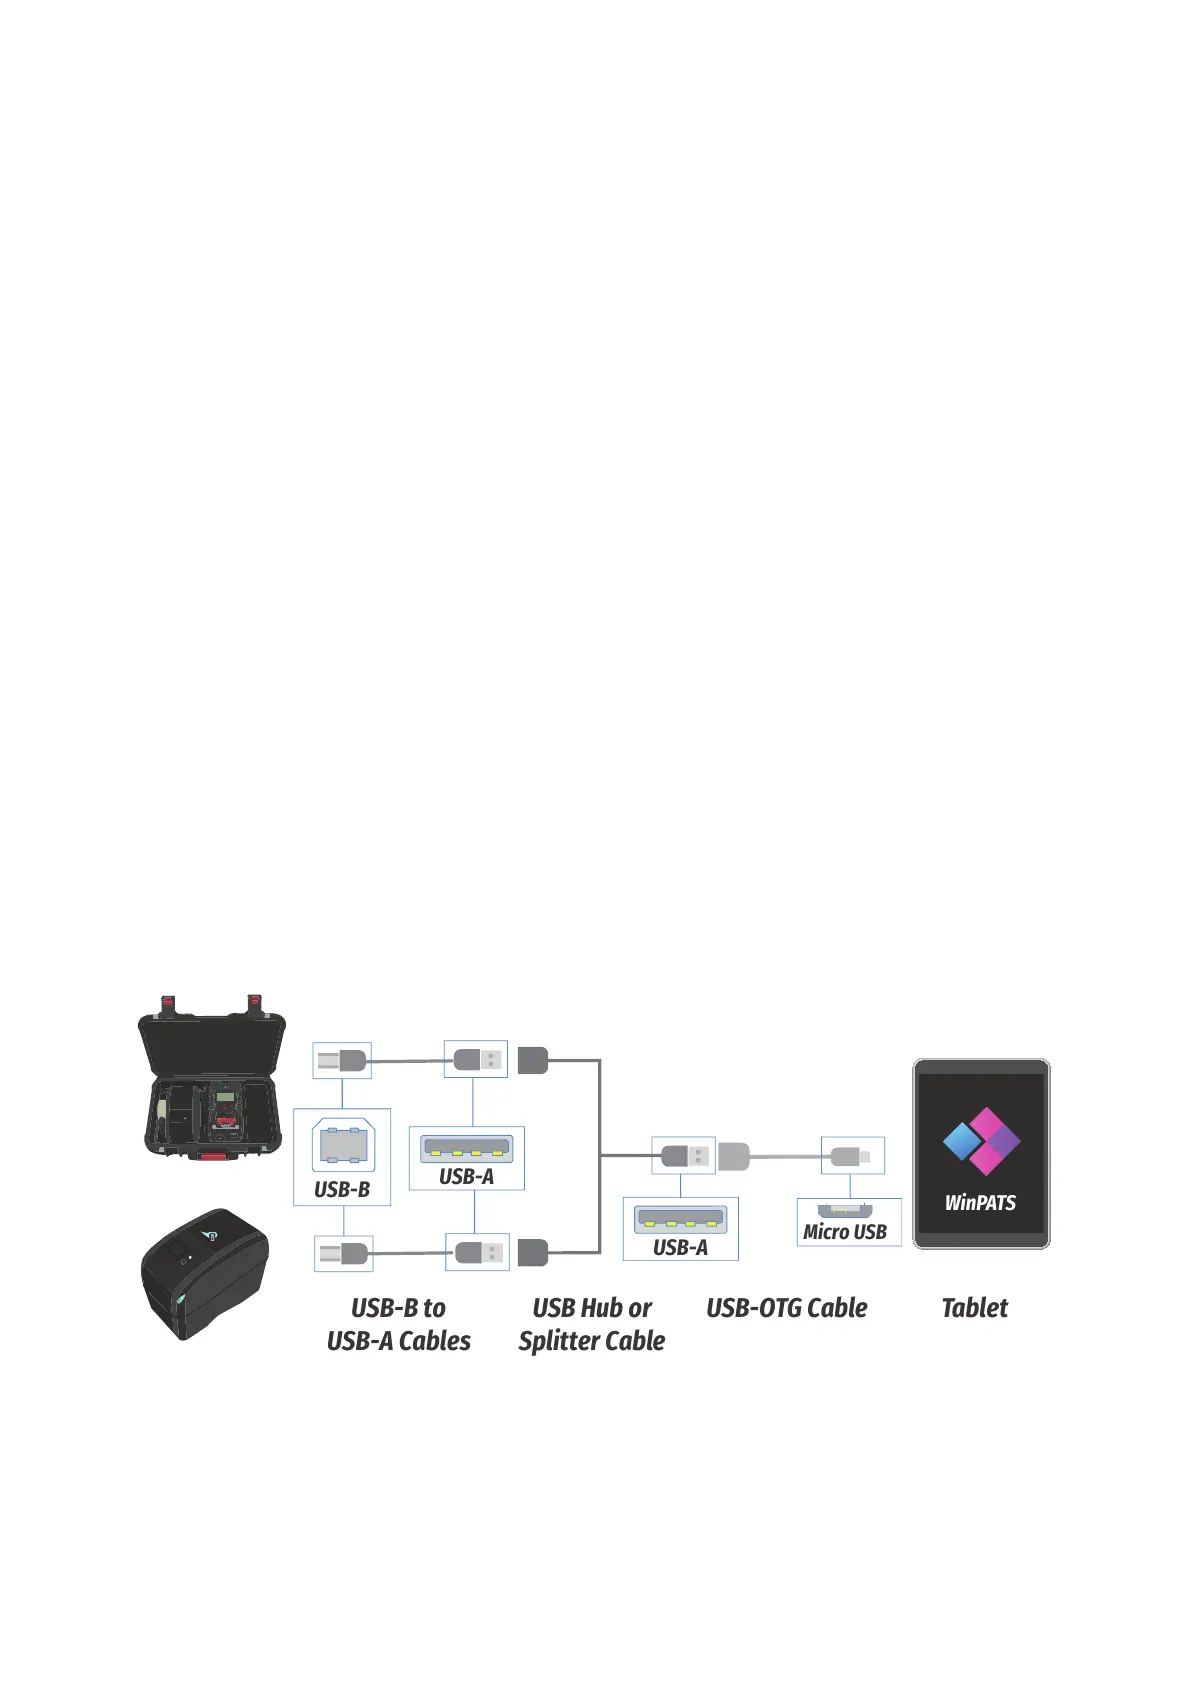
Connecting via USB
You can also connect to your TnP Prime via USB if needed. Follow the following diagrams to connect your TnP
Prime to your tablet or PC, with or without your printer. Please note that you need to connect your printer in
addition to your TnP Prime as shown.
Connecting your TnP Prime to your Tablet via USB
To connect your TnP Prime to your tablet via USB, you will need:
• A USB-A to USB-B cable (1 Included)
(2 Cables are required if connecting your TnP Prime and your Printer)
• A USB Hub or USB Splitter cable
• A USB-OTG Cable (Included)
Connect your cables in the sequence shown below. Your TnP Prime USB-B port is located inside the storage
compartment, and the Printer USB-B port is located at the rear of the printer. Once connected, open WinPATS
on your tablet. You should see the Test icon and the Print icon (if you connect the printer) at the top of the
screen change to green.
Connecting your TnP Prime to your PC via USB
To connect your TnP Prime to your PC via USB, you will need:
• A USB-A to USB-B cable (1 Included)
(2 Cables are required if connecting your TnP Prime and your Printer)
• A USB Hub or USB Splitter cable
WinPATS
USB Hub or
Splitter Cable
USB-OTG CableUSB-B to
USB-A Cables
Micro USB
USB-B
USB-A
USB-A
Tablet