120 CHAPTER 10 CLICK 112/114
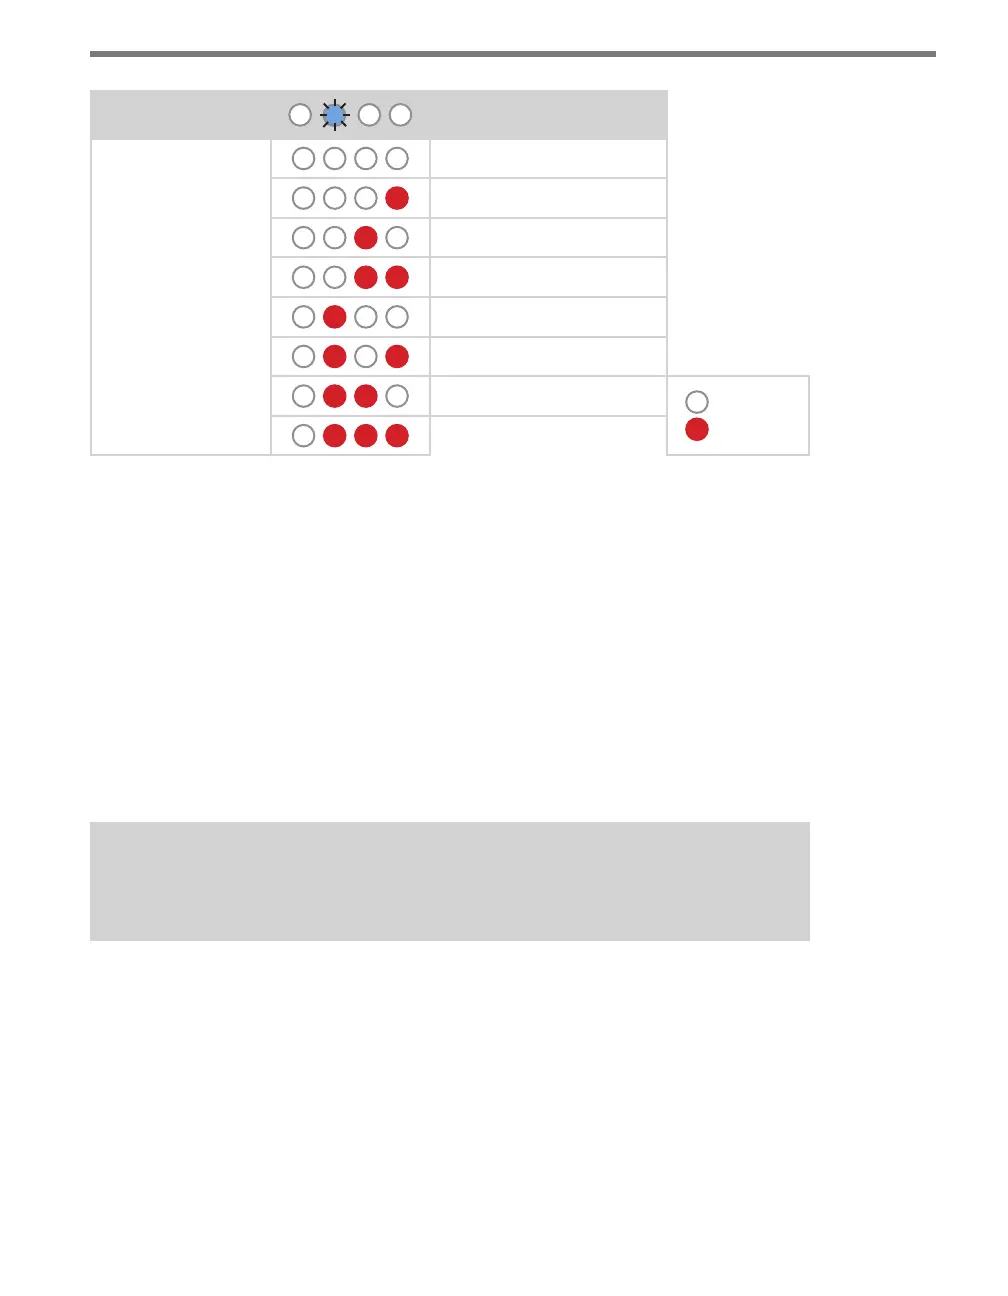
Level 1 LEDs
Input Mapping
Level 2 LEDs
Cancel and exit menu
Channels 1–4
Channels 5–8
Channels 9–12
Channels 13–16
Channels 17–20
Channels 21–24
LED o
LED on
Channels 25–28
Table 10.8 – Click 114 Front Panel Menu Channel Input Map Settings
See the earlier Navigating through the Menu and the Menu Operation Example sections for
how to congure this parameter.
Because this parameter can also be set by the DIP switches, you may need to ensure that the
DIP switches are set to Soware conguration mode; if they are set to Hardware, the front
panel menu will be able to display but not change these settings.
Autobaud
e second option that comes up when you’re cycling through the front panel menu is
the autobaud function. To select this option, release the push-button when the green LED
comes on solid.
Note
The autobaud function can only be accessed here, on the front panel menu.
is function initiates an autobaud on the RS-485 buses (you will select which bus to auto-
baud on the Level 2 LEDs). An autobaud will stop data reporting on the selected port and
attempt to communicate with the SmartSensor at all supported baud rates.