68 CHAPTER 4 CLICK 104
light up to indicate that the device is cycling through all menu options (specics on
these menu options, and which LEDs and LED combinations represent them, will be
covered later in this section).
2 Release the mode switch when you reach the desired menu option. (Pressing and hold-
ing again will resume cycling through menu options.)
3 Quickly press and release the mode switch to select the current menu option. Once it’s
selected, the Level 2 LEDs will start to let you congure the options for the selected
menu option.
4 Press and hold the mode switch to cycle through the submenu. e Level 2 LEDs will
light to indicate that the device is cycling though all conguration options (specics on
these conguration options, and which LEDs and LED combinations represent them,
will be covered later in this section).
5 Release the mode switch once the desired conguration option is reached.
6 Quickly press and release the mode switch to select the current conguration option.
e device will exit Menu mode, and either the selected function will run or the se-
lected conguration will be set and saved to the device.
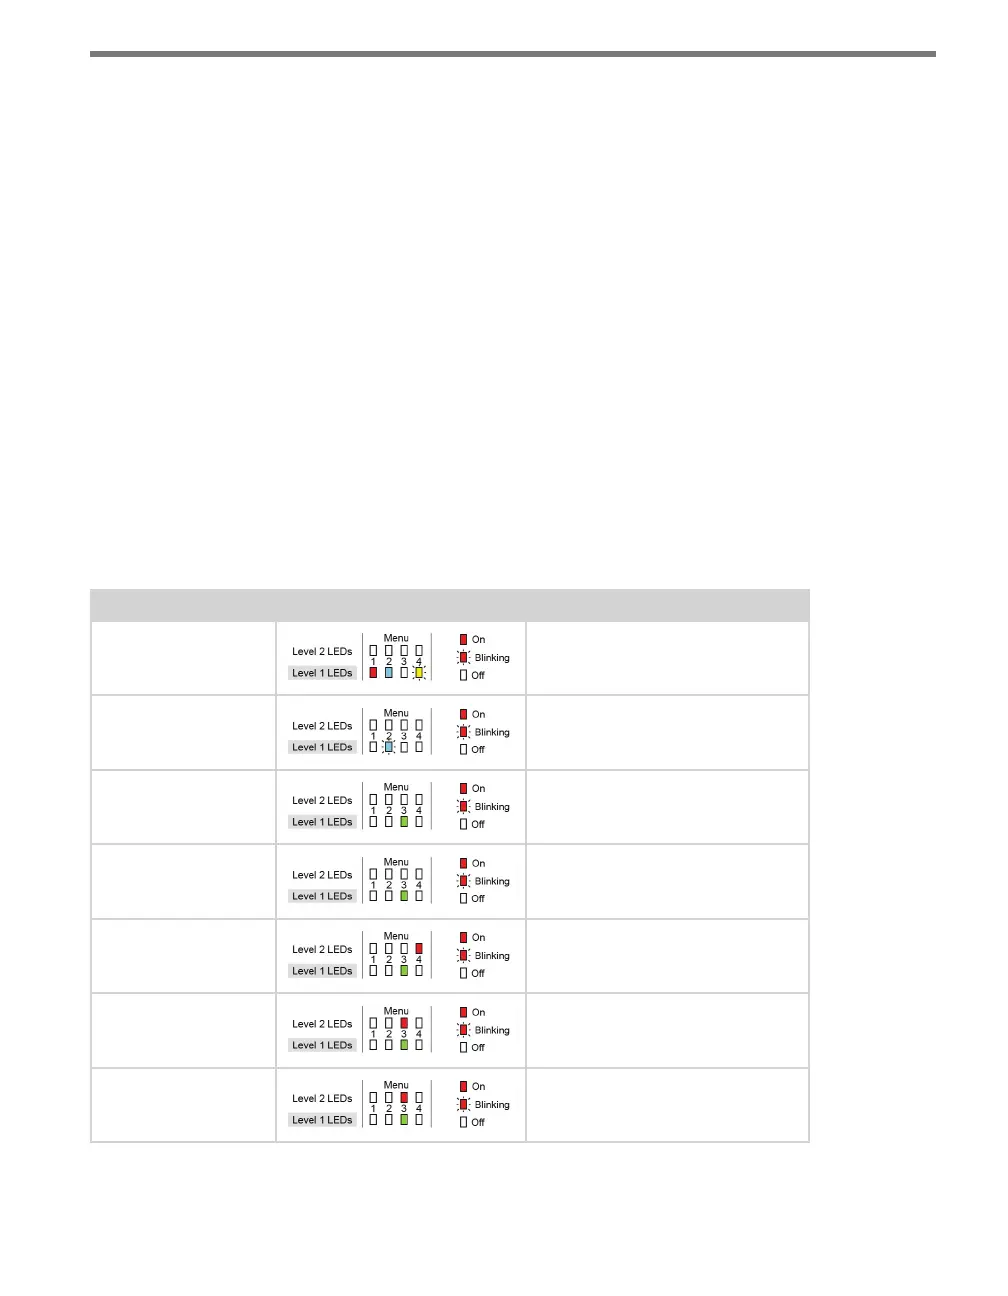
For example, the following table illustrates an example of how the mode switch and menu
indicator LEDs are used in conguring the Click 104—in this case, how to autobaud bus 2.
Mode Switch Action Display State
None Normal operation
Press and hold Channel map menu option displayed
Continue holding Autobaud menu option displayed
Release Autobaud menu option displayed
Press and release Autobaud menu selected and first
configuration parameter displayed
(bus 1 autobaud)
Press and hold Second configuration parameter
displayed (bus 2 autobaud)
Release Second configuration parameter
displayed