12
Please Do Not Return This Product To The Store. Contact your local Wayne-Dalton dealer. To find your local Wayne-Dalton dealer, refer to your
local yellow pages/business listings or go to the Find a Dealer section online at www.wayne-dalton.com
Tools Needed:
2
None
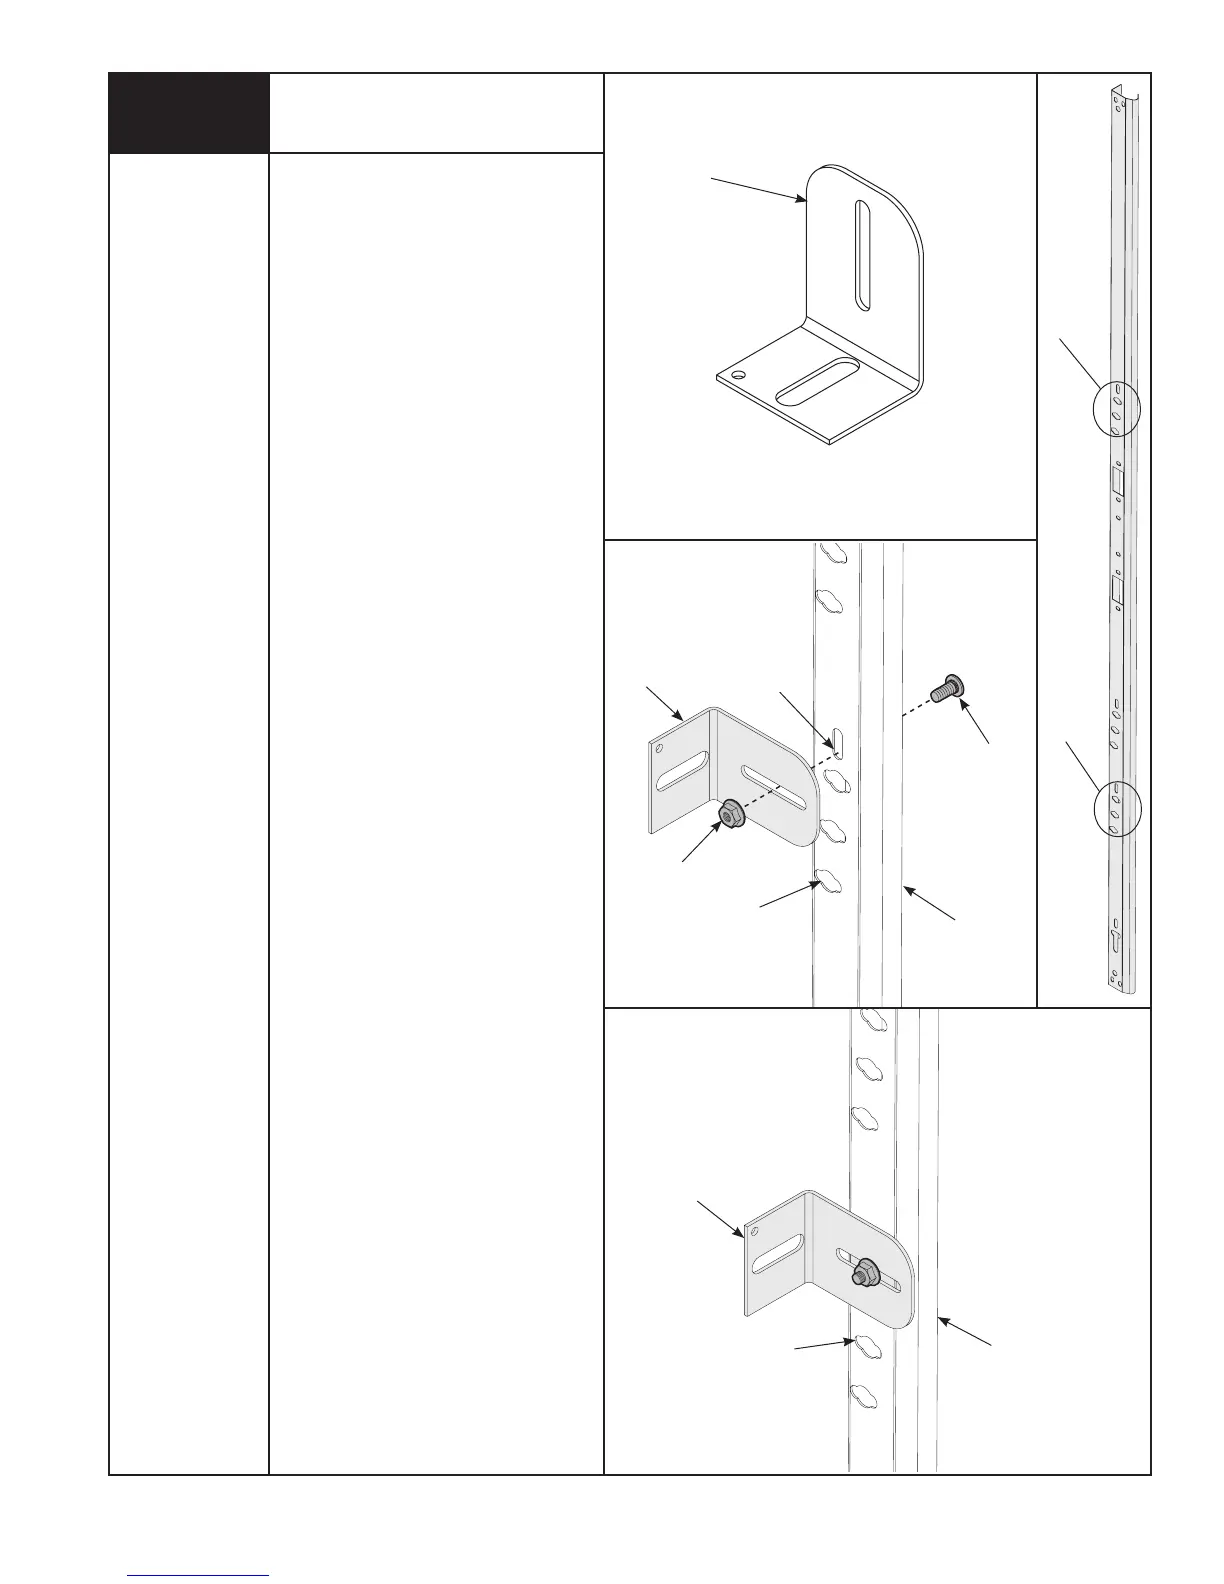
Installing Fully Adjustable Jamb
Brackets
1ST SET
3RD SET
FULLY ADJUSTABLE
JAMB BRACKET
JAMB BRACKET
SLOT
(1) 1/4”- 20 X 5/8”
CARRIAGE BOLT
(1) 1/4”- 20
FLANGE
HEX NUT
JAMB BRACKET
VERTICAL
TRACK
QUICK INSTALL
FEATURE
QUICK INSTALL
FEATURE
VERTICAL
TRACK
NOTE: If you have riveted track, skip
this step.
To attach the bottom jamb bracket,
JB-2, locate the first set of quick install
features of the vertical track. Align
the slot in the jamb bracket with the
slot above the quick install features in
the vertical track. The long side of the
bracket is placed against the track.
Fasten the jamb bracket finger tight,
using (1) 1/4”- 20 x 5/8” carriage bolt
and (1) 1/4”- 20 flange hex nut.
To attach the top jamb bracket, JB-3,
locate the third set of quick install
features of the vertical track. Align
the slot in the jamb bracket with the
slot above the quick install features in
the vertical track. The long side of the
bracket is placed against the track.
Fasten the jamb bracket finger tight,
using (1) 1/4”- 20 x 5/8” carriage bolt
and (1) 1/4”- 20 flange hex nut.