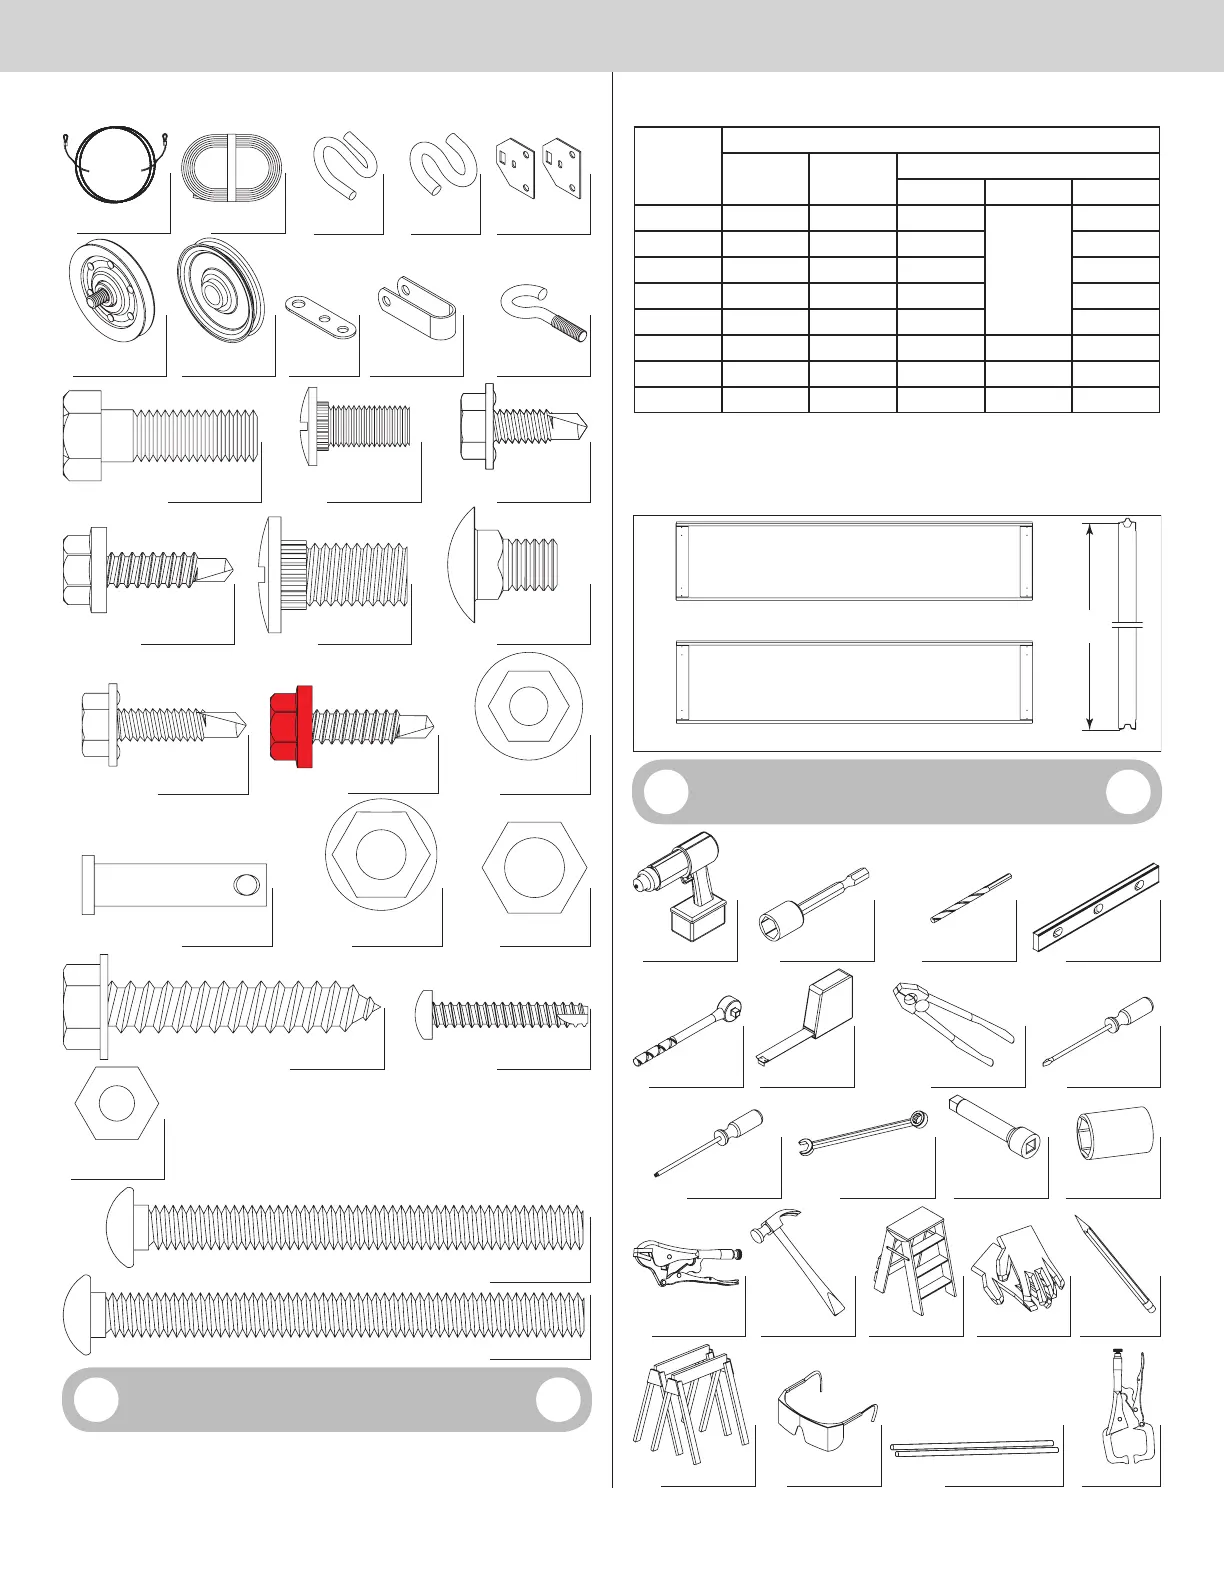
(2) Front
(2) Rear
cable lift sheaves
(2) Sheave forks
(as required)
3 Hole clips
(as required)
(2) Hook plates
(as required)
Spring
restraint cables
Small S-hooks
(as required)
Large S-hooks
(as required)
Counterbalance
lift cables
5/16”-18 x
3-3/4” Eye bolts
3/8” - 16 x 1-1/4”
Hex head bolts (as required)
5/16”-18 x 1/2”
Carriage bolts (as required)
1/4”-14 x 7/8” Self
drilling screws (as required)
(2) 3/8”-16 x 3/4”
Truss head bolt
1/4”-20 x 11/16” Self
drilling screws (as required)
1/4”-20 x 9/16”
Track bolts (as required)
1/4”- 20 Flanged
hex nuts (as required)
5/16”-18 Flange hex
(2) 3/8”- 16
5/16” x 1-1/4”
Clevis pin
1/4”-20 x 7/8” Self
drilling screws (as required)
1/4”-14 x 7/8”
Self drilling screws
(RED HEAD) (as required)
x
5/16” x 1-5/8” Hex head lag screws
(as required)
#8-18 x 1” Self tapping
screws (as required)
1/4” - 20 x 2-1/2” Carriage bolts (as required)
1/4” - 20 x 2-3/4” Carriage bolts (as required)
Door Section Identification
Door Height Type Of Sections
Bottom Lock Intermediate(s) Sections
Int I Int II Top
6’0” 18” 18” 18” N/A 18”
6’3” 21” 18” 18” 18”
6’6” 21” 18” 18” 21”
6’9” 21” 21” 21” 18”
7’0” 21” 21” 21” 21”
7’6” 18” 18” 18” 18” 18”
7’9” 21” 18” 18” 18” 18”
8’0” 21” 18” 18” 18” 21”
When installing your door you must use sections of the appropriate height in the right stack-
ing order. What sections heights you need to use in what order depends on the height of your
door.
NOTE: Unless your door is five sections in height, you will not receive an Intermediate II
section.
Side view
Intermediate I section
Bottom section
Section
height
Tools Required
Power drill Socket driver: 7/16” Level
Drill bits: 1/8”, 3/16”,
9/32”, 7/16”, 1/2”
Ratchet wrench Tape measure Pliers / Wire cutters Flat tip screwdriver
r
Wrenches: 3/8”, 7/16”,
3” Ratchet
extension
Sockets: 7/16”,
1/2”, 9/16”, 5/8”
Vise clamps Hammer Step ladder PencilLeather gloves
Locking pliersSafety glasses
Approved winding bars
Saw horses
4