EasyManua.ls Logo

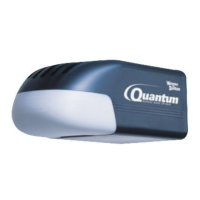
Wayne-Dalton 3018 User Manual

Wayne-Dalton 3018
46 pages
To Next Page IconTo Next Page
Page #1 background imageLoading...
Page #1 background image
INSTALLATION INSTRUCTIONS AND OWNER’S MANUAL
Chain/ Belt Drive
Models: 3018, 3018DLX, 3522, 3522DLX
IMPORTANT NOTICE!
Read the enclosed instructions carefully before installing/operating
this garage door opener. Pay close attention to all warnings and
notes. This manual MUST be attached to the wall in close proximity
to the garage door.
© Copyright 2006 Wayne-Dalton Corp. Part No. 326568 NEW 6/6/2006
FOR RESIDENTIAL SECTIONAL OVERHEAD GARAGE DOORS ONLY!
DO NOT USE ON ONE PIECE DOORS!
IMPORTANT! THE DOOR AND OPENER WILL NOT FUNCTION PROPERLY UNTIL
INFRARED SAFETY SENSORS ARE INSTALLED AND PROPERLY ADJUSTED!
GARAGE DOORS & OPENERS

Questions and Answers:

Wayne-Dalton 3018 Specifications

General IconGeneral
TypeChain Drive
Horsepower1/2 HP
Voltage120V
Remote Controls Included2
Battery BackupNo
Speed7 inches per second

Summary

INSTALLATION INSTRUCTIONS AND OWNER'S MANUAL

Important Safety Notices

Critical warnings for safe and proper opener operation, including door type suitability.

Pre-Installation and System Overview

Package Contents

Lists all components included in the garage door opener package.

Pre-Installation Inspection

Ensures the garage door is properly installed and balanced before opener installation.

Pre-Installation Steps

Covers identifying the door, testing its balance, and pre-assembly checks.

System Features

Outlines key features of the garage door opener system.

Important Safety Instructions

Definition of Key Words

Explains the meaning of WARNING, CAUTION, IMPORTANT, and NOTE terms used in the manual.

Rail Assembly and Mounting

Rail Assembly

Step-by-step instructions for assembling the opener rail.

Removing Tie Wrap

Instruction to remove the tie wrap securing the upper door arm.

Front Rail Assembly

Covers mounting the front rail and setting the idler.

Rail Alignment

Aligns the rail assembly and sets the chain or belt tension.

Attaching Rail to Opener

Securely attaches the rail assembly to the opener unit.

Front Wall Bracket Installation

Details on locating and mounting the front wall bracket to the header wall.

Opener Mounting

Attaches the opener to the wall bracket and positions the motor end.

Mounting Opener End

Secures the opener unit to the ceiling joists using hangers.

Door and Component Installation

Door Bracket and Light Installation

Mounts the door bracket and installs the opener light.

Wired Wall Station Installation

Covers the installation of the wired wall station and entrapment warning label.

Wired Infrared Safety Sensor Installation

Details on mounting the wall brackets and attaching the safety sensors.

Wiring Installation

Routes and connects wires for safety sensors to the opener.

Final Connections

Connects the opener to power and the trolley to the latch assembly.

Infrared Safety Sensor Alignment

Ensures proper alignment of safety sensors for correct operation.

Connecting Door Arm to Door

Attaches the upper and lower door arms to the garage door bracket.

Travel Settings and Adjustments

Setting Trolley Close Position

Adjusts the trolley's position for the fully closed door state.

Travel Adjustments

Sets the door's closing and opening limits for optimal operation.

Opening Travel Adjustment

Fine-tunes the door's opening limit for proper operation.

Adjustments

Covers force, obstruction sensing, and mechanical lock adjustments.

Testing and Operation

Obstruction Tests

Tests door reversal against floor and safety sensor obstructions.

Door Activation and Emergency Disconnect

Explains door operation, emergency release, and safety sensor engagement.

Light Operation & Warnings

Explains the opener light functions and error indicators.

Operating the Wired Wall Station

Describes the function of the wall station's Up/Down and Light buttons.

Opener Controls

Identifies the program button and its functions on the opener unit.

Programming

Programming Wireless Keyless Entry

Instructions for programming the wireless keyless entry device.

Installing Wireless Keyless Entry

Guides the mounting of the wireless keyless entry unit.

Customizing the Settings

Instructions for programming multiple doors or openers to a single transmitter.

HomeLink® Programming

Connects the vehicle's HomeLink® system to the garage door opener.

Alternate HomeLink® Programming

Alternative method for programming HomeLink® if primary fails.

Programming Transmitter(s) to Opener

Procedures for programming remote transmitters to operate the opener.

Optional Installations

Optional Wiring

Details on how to hardwire the opener, bypassing the power cord.

Optional Bracket Installation

Instructions for installing an adjustable bracket for specific door models.

Setting Trolley Close Position and Door Arm Connection

Connects door arm to trolley, considering track radius and torsion springs.

Setting Trolley Position (Continued)

Continues trolley position settings for torsion spring systems.

Setting Trolley Position (Models 9700)

Connects door arm to trolley for Model 9700 with torsion springs.

Setting Trolley Position (Continued)

Final trolley position adjustments for Model 9700.

Maintenance

Monthly Maintenance

Regular checks and lubrication for optimal door and opener performance.

Twice a Year Maintenance

Periodic checks for chain tension and fastener security.

Battery Replacement

Instructions for replacing batteries in transmitters and keyless entry devices.

Troubleshooting

Parts Breakdown

Parts Breakdown - Rail Assembly

Detailed list and diagram of parts for the rail assembly.

Parts Breakdown - Opener Assembly and Accessories

Detailed list and diagram of parts for the opener assembly and accessories.

Classicdrive® Accessories

Lifetime Limited Warranty

Installation Template

Patent and Regulatory Information

Patent Information

Lists patents covering the garage door opener models.

FCC and IC Statement

Regulatory compliance information regarding FCC and IC standards.

Related product manuals