Please Do Not Return This Product To The Store. Call Us Directly! Our Trained Technicians Will Answer Your Questions and/or Ship Any Parts You May Need
You can reach us Toll Free at 1-888-827-3667 for Consumer Assistance or online at www.wayne-dalton.com
4
6
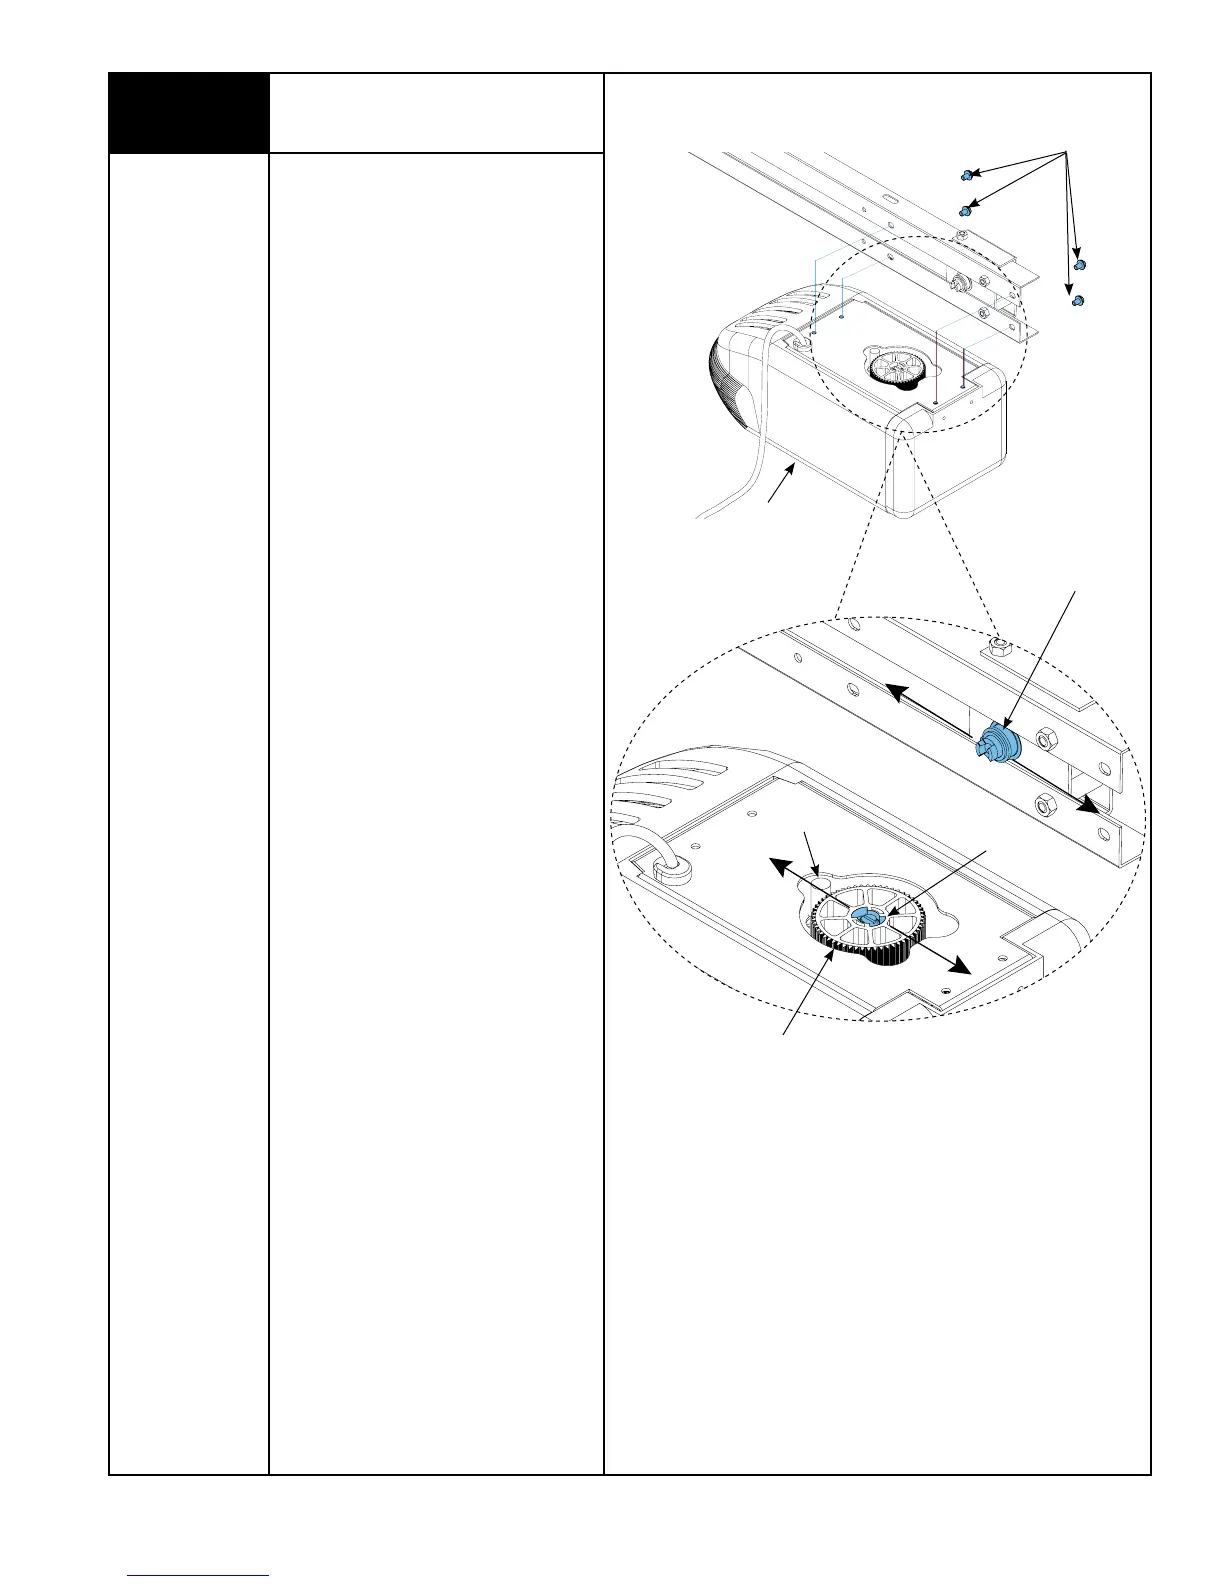
Attaching Rail to Opener
Tools Needed:
3/8” Socket
Ratchet Wrench
IMPORTANT: THE DRIVER GEAR IN THE
OPENER MUST BE PROPERLY ALIGNED
WITH THE SPROCKET/ COUPLING COGS IN
THE RAIL ASSEMBLY AND THE MOUNTING
BOLTS FULLY TIGHTENED, BEFORE
POWERING UP THE OPENER. NEGLECTING
TO DO THIS WILL RESULT IN GEAR FAILURE.
Before assembly, align sprocket/ coupling
cogs to match notches of driver gear. Rotate
the motor spline to position driver gear so
the nearest notch in driver gear is directly
behind motor spline, as illustrated.
NOTE: Do not rotate more than 1/2 turn.
NOTE: Place front end of rail on temporary
support approximately 6” in height.
Proceed with attaching rail to opener,
insuring proper engagement between
sprocket/coupling cogs and driver gear
notches. Realign if necessary, making sure
to keep any rotation only to the nearest
notch. Using the (4) pre-attached
1/4”-20 x 5/8” hex head bolts, assemble
rail to opener using 3/8” socket; tighten
securely.
IMPORTANT: DO NOT PLUG THE OPENER
POWER CORD INTO ELECTRICAL OUTLET
UNTIL OPENER IS FULLY INSTALLED AND
YOU ARE INSTRUCTED TO DO SO IN THIS
MANUAL.
1/4” - 20 x 5/8”
Hex Head Bolts
Sprocket / Coupling Cogs
Motor Spline
Notches
Driver Gear
Opener