6
ATTACHING TO THE STAND
1. Locate the Oil Pan that is located under the sewing machine head in the box.
2. Position the Rubber Bumpers on the four corners of the Oil Pan (Figure 1).
3. Drop the Oil Pan into the opening in the stand (Figures 2a & 2b).
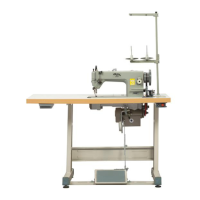
SEWING MACHINE SET-UP
Figure 2b
Figure 3
Figure 6a
Figure 1
ADDING OIL
1. With the sewing machine head tilted back, pour the Oil
that came with the machine into the Oil Pan, ensuring that
it fills the pan between the high and low levels (Figure 8).
When you’re out of the oil that comes with the machine,
we recommend our Lily Stitching Oil for future refills.
Figure 2a
4. Install Rubber Sockets (Figure 3).
5. Install knee lift plunger (Figure 4).
6. Attach the metal Hinges to the back of the sewing machine head (Figure 5).
7. Pick the sewing machine head up, being careful to use proper lifting techniques, and position it in the opening
with the Hinges resting in the Rubber Sockets (Figures 6a & 6b).
8. Place the Stopper in the hole located on the stand behind the head (Figure 7). This Stopper holds the head in
place when you tilt it back to attach the belt, add oil or access the bobbin case.
Figure 4
Figure 6b
Figure 5
Figure 7
Figure 8