8
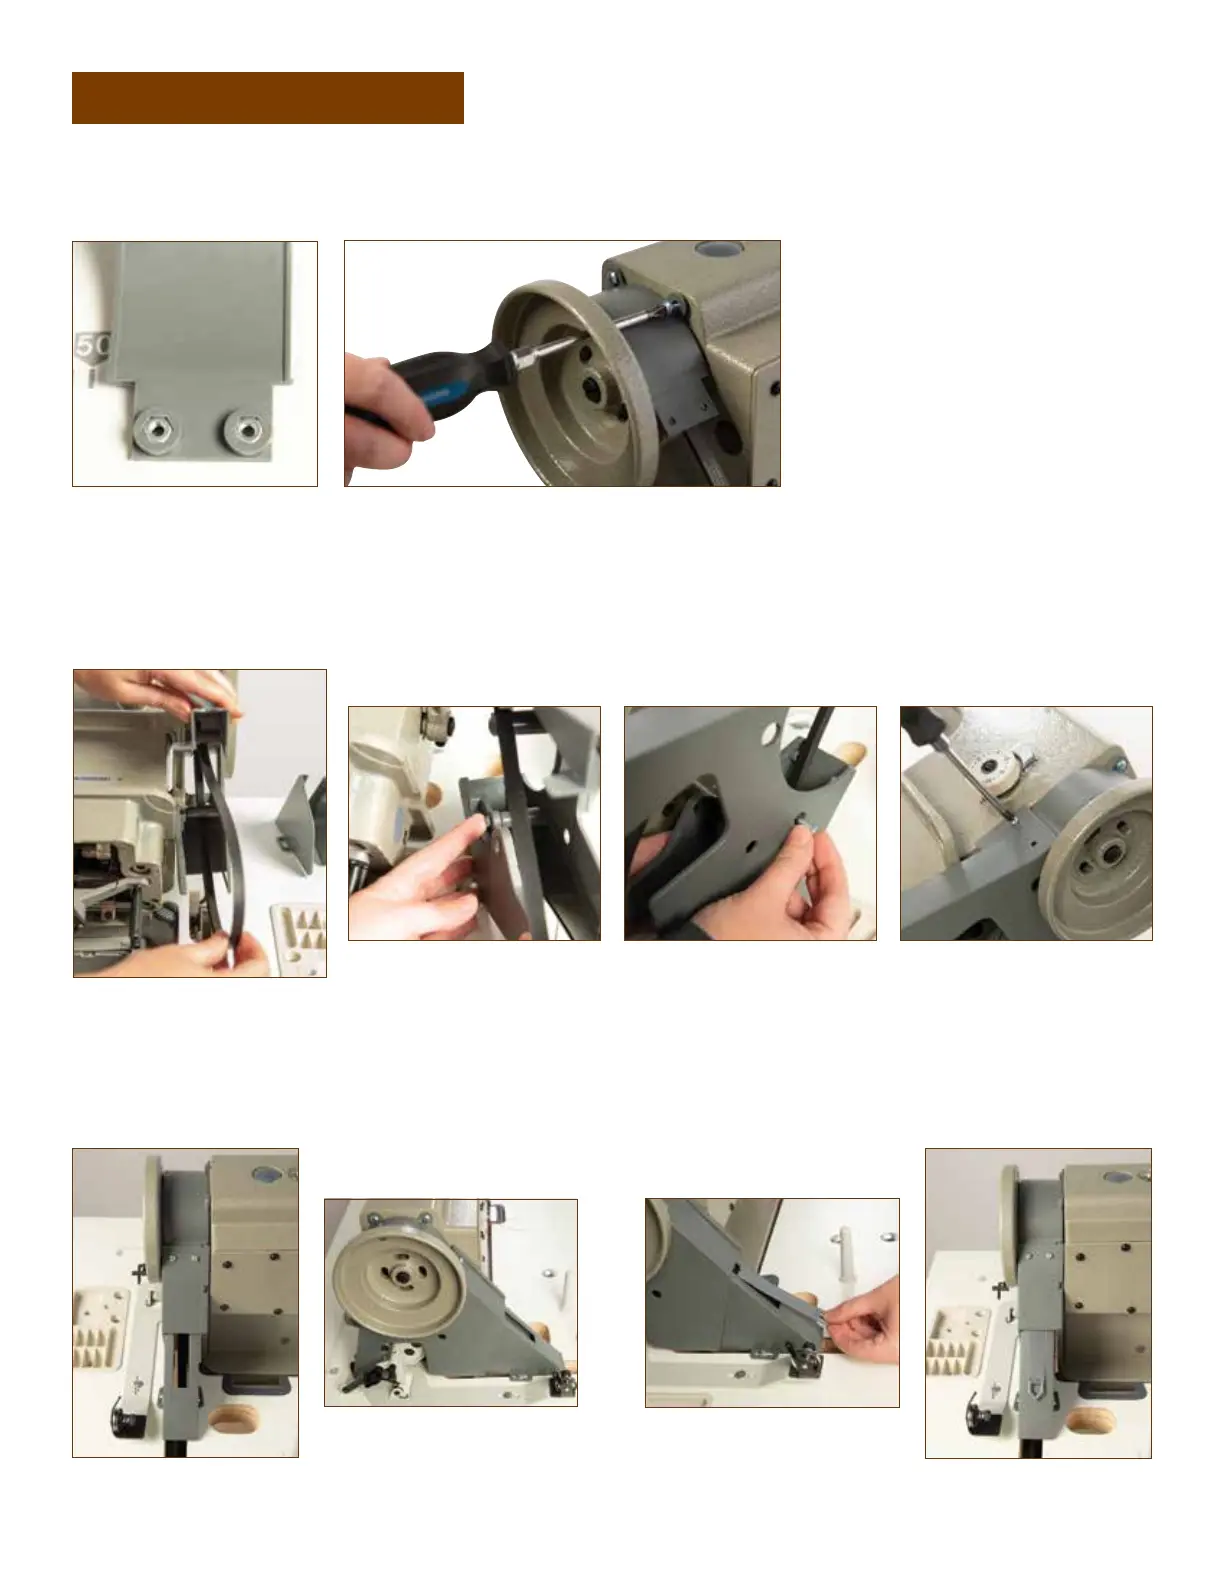
1. The Belt Guard includes three pieces. Before installing Piece 1, insert nuts (Figure 12a) using super glue to
hold in place. When installing Piece 1, rotate flywheel so hole in flywheel aligns with the hole in Piece 1 to
screw onto the machine (Figure 12b).
2. Tilt sewing machine head back. Add Piece 2 to the front of the machine (Figures 13a, 13b, 13c, 13d)
and screw into place. Tip: Our machinery team finds that applying a tiny bit of glue to the screws helps
secure them in place.
3. Add Piece 3 to the back of the machine
(Figures 14a, 14b) and screw onto the tabletop.
Figure 12a Figure 12b
Figure 13a
Figure 14a Figure 15b
Figure 13b
Figure 14b Figure 15a
Figure 13c Figure 13d
4. Slide Piece 4 into place (Figures 15a, 15b).
INSTALLING BELT GUARD