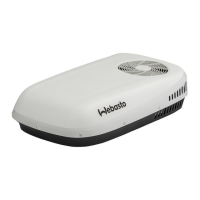
4 Installation instructions CC8 roof-top air-conditioning system
414
4.10.2 Preparing the weatherseal
1. Cut out the weatherseal taking care to adapt its thickness to the contours of the roof (beads, channels and roof
curvature), so that the contours (Fig. 406) are properly sealed.
The thickness of the sealing material should be compressed by approx. 20 %-40 % when the air-conditioning unit
is installed.
2. The height of the spacers may have to be adjusted so that the sealing strip is pressed on to the roof over its entire
length.
NOTE
The roof must be dry and clean for bonding.
3. Cut the sealing strips to length and glue them together with Sikaflex (supplied in the installation kit) at the points of
contact to form the weatherseal.
4. Affix the weatherseal to the underside of roof-top unit as shown in Fig. 407 using Sikaflex 221 and leave to cure for
approx. 2 hours.
5. Apply Sikaflex sealing compound to the underside of weatherseal before fitting base frame on the top of roof.
Fig. 407 Weatherseal made from Armaflex/Eurobatex sealing sections
NOTE
If Sikaflex 221 is used to install the roof-top unit, it must be allowed to cure for
3 – 5 hours. Install the base plate before Sikaflex has cured. Do not expose the seal to
moisture until the Sikaflex has cured.
34
±2
814
±2
32
±3
411
±2
241
±2
Cut edge must be folded over to prevent
the sealing frame wandering when compressed
Roundabout
side skin
Seal-bonded with
Sikaflex 221 (6x)
Breakthrough air conditioning
system air outlet
Breakthrough air conditioning
system exit openings
Roof cut-outs
Roof outer skin
profile line
Base frame
Seat against roof
breakthrough opening
Drain hole, air conditioning
system do not bond