SmarTemp Control 3.0 Installation - Operating Instructions
2
General
Thank you for choosing Webasto to meet your heating needs. The Webasto SmarTemp Control 3.0
enables you to quickly and effortlessly operate Webasto air and coolant heaters specified in the
compatibility section.
NOTE: The information in this document refers to both the SmarTemp Control 3.0 and SmarTemp
Control 3.0 Bluetooth unless otherwise noted.
Operation
The Webasto SmarTemp Control 3.0 is the next generation of the SmarTemp series controllers. It’s
operated using a single rotary dial around the outside of the unit to scroll through menu options.
Simply click the select button to make your choice. Refer to LCD Screen Symbol Legend on page 5 for
more information.
Compatibility
AT 2000 STC – Rheostat to SmarTemp 3.0 Bluetooth Adapter harness (P/N: 5013929B)
AT EVO 40/55 – Rheostat to SmarTemp 3.0 Bluetooth Adapter harness (P/N: 5013930A)
AT 2000STC & EVO 40/55 – SmarTemp 2.0 to SmarTemp 3.0 Adapter harness (P/N: 5013931A)
Thermo Pro 50 & Thermo Top Evo – Rocker switch to SmarTemp 3.0 Bluetooth Adapter harness (P/N:
5013932A)
Mounting Procedure
Multiple factors such as doors and windows must be taken into consideration as they can directly affect
the SmarTemp Controls ambient temperature reading. Refer to “Temperature Calibration” section on
page 4 if these obstacles are unavoidable.
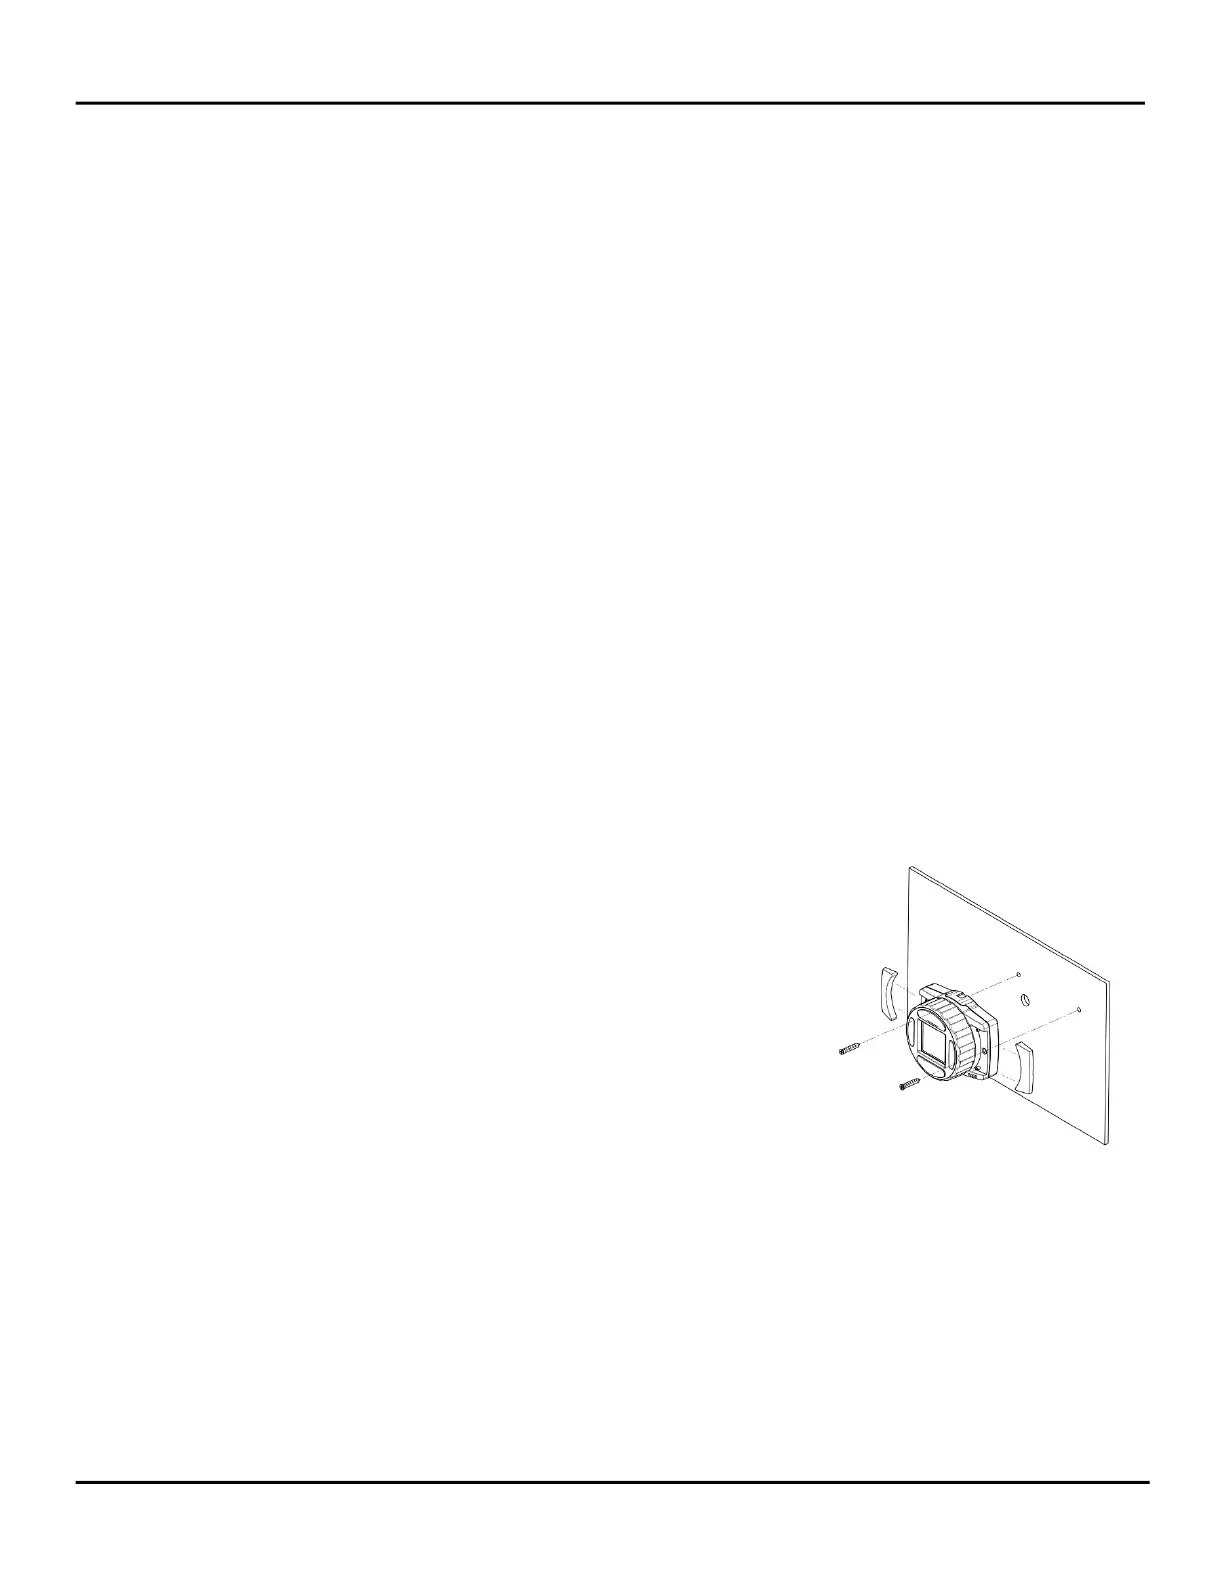
1. Find a suitable mounting location (on a flat surface if possible) in a visible area.
CAUTION: The SmarTemp unit must not be mounted within 7.9
in (20 cm) from occupants.
CAUTION: Always install the unit in an area protected from the
effects of weather and dust contamination or the unit will not
function as intended.
2. Use the drilling dimensions / template in the back of this manual
to lightly mark the two mounting holes.
3. (Optional Step) To route wire harness through the mounting
surface, drill a 17mm hole as notated on the drilling
dimensions / template.
Note: Always make sure there are no obstacles behind the
mounting location prior to drilling.
4. Secure the Webasto SmarTemp Control 3.0 using the two supplied #4 screws.