Installation
www.webasto.us Webasto Product N.A., Inc. www.techwebasto.com
9
Installation Site / Installation Position
The heater must be installed in as low a position as possible to allow the heater and circulating pump to be bled auto-
matically. This is particularly important as the circulating pump is not self-priming.
Mounting the Heater
The heater must be secured with at least three M8 screws. The screws must be tightened with a torque value of 13
lb-ft. (18 Nm).
Model plate
The model plate must be positioned so that it cannot be damaged and must be clearly legible when the heater is
installed (otherwise a duplicate model plate must be used). Inapplicable years must be erased from the model
plate.
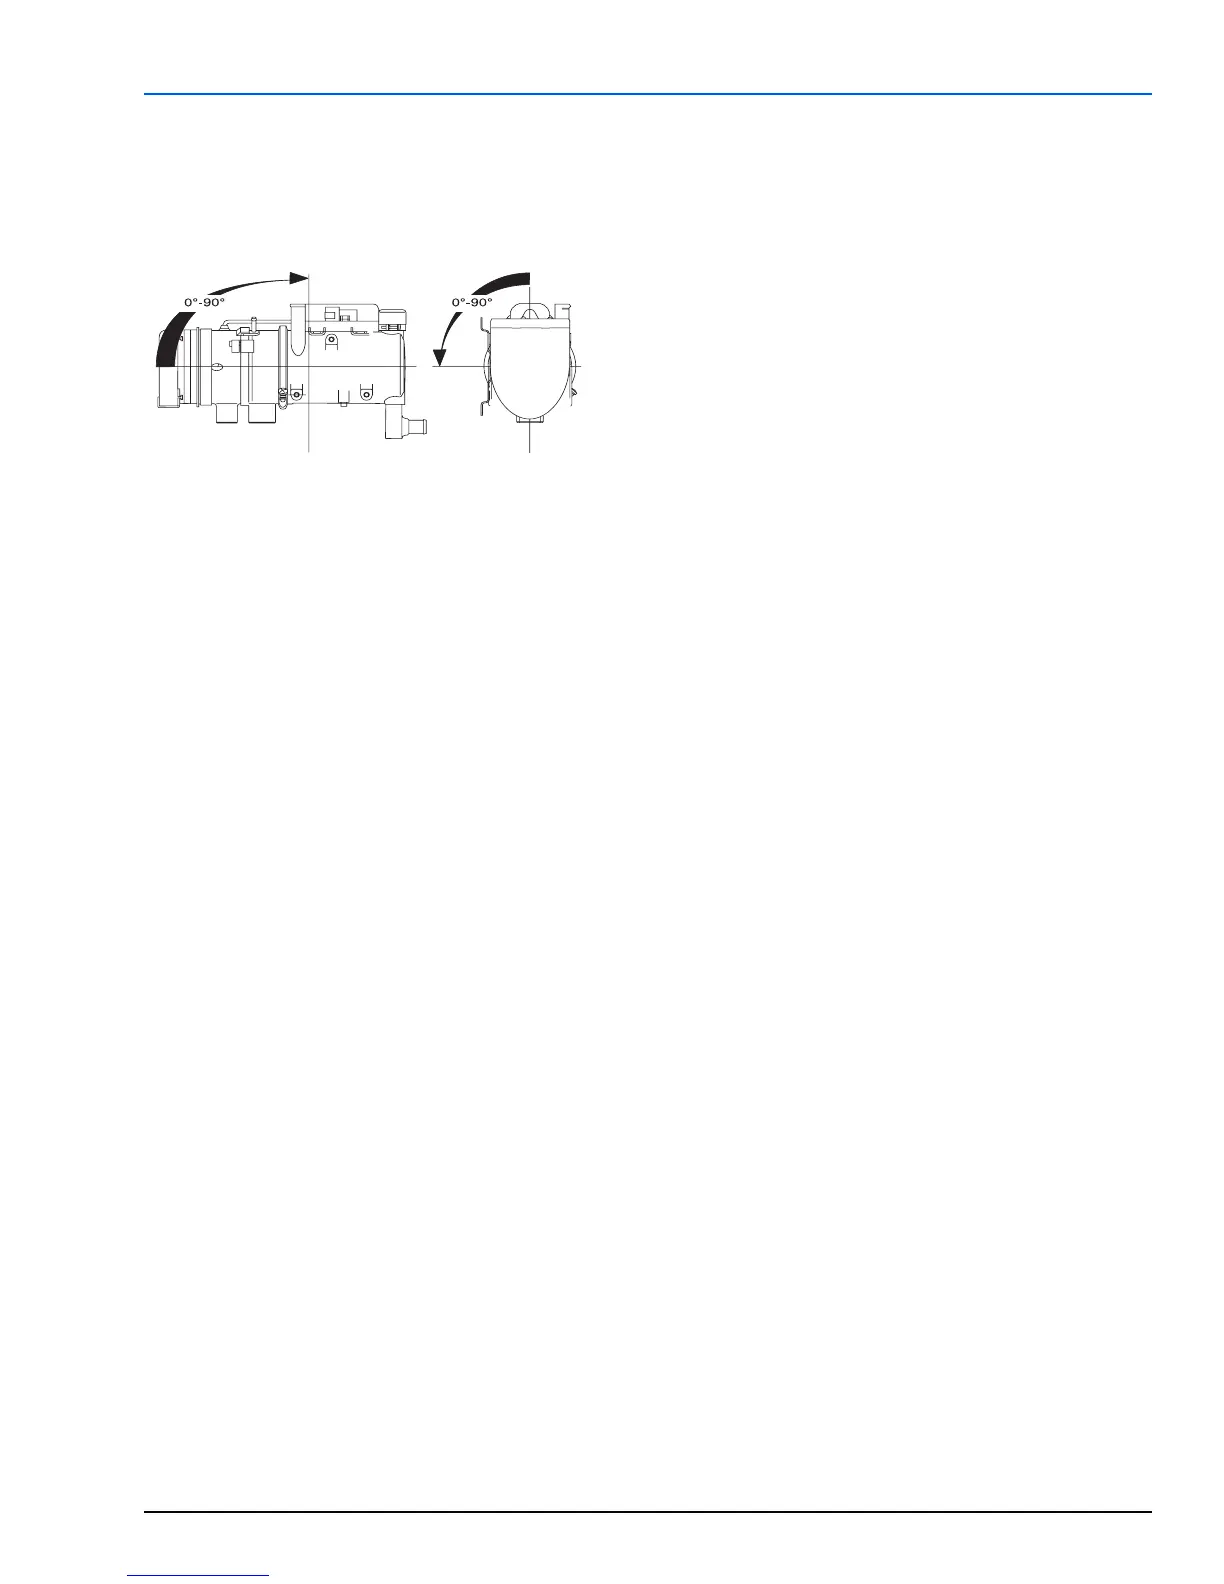
Fig. 2 Correct installation positions for the Thermo 90 ST
 Loading...