Marine heating system Installation Instructions
14 © Webasto Global Comfort Solutions
®
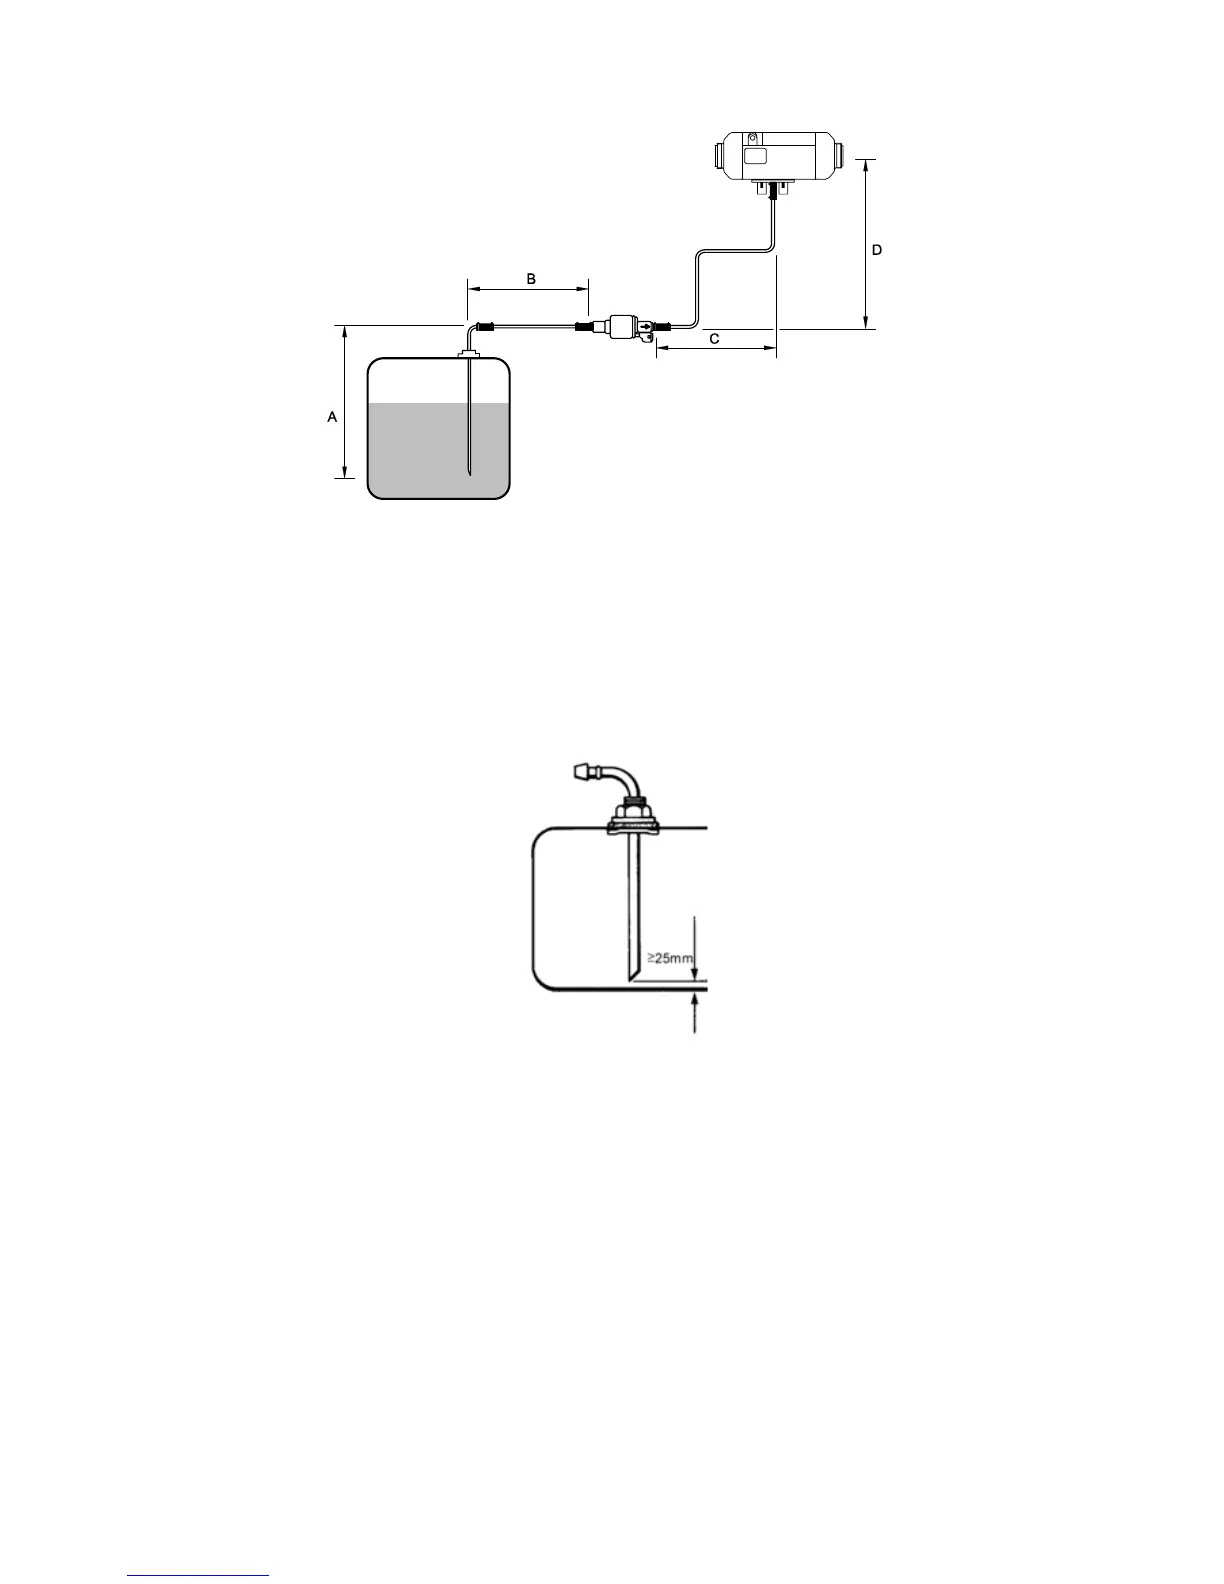
Permissible pipe lengths and lifting heights
7.2 Fuel take-off
For taking off the fuel for the heater there are the following alternatives:
7.2.1 Tank take-off device
• Fuel take-off directly from the boat’s fuel tank.
• Plastic tanks: install tank take-off in tank fitting. Do not drill into a plastic tank.
• Suitable tank take-off for metal tanks: see parts catalog and/or scope of delivery.
Installation of a tank take-off in metal tanks
Fit a tank take-off as shown in illustration:
1. Shorten the immersion tube: the end should be approx. 25 mm from the bottom of the tank.
Cut the hose diagonally. Deburr the cut end.
2. Cut a hole in the top of the tank or tank fitting. Use a suitable drilling attachment. Grease the
drill and drilling surface in advance (to catch small drill swarf).
3. Insert the take-off into the hole and screw tight (seal lightly compressed).
7.2.2 Tank drain pipes
If an unused tank drain pipe is already fitted to the boat’s tank, use this.
Do not use a tank discharge screw at the bottom since contamination or water can be taken up.
 Loading...