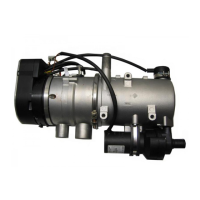
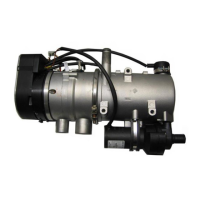
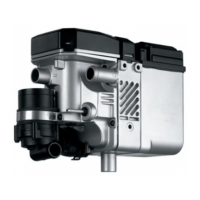
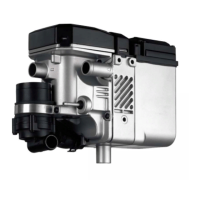
8 Servicing Thermo 90
808
8.7 Removal and Installation
CAUTION
In installed condition, only
the following removal and
disassembly procedures are allowed as long as the top
cover is accessible for removal and sufficient space for
removal is available:
– replacement of circulation pump
– replacement of temperature limiter
– replacement of temperature sensor
– replacement of combustion air fan
– replacement of control unit (Thermo 90 S)
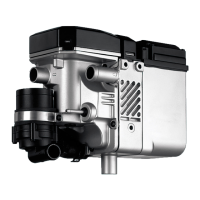
8.7.1 Heater, Removal and Installation
8.7.1.1 Removal
1. Disconnect battery terminal leads.
NOTE
On heater Thermo 90 S with control unit flanged
to combustion air fan only connectors X12 and X13
r
equire disconnection from control unit.
2. Remove top cover.
3. Disconnect plug of cable loom from heater.
4. Disconnect fuel inlet on heater.
5. Loosen hose clamps and di
sconnect coolant hoses
from heater.
6. Disconnect connections of combustion air intake and
ex
haust outlet on heater.
7. Remove three nuts and washers from heater mount.
8. Remove heater.
8.7.1.2 Installation
1. Locate heater in installation position and secure with
th
ree nuts and washers.
2. Reconnect coolant hoses and secure with hose
clam
ps. Torque tighten clamps with 5 Nm.
3. Secure connection for fuel inlet on heater.
4. Secure connections for combustion air inlet and
ex
haust outlet on heater.
NOTE
On heater Thermo 90 S with control unit flanged to
com
bustion air fan reconnect connectors X12 and
X13 to control unit.
5. Connect plug of cable loom to heater.
6. Plug on top cover and arrest.
7. Reconnect battery terminal leads.
8. Bleed fuel supply system.
9. Bleed coolant circuit.
8.7.2 Replacement of Circulation Pump
NOTE
The procedure for replacement of the circulation pump is
iden
tical with the heater removed or installed.
Replacement is to be performed in accordance with 9.2.2.
8.7.3 Replacement of Temperature Limiter
NOTE
The procedure for replacement of the temperature limiter
is
identical with the heater removed or installed.
Replacement is to be performed in accordance with 9.2.3.
8.7.4 Replacement of Temperature Sensor
NOTE
The procedure for replacement of the temperature sensor
is
identical with the heater removed or installed.
Replacement is to be performed in accordance with 9.2.4.
8.7.5 Replacement of Combustion Air Fan
NOTE
The procedure for replacement of the combustion air fan
is
identical with the heater removed or installed.
Replacement is to be performed in accordance with 9.2.5.
8.8 First Operation
After installation of the heater, the fuel supply system
and the cooling circuit must be thoroughly bled observing
th
e vehicle manufacturer's instructions. During the test
run of the heater all connections are to be checked for
leakage and tight fit. Should the heater during operation
assume an error lock-out condition, perform trouble-
shooting (see Section 5).
 Loading...