QUICKSTART | BASIC USAGE
6
5 - Plug in unit. Use the included power cord. You may
need an adapter or an alternative C13 style cable for your
country, but a transformer should not be needed as it
works anywhere with a 100v-240v (50 or 60Hz) electrical
service.
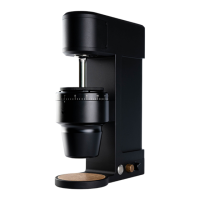
6 - Power on mains. This is the switch on the back of the
unit next to where the cord plugs in.
7 - Adjust the RPM level. Turn the knob counterclockwise
to reduce to the 50 - 70 RPM range (a good starting point).
8 - Using the On/Off Button. When the burrs are
spinning, the button will illuminate and remain depressed.
Be sure not to leave the grinder ON/Spinning for
excessive periods of time.
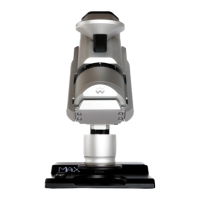
9 - Adjust the Grind. Test grind a small amount of coffee
to verify the initial setting. The KEY ships p re-set to a
reasonable grind setting for espresso. You will need to
make appropriate adjustments for your particular coffee
and b rewing method . Adjustments are made by lifting the
locking ring and turning. Larger numbers mean larger
particles (clockwise = coarser). Some coffee remnants
may remain in the grinder during shipping, as we test-
grind ~200g of coffee with each unit before shipping.
While we do clean, a small amount of coffee may remain.
RPM KNOB
ON/OFF BUTTON
CLEANING BRUSH
main power on
main power off
Copyright 2023 Weber Workshops, manual version Mk ii