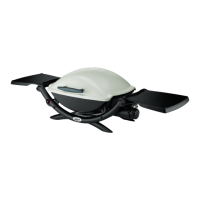
3weber.com
m DANGER: Do not store a spare LP tank under or
near this grill. Never fill the tank beyond 80% full.
Failure to follow these statements exactly may
result in a fire causing death or serious injury.
m WARNING: Do not use a wrench to tighten the
connection. Using a wrench could damage the
regulator coupling and could cause a leak.
m CAUTION: Use cylinders that are marked
"Propane" only.
m WARNING: It may be hazardous to attempt to fit
other types of gas containers.
m IMPORTANT: We recommend that you replace the
gas hose assembly on your gas grill every five
years. Some countries may have requirements
that the gas hose be replaced within less than five
years, in which case that country’s requirement
would take precedence.
For replacement hose, regulator, and valve
assemblies, contact the Customer Service
Representative in your area using the contact
information on our web site.
Log on to weber.com.
m This appliance is not suitable for installation or
connection to a reticulated gas supply.
GETTING STARTED
Important Information about LPGas &
Gas Connections
What Is LP Gas?
Liquefied petroleum gas, also called LP, LP gas, liquid
propane, or simply propane or butane, is the flammable,
petroleum-based product used to fuel your grill. It is a gas
at moderate temperatures and pressure when it is not
contained. But at moderate pressure inside a container, such
as a tank, LP is a liquid. As pressure is released from the tank,
the liquid readily vaporizes and becomes gas.
Safe Handling Tips For LP Tanks
• A dented or rusty liquid propane tank may be hazardous and
should be checked by your liquid propane supplier. Donot
use a liquid propane tank with a damaged valve.
• Although your liquid propane tank may appear to be empty,
gas may still be present, and the tank should be transported
and stored accordingly.
• The LP tank must be installed, transported, and stored in an
upright, secure position. LP tanks should not be dropped or
handled roughly.
• Never store or transport the LP tank where temperatures
can reach 125° F (51.7° C) (the tank will become too hot to
hold by hand).
• Place dust cap on cylinder valve outlet whenever the
cylinder is not in use. Only install the type of dust cap on
the cylinder valve outlet that is provided with the cylinder
valve. Other types of caps or plugs may result in leakage of
propane.
LP Tank Requirements
• The tank must be approximately 18¼inches (46.35 cm) high
and 12¼ inches (31.1 cm) in diameter with a marked 20
pound (9.07 kg) LPG capacity or 47.6 pound (21.6 kg) water
capacity as stated by the manufacturer. Other tanks may
be acceptable provided they are compatible with the grill
retention means (tank scale).
• The tank used must be constructed and marked in
accordance with the Specifications for LP gas Cylinders
of the U.S. Department of Transportation (D.O.T.); or the
Canadian Standard for Cylinders, Spheres and Tubes for
Transportation of Dangerous Goods and Commission, CAN/
CSA-B339, as applicable.
• Tanks must be provided with a listed OPD (Overfilling
Prevention Device) and a Type 1 (CGA 791) tank connection.
The tank connection must be compatible with the grill
connection.
• The tank must include a collar to protect the tank valve.
• Tanks must have a D.O.T. certification (A), and a testing date
(B) that is within five years of current use.
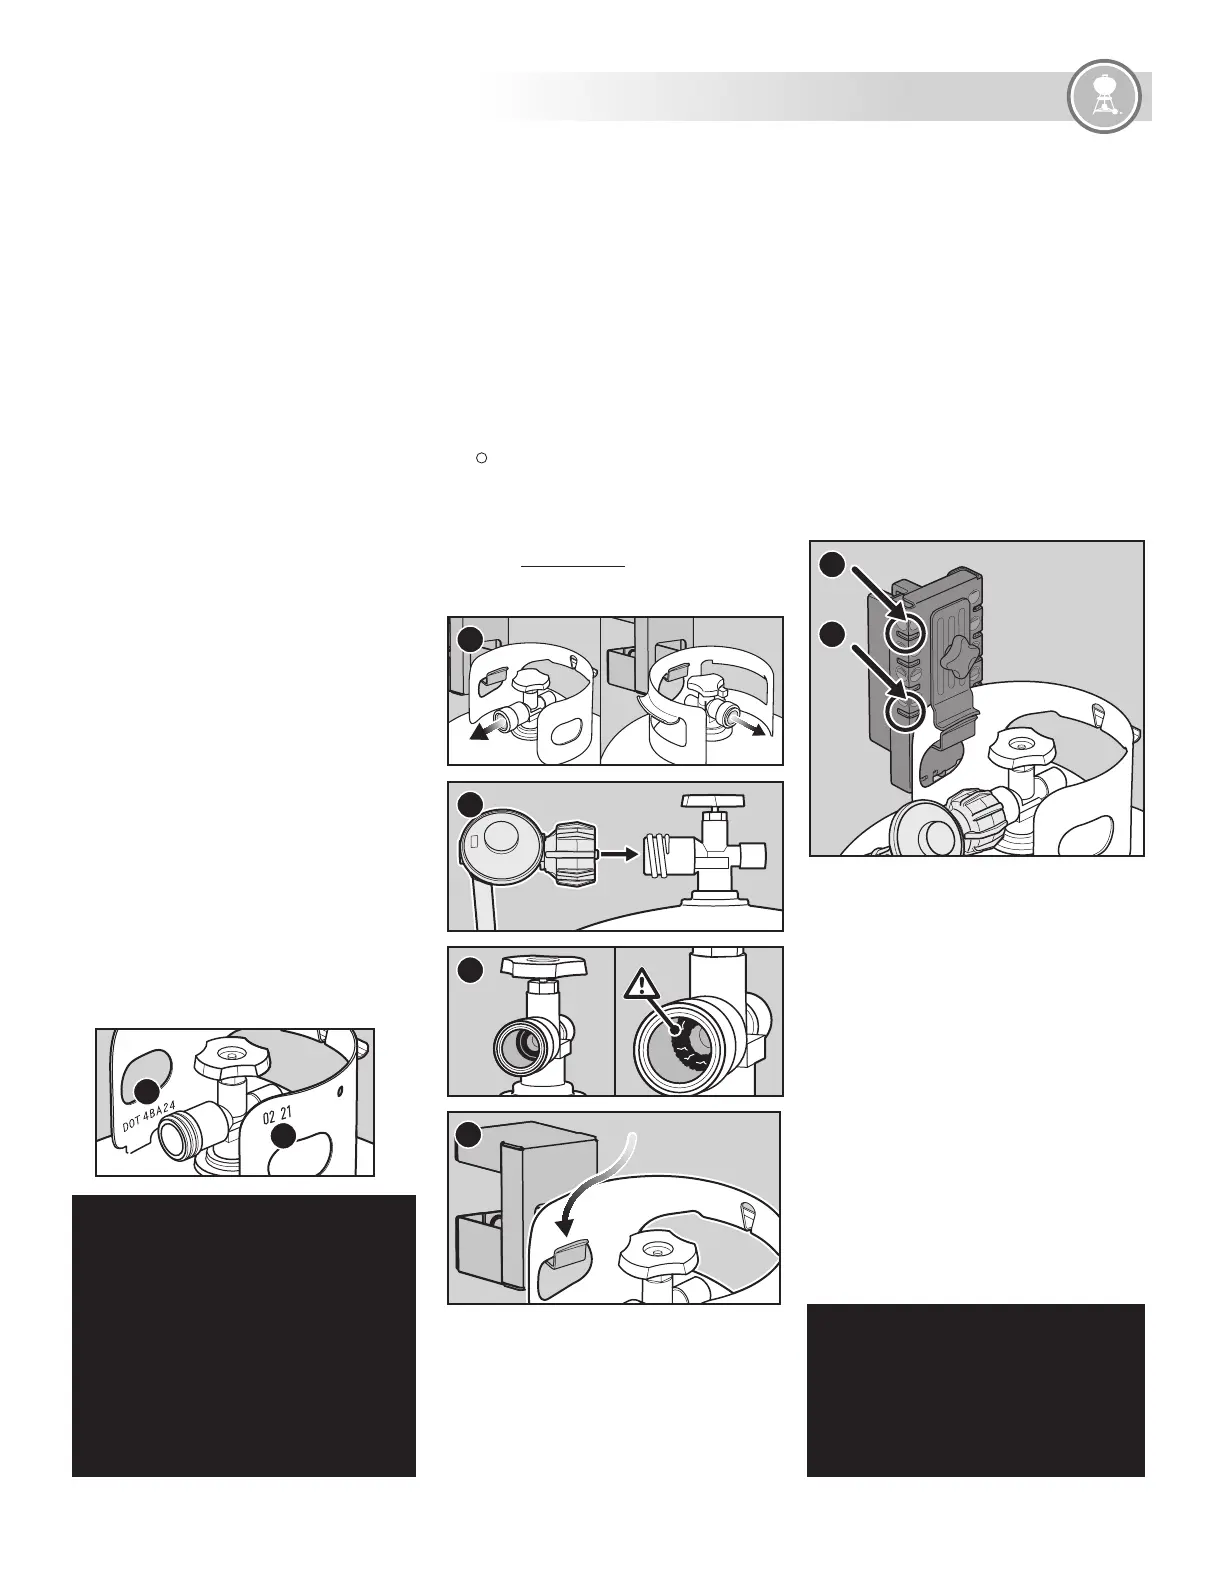
LP Tank Installation
The tank is hung onto the tank bracket which is located on
the right side of grill. The shape of the collar assembly (the
metal protective ring around the tank valve) determines one
of two directions in which the tank will correctly hang on the
tank bracket (A).
Inspect the Tank
1) Confirm that the tank valve is fully closed. Close by
turning valve clockwise.
2) Confirm that the tank valve is the proper mating type for
the regulator (B).
3) Inspect the tank valve, including the internal rubber seal
for damage or debris (C). If damaged, return tank to local
retailer.
Install The Tank
1) Check that all burner control knobs are in the
o position. Check by pushing in and turning knobs
clockwise.
2) The tank is hung by the collar assembly (the metal
protective ring around the tank valve) onto the tank
bracket (D).
3) Screw the regulator coupling onto the tank valve, turning
clockwise. Hand-tighten only. Using a wrench could
damage the regulator coupling and could cause a leak.
Proceed to “CHECKING FOR GASLEAKS.”
A
B
B
C
D
A
Refilling or Replacing an LPTank
How Much Fuel is in the Tank?
This feature is only available on select models.
The tank scale indicates the amount of fuel in a standard
20 pound (9.07 kg) tank once the tank is hung from the
scale. The fuel level is checked by viewing the indicator
line located on the scale inside of the cabinet. Some
models include an indicator on the front of the grill. The
indicator points to a full tank (A), and gradually moves
to indicate when the tank is empty (B) and needs to be
removed to replace or refill.
Removal of the LP Tank
1) Make sure the grill is o and cool.
2) Confirm that the tank valve is fully closed. Close by
turning valve clockwise.
3) Unscrew regulator coupling by turning
counterclockwise by hand.
4) On the tank scale, loosen hand nut and rotate tank lock
up.
5) Lift tank o tank hook.
A
B
 Loading...