EasyManua.ls Logo

Weiser PowerboIt 3 User Manual

Weiser PowerboIt 3
4 pages
To Next Page IconTo Next Page
Page #1 background imageLoading...
Page #1 background image
If drilling a new door, use the supplied template and the complete
door drilling instructions available at www.kwikset.com/doorprep.
or
backset
the door is either 54 mm (2-1/8 in) or
38 mm (1-1/2 in).
either 60 or 70 mm (2-3/8 or 2-3/4 in).
60 or 70 mm
2-3/8 or 2-3/4 in
35 – 44 mm
1-3/8 – 1-3/4 in
the door edge is 25 mm (1 in).
Measure to conrm that the door is
between 35 mm and 44 mm
(1-3/8 and 1-3/4 in) thick.
A
B
C
B C D
Is the door edge chiselled?
54 mm
2-1/8 in
38 mm
1-1/2 in
25 mm
1 in
C
door frame
D
Install strike on the door frame.
Make sure the hole in the door frame is drilled a
minimum of 25 mm (1 in) deep.
1
Prepare the door and check dimensions
2
Install the latch and strike
1 / 4
ENGLISH
Required tools
Ruler
Hammer Wood block
Phillips head screwdriver
Additional Tools (depending on application)
A
Is the rectangular shaped hole centered in the
door hole?
Hold the latch in front of the door hole, with the latch
YES NO
No adjustment is required.
Proceed to next step.
Rectangular shaped holeRectangular shaped hole
Rotate latch face as
shown to extend latch.
or
actual size
53648
For Latch /
Strike Bag
(4x)
53648
(2x)
(For Latch/
Strike Bag
)
Latch
Strike
Keys
Exterior Assembly
Adapter
Ring
Mounting
Plate
Parts in the box
For Latch / Strike For Lock
Interior Assembly
SmartKey
Tool
Transitional
53648
52367
52502
Batteries
Collar
53764-001
Rev 01
GED250
Note: Please contact customer service if door
thickness exceeds 44 mm (1-3/4 in) for a thick
door kit.
180°
YES NO
Install latch in door with
supplied screws.
chiseled
not
chiseled
unlocked
IMPORTANT: Make sure the latch bolt is fully
retracted (in the unlocked position).
53648
(2x)
(For Latch/
Strike Bag
)
Make sure
slotted hole is at
bottom of latch.
Installation and User Guide
Weiser Technical Support | 1-800-501-9471 | www.weiserlock.com
Install latch in
door with wood
block and
hammer.
Make sure
slotted hole is at
bottom of latch.
Ensure collar
snaps into place.
Pull collar to test
for tight t.
or
Note: Additional door preparation may be
required for doors with 38 mm (1-1/2 in ) holes.
Use a athead screwdriver to remove
latch face. Once removed, grip the
latch with one hand and with the
other hand twist collar o. Install
drive-in collar.
Align tabs with
holes in collar.
Question and Answer IconNeed help?

Do you have a question about the Weiser PowerboIt 3 and is the answer not in the manual?

Weiser PowerboIt 3 Specifications

General IconGeneral
BrandWeiser
ModelPowerboIt 3
CategoryDoor locks
LanguageEnglish

Summary

Prepare the Door and Check Dimensions

Confirm Door Hole Diameter

Verify the door hole diameter is 54 mm (2-1/8 in) or 38 mm (1-1/2 in).

Confirm Backset Measurement

Measure to ensure the backset is 60 mm (2-3/8 in) or 70 mm (2-3/4 in).

Check Door Edge Hole Size

Measure the hole in the door edge to confirm it is 25 mm (1 in).

Verify Door Thickness

Confirm the door thickness is between 35-44 mm (1-3/8 to 1-3/4 in).

Install Latch and Strike

Position Latch and Check Hole Shape

Place latch in door hole and check if rectangular hole is centered.

Secure Latch with Screws

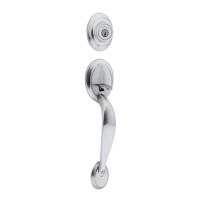
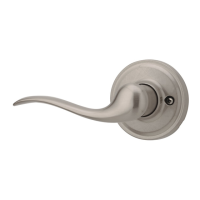
Install the latch into the door using the supplied screws.

Adjust Latch for Chiseled Edge

Modify latch for chiseled door edge by removing face and installing drive-in collar.

Install Door Frame Strike

Mount the strike plate onto the door frame, ensuring minimum hole depth.

Ensure Latch Bolt Retraction

Verify the latch bolt is fully retracted and in the unlocked position.

Install Exterior Keypad

Determine Door Hole Size and Adapter Need

Check door hole diameter and if an adapter ring is required.

Prepare Mounting Plate Screws

Locate and keep screws for mounting plate installation within reach.

Mount Exterior Keypad Assembly

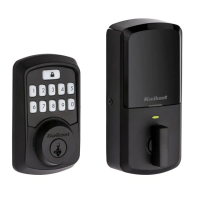
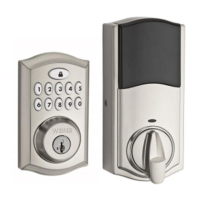
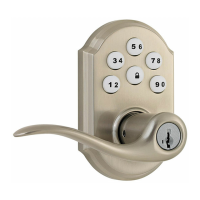
Install the exterior keypad and mounting plate, routing cables correctly.

Test Latch Operation with Key

Use the key to test latch extension/retraction and adjust screws if needed.

Install Interior Assembly

Remove Interior Cover

Detach the interior cover from the main interior assembly.

Check Latch Bolt Position

Ensure the latch bolt is extended/locked before installing the interior assembly.

Rotate Turnpiece Shaft

Align the turnpiece shaft to the correct position for installation.

Secure Interior Assembly

Attach the interior assembly to the mounting plate, connecting the cable.

Insert Flat Blade into Turnpiece

Insert the flat blade into the turnpiece shaft for operation.

Install Interior Cover

Reattach the interior cover to the assembly.

Install Batteries

Install AA Batteries

Insert 4 AA batteries into the interior assembly, ensuring correct polarity.

Add User Codes

Initiate Programming Mode

Ensure interior cover is off, then press the Program button once.

Enter User Code Sequence

Press number 1, then the Weiser logo, followed by the 4-8 digit user code.

Confirm User Code Entry

Press the Weiser logo button again to complete user code programming.

Test Lock Operation

Test Locking Mechanism

Press Weiser logo button; lock will beep twice and flash amber to extend deadbolt.

Test Unlocking Mechanism

Enter user code; lock will beep twice and flash green to retract deadbolt.

Manage User Codes

Add One-Time User Code

Program a temporary user code that deletes after single use.

Delete Single User Code

Remove a specific user code by entering it twice.

Delete All User Codes

Wipe all programmed user codes, disabling electronic functions.

Configure Lock Settings

Enable/Disable Audio

Toggle audible feedback for lock operations.

Enable/Disable User Codes

Globally enable or disable all programmed user codes.

Enable/Disable Auto-Lock

Configure the lock to automatically re-lock after a set period.

Change Auto-Lock Time Delay

Set the delay time for the auto-lock feature (1-10 minutes).

Advanced Lock Functions

Door Rehanding

Adjust the lock mechanism for left- or right-handed door orientation.

Factory Reset

Restore the lock to its original factory settings, deleting all codes.

Add/Change Programming Code

Set or modify a code to control programming without the physical button.

SmartKey Re-Keying

Re-keying Instructions

Information on re-keying the lock to match an existing key.

Important Safeguards

General Safety Precautions

Read instructions, know safety measures, and always have keys.

Environmental Considerations

Dispose of batteries properly and be aware of environmental factors.

Security and Access Control

No lock provides complete security; use caution and professional advice.

Related product manuals