2
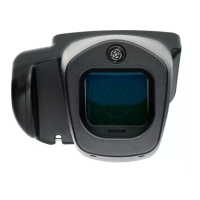
Spot
™
Vision Screener Quick Reference
Screen a subject
1. If possible, dim the lights.
2. Turn on the vision screener. The Home screen appears.
3. Have the subject close his or her eyes for 10 to 15 seconds
to encourage dilation.
4. Touch and enter the subject information. Date of Birth
or age is required. Enter Date of Birth (or Age) in a valid format
as shown:
• 8 months
• 10 years
• 5/24/1963
5. Prepare to screen the subject:
• Stand approximately 3 feet (1 meter) from the subject
• Hold the vision screener so that the front is on a level with
the subject’s eye
• Keep the vision screener steady
6. Touch Go.
The screening begins immediately. The vision screener emits
the sound of chirping birds. This sound is intended to focus
the subject’s attention on the device.
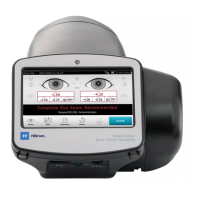
The Subject Results screen appears at the end of the screening
process. Completed exams are saved automatically. A PDF with
exam results is generated. The Troubleshooting section of the
Directions For Use provides additional suggestions to ensure a
successful screening.
3 feet
1 meter
Connect to a wireless network
Note: Your system administrator can supply you with the case-
sensitive information needed to access the network.
1. Touch Tools, and then touch Network .
2. To connect a device to the network, add the network name,
security type, and password.
3. Touch OK to save your changes and return to the previous
screen.
4. To verify the network connection status, check the status bar at
the top of the screen.
Icon Meaning
You have successfully connected the device to your wireless network.
The vertical bars indicate the strength of the connection.
The device is not connected to the network. For tips on connecting to
the network, refer to Troubleshooting.
5. To return to the Tools menu, touch the X in the upper-left corner
of the screen.
Connect to a printer
Note: You can connect the device to a USB printer or you can add
a wireless network printer.
1. Touch Tools, and then touch Printer. The Available Printers
screen appears.
2. Touch Plus. The Add Printer screen appears.
3. If you do not see the printer you want to add, touch Refresh.
If the printer does not appear, consult the Directions For Use.
4. Select the printer to add, and then touch Save.
5. To verify the printer is installed correctly, select the printer on
the Available Printer screen. Then touch Print test page.
6. To return to the Tools menu, touch the X in the upper-left corner
of the screen.
If you have difficulty connecting to a network or printer,
see the Directions For Use, How To Videos, and more
available at www.welchallyn.com/getstarted.
 Loading...