W9 Manual Page 27 - Revision: 10-06-2023
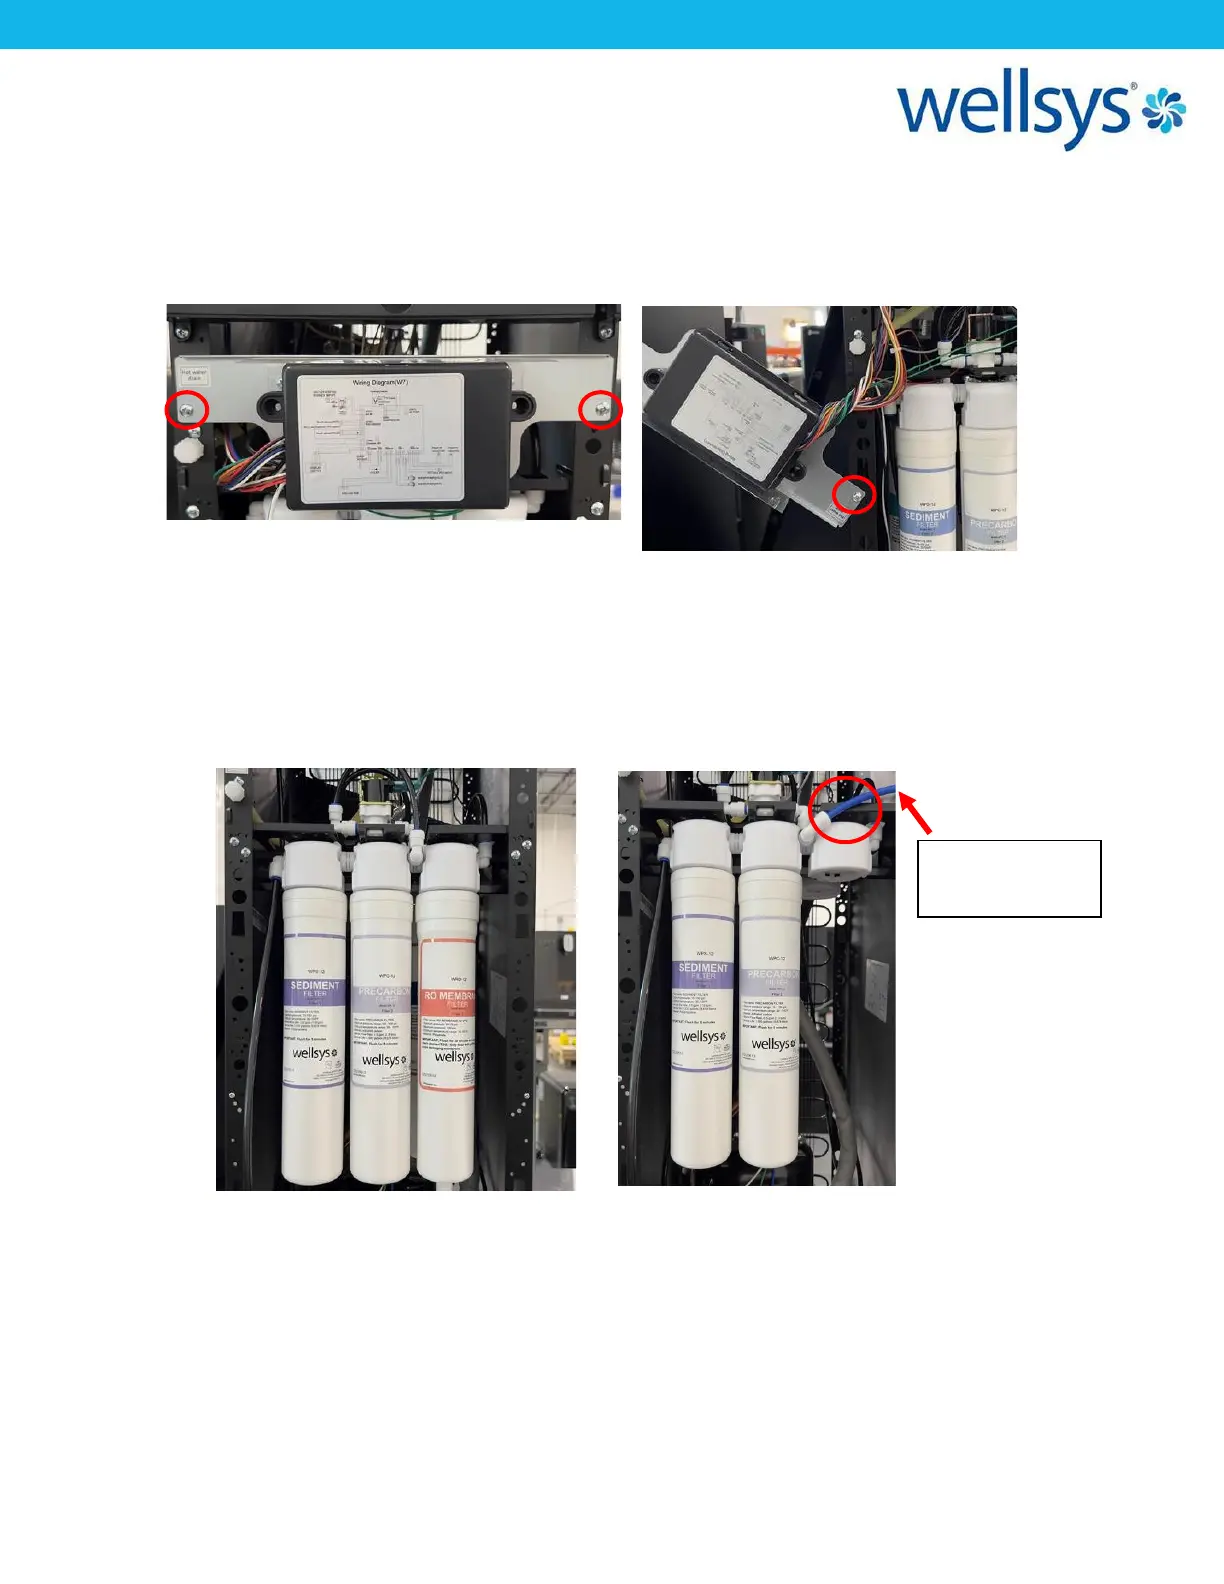
5. Before getting started, it makes the process easier to move the PCB out of the way.
Located the two screws holding the PCB mounting plate to the side panels and remove
them. Pull the mounting bracket to the side (you may need to rotate it 90˚) and reinstall
one screw to hold it out of the way, as shown below.
6. Locate the precarbon filter (front and center) and look to the right side of the filter
head. Disconnect the tube at the right side port of the precarbon filter from the elbow
fitting as shown. Remove the RO filter (twist-tied to the inside of unit), the Biosure filter,
and the TCR filter . With an extra section of ¼” LLDPE tubing (about 2-5ft long), plug this
into the open elbow on the right side of the filter head, and run the other end to a
bucket or drain/sink.
7. Open the ¼-turn valve on the supply line. Water will rush into the sediment and
precarbon filter and exit from the outlet into the bucket/sink. Allow 2 gallons (roughly
estimated) to flow out of the filters.