W9 Manual Page 30 - Revision: 10-06-2023
INSTALLATION
Before starting the installation, any filters being used to filter the source water for the unit
must be flushed. This is important to rinse any loose carbon or debris from the filters so that it
does not plug another filter or membrane or end up inside the unit. DO NOT install and setup
the unit before flushing the filters.
Once the filters have been flushed or “rinsed”, installation can begin. Listed below are the steps
to properly install and begin use of the Wellsys W9 Water Dispenser.
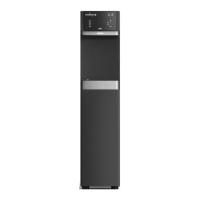
1. To begin, you will need a ¼” LLDPE tube connecting the unit to a water supply,
connected to the “Water In” port on the back of the machine. It is recommended to
install a ¼-turn valve just before the unit to easily turn the water on and off. If using an
RO filter configuration, the RO Drain port should be connected using the same tubing to
a drain connection. Make sure the Hot Tank Power Switch on the back of unit is OFF.
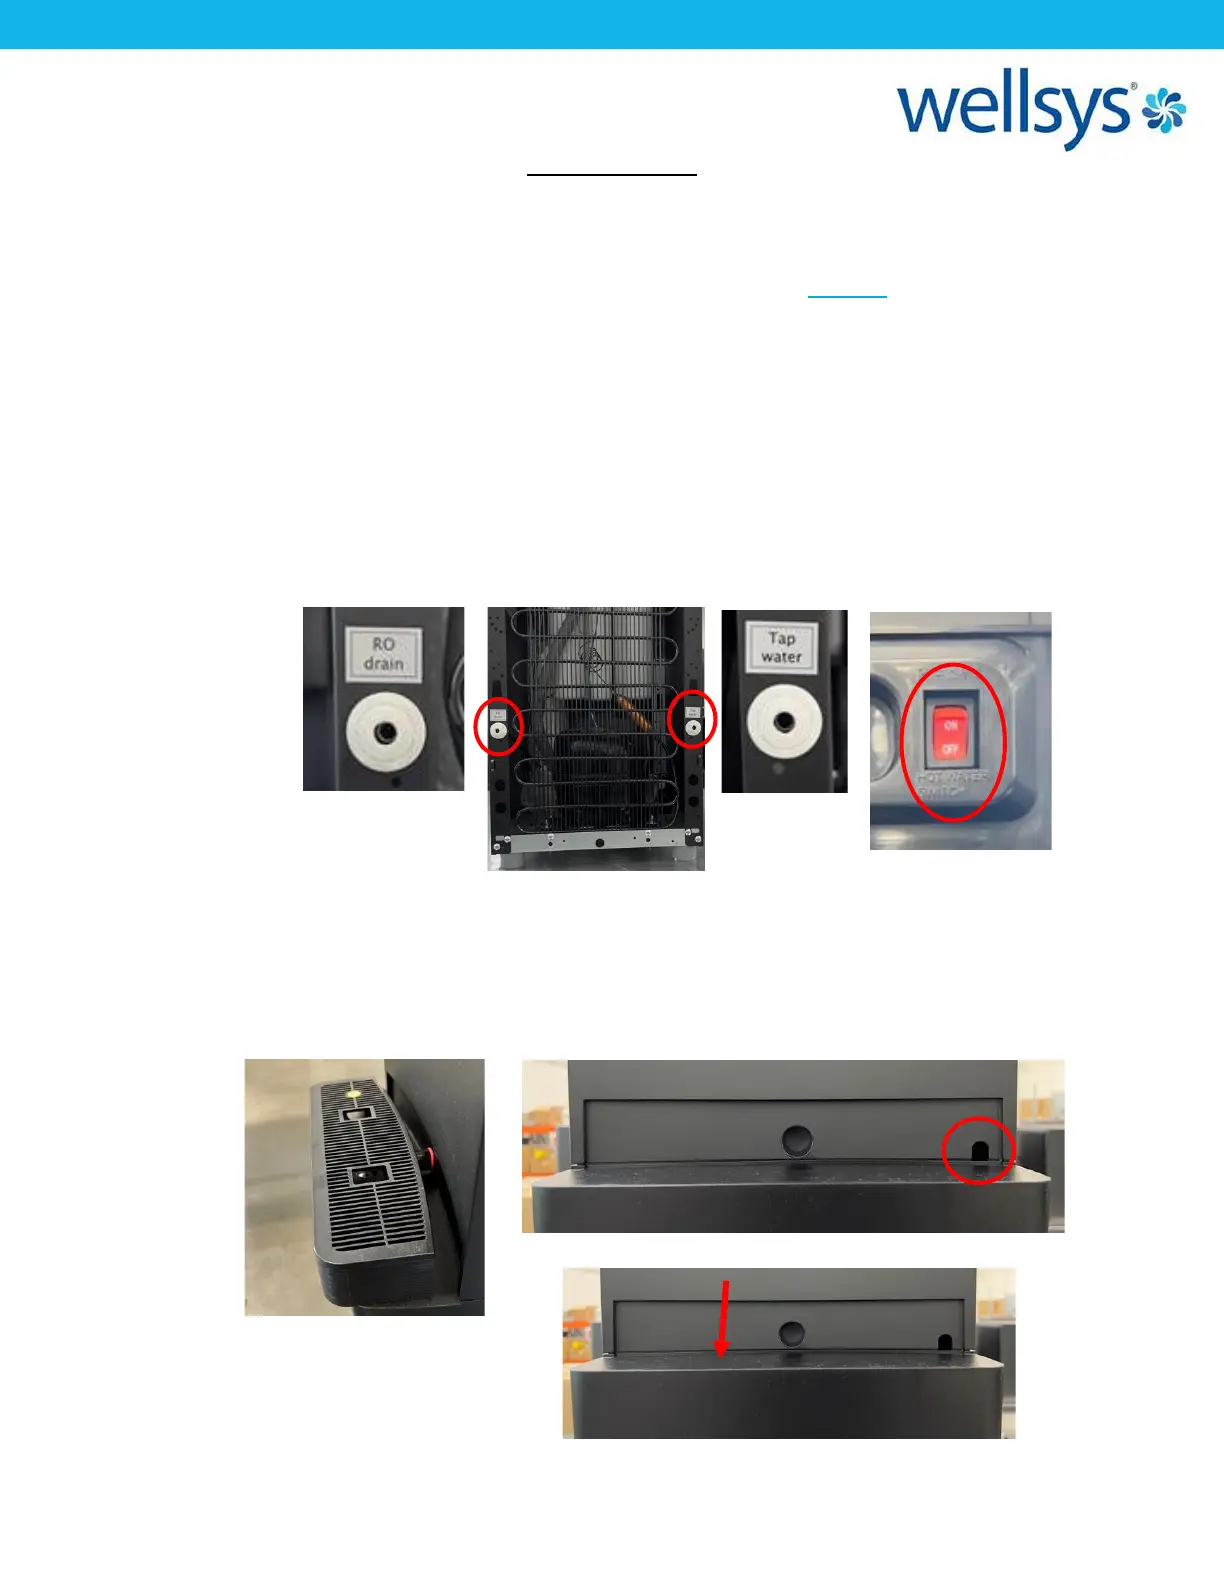
2. If not already done during the filter flushing process, remove the lower front panel of
the unit. First, pull the driptray straight out from the unit. Remove and set aside. Locate
the screw at the top right of the panel and removed. Then, push the top of the panel
down and then pull away from the unit. The panel should hinge outward, and then
come away from the unit completely. Set this panel aside. Turn the water to the unit on.