7
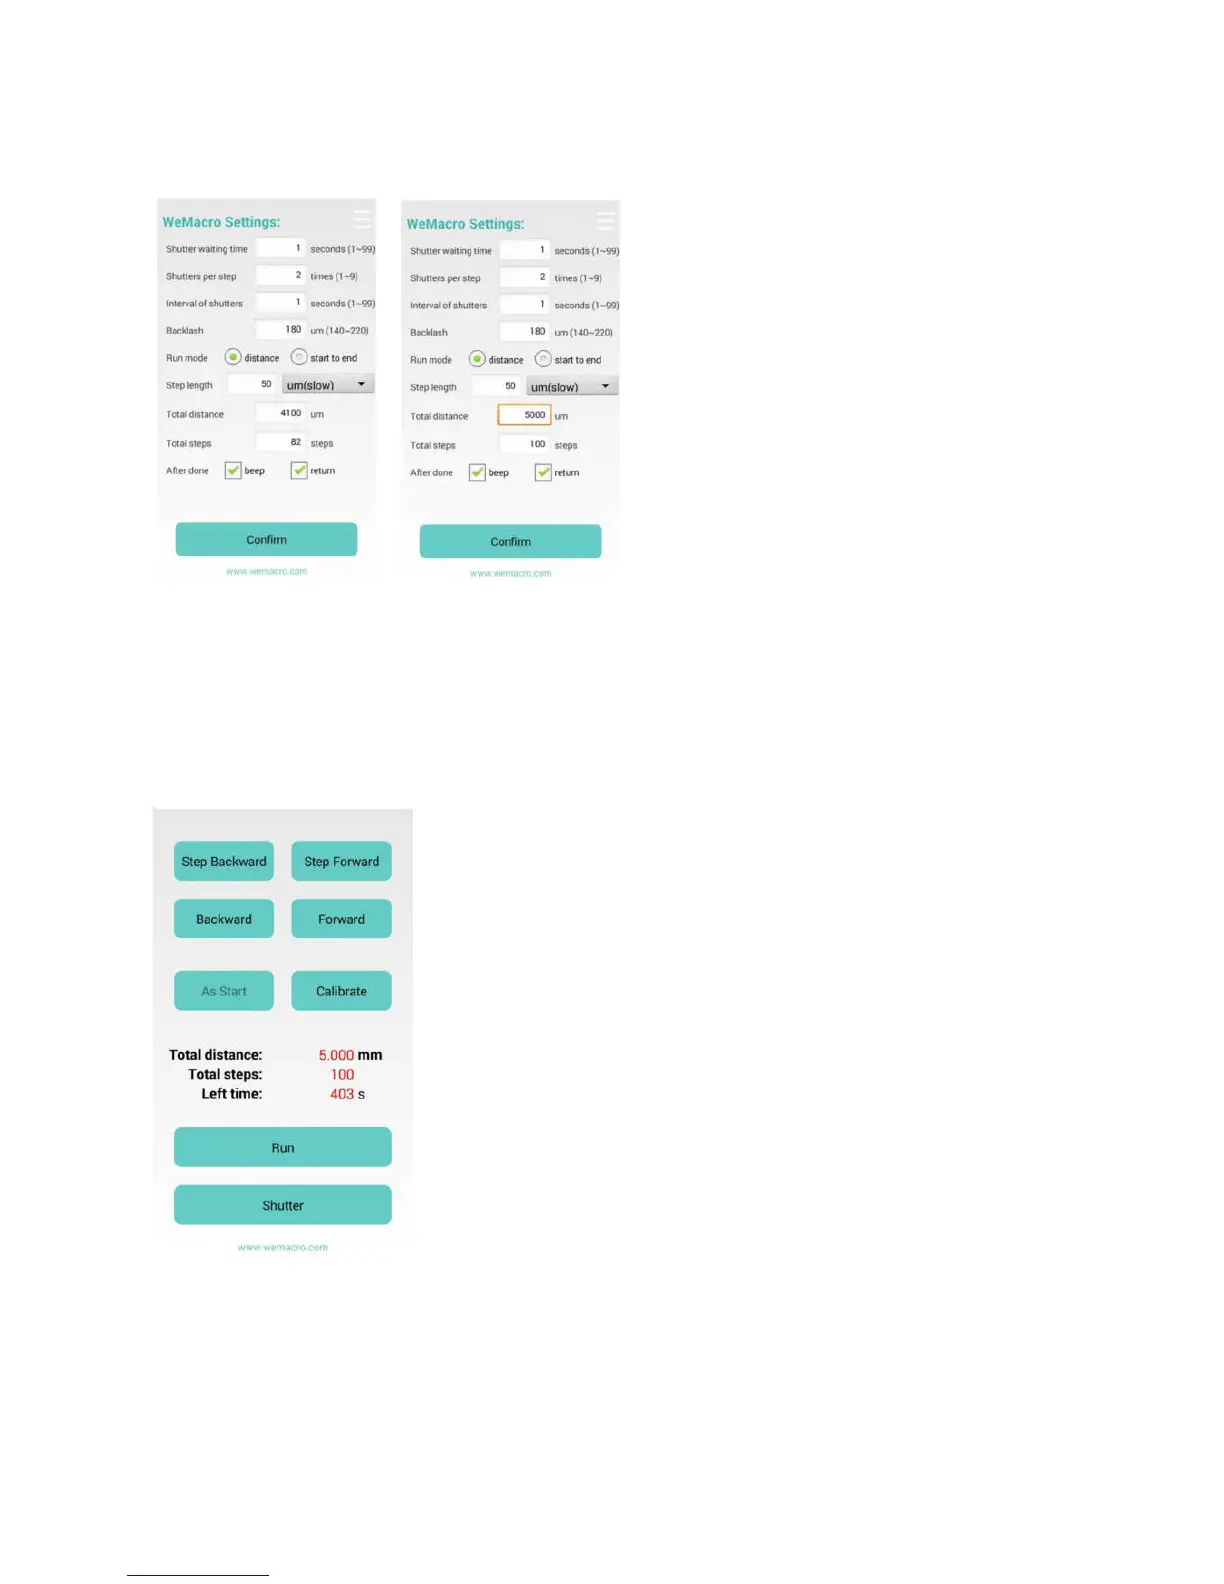
1 distance mode : Means you can input the total distance you want to move and single step length.The program will calculate
how many steps it will take automatically. If you change single step length, the step number will change accordingly.
Press “confirm” to save setting to control box.
You can see steps number changed after typing new distance.
After pressing “confirm”, you can slide to next page.(1000um=1mm)
In second page, you can step forward, or go backward to adjust position. If you tick off go back after running, you can press
“calibrate” to compensate backlash after the rail stop.
When the rail is running, the “run” button will show as “STOP”. If it be pressed, the rail will
stop.
The ”stop” button need to be pressed to switch to ”run” when it finish running.
Mode: Start to End
Means you can set starting position and ending position, step length. The rail will run
automatically. Press confirm after setting the first page.
In second page you can adjust the position to close to the starting point. If you feel too slow
to adjust in micron mode, you can return to first page, swtich to mm mode. But please
remember to change back before fine adjustment. To get better accuracy, if you press
backward or stepbackward in adjusting positon, please make forward or stepforward, length
should be longer than backlash. So we suggest slowly go forward or step forward to
approach the starting point. You view it on camera’s LCD or by using EOS utility,helicon remote or nikon camera control pro on
PC. But remember to turn off live view on camera or PC software, before start shooting.Press “As start” to set starting point. Then
press step forward or forward to find the ending point. Forward direction only!
When the rail arrive ending point, please press “As end” the rail will go back to starting point you just set. Please remember to
press “calibrate” before running.
 Loading...